When you’re collecting data from your users, some of your fields are probably optional to fill out and others are required. There’s no explicit option to make fields required in Calcapp Creator, so many users assume that the option isn’t there. We do offer that functionality, though, and this post shows you how to access it.
First, you need to ask yourself what you want to happen when users fail to fill out required fields. If your app consists of multiple panels, you probably want to prevent users from moving on to the next panel. If you only have one panel, you’re probably looking for a way to prevent users from submitting reports to you with incomplete information. This post goes over both scenarios.
Preventing users from moving on to the next panel
Some of Calcapp’s advanced features can only be accessed by associating formulas with properties. You may know that you can associate a formula with the Visible property of any field or button to have them appear only when the formula evaluates to TRUE. There are many other properties, though.
The one we’re interested in is named NextPanelAvailable and belongs to panels. To see it, you first need to make sure that your panel is selected and not, say, a field or a button. To do that, press anywhere in the navigation bar between the arrows. Then, the Next panel available property will appear in the inspector on the left-hand side of your window:
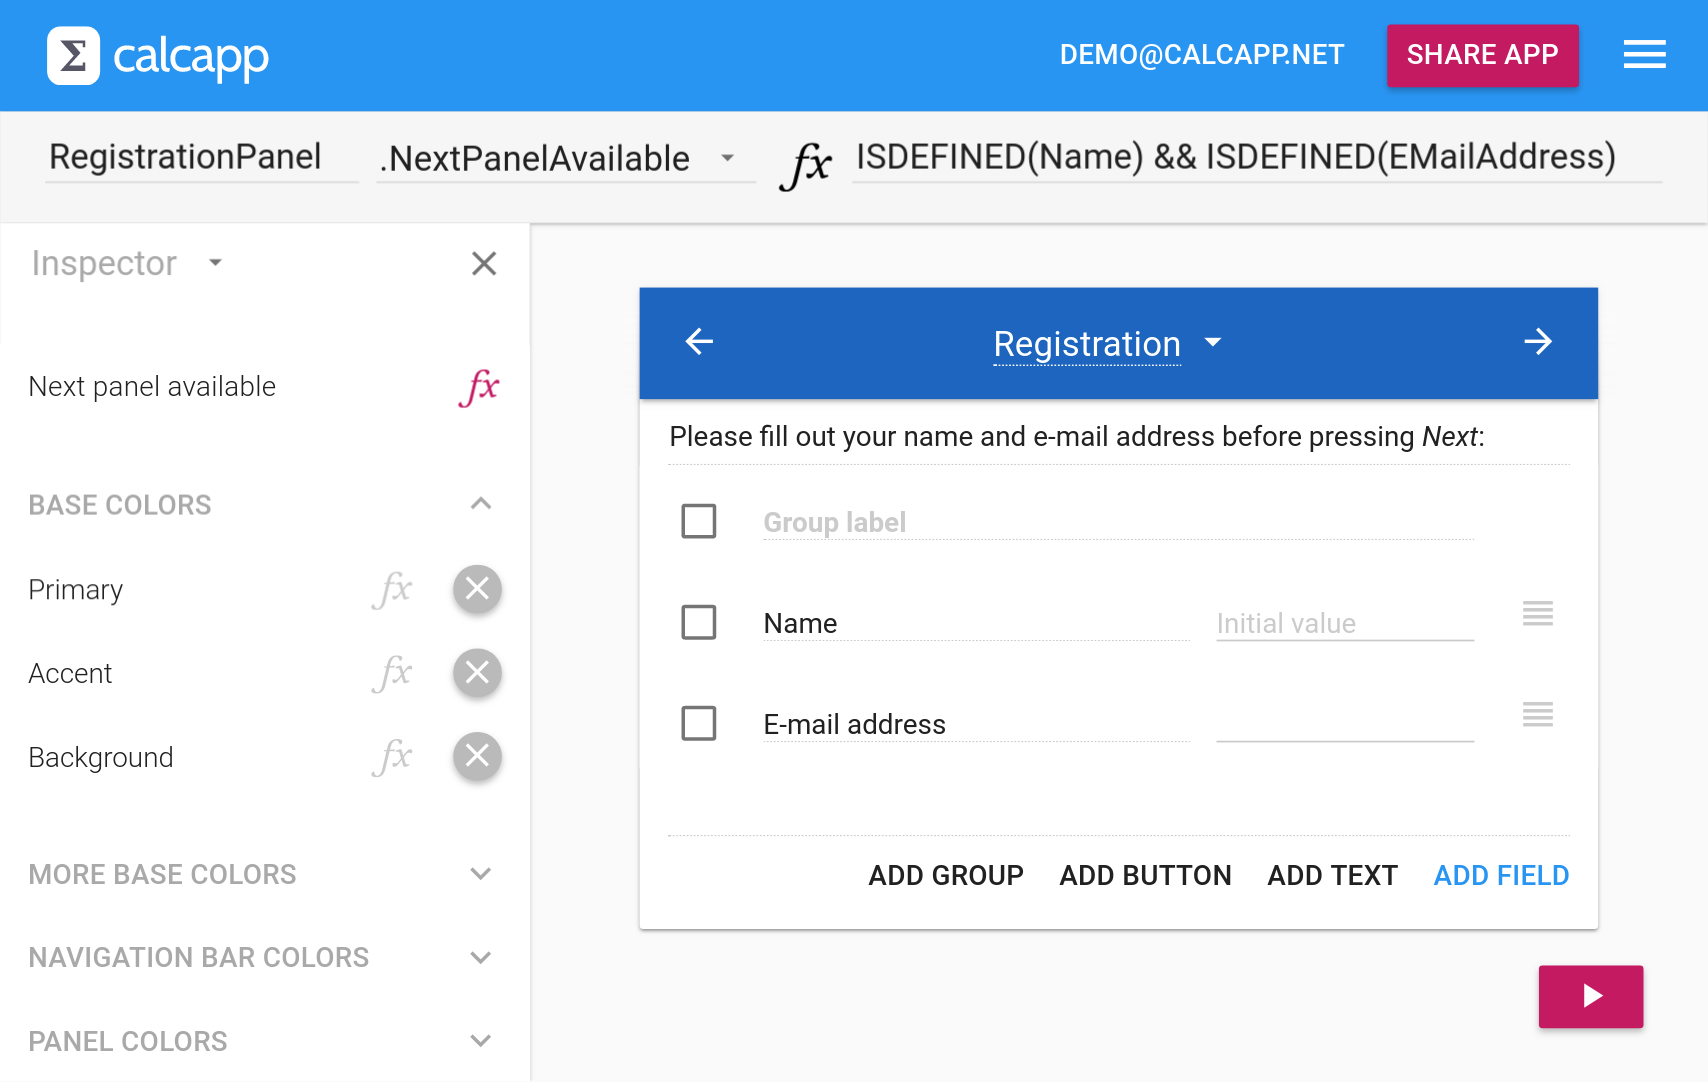
What does it mean for a field to be required? If you’re fine with users entering anything, use the ISDEFINED formula function as part of your formula. In the image above, we have added two fields, Name and EMailAddress. Associate this formula with the NextPanelAvailable property (press the faint fx button) to require that these two fields are filled out (&& means “and.”):
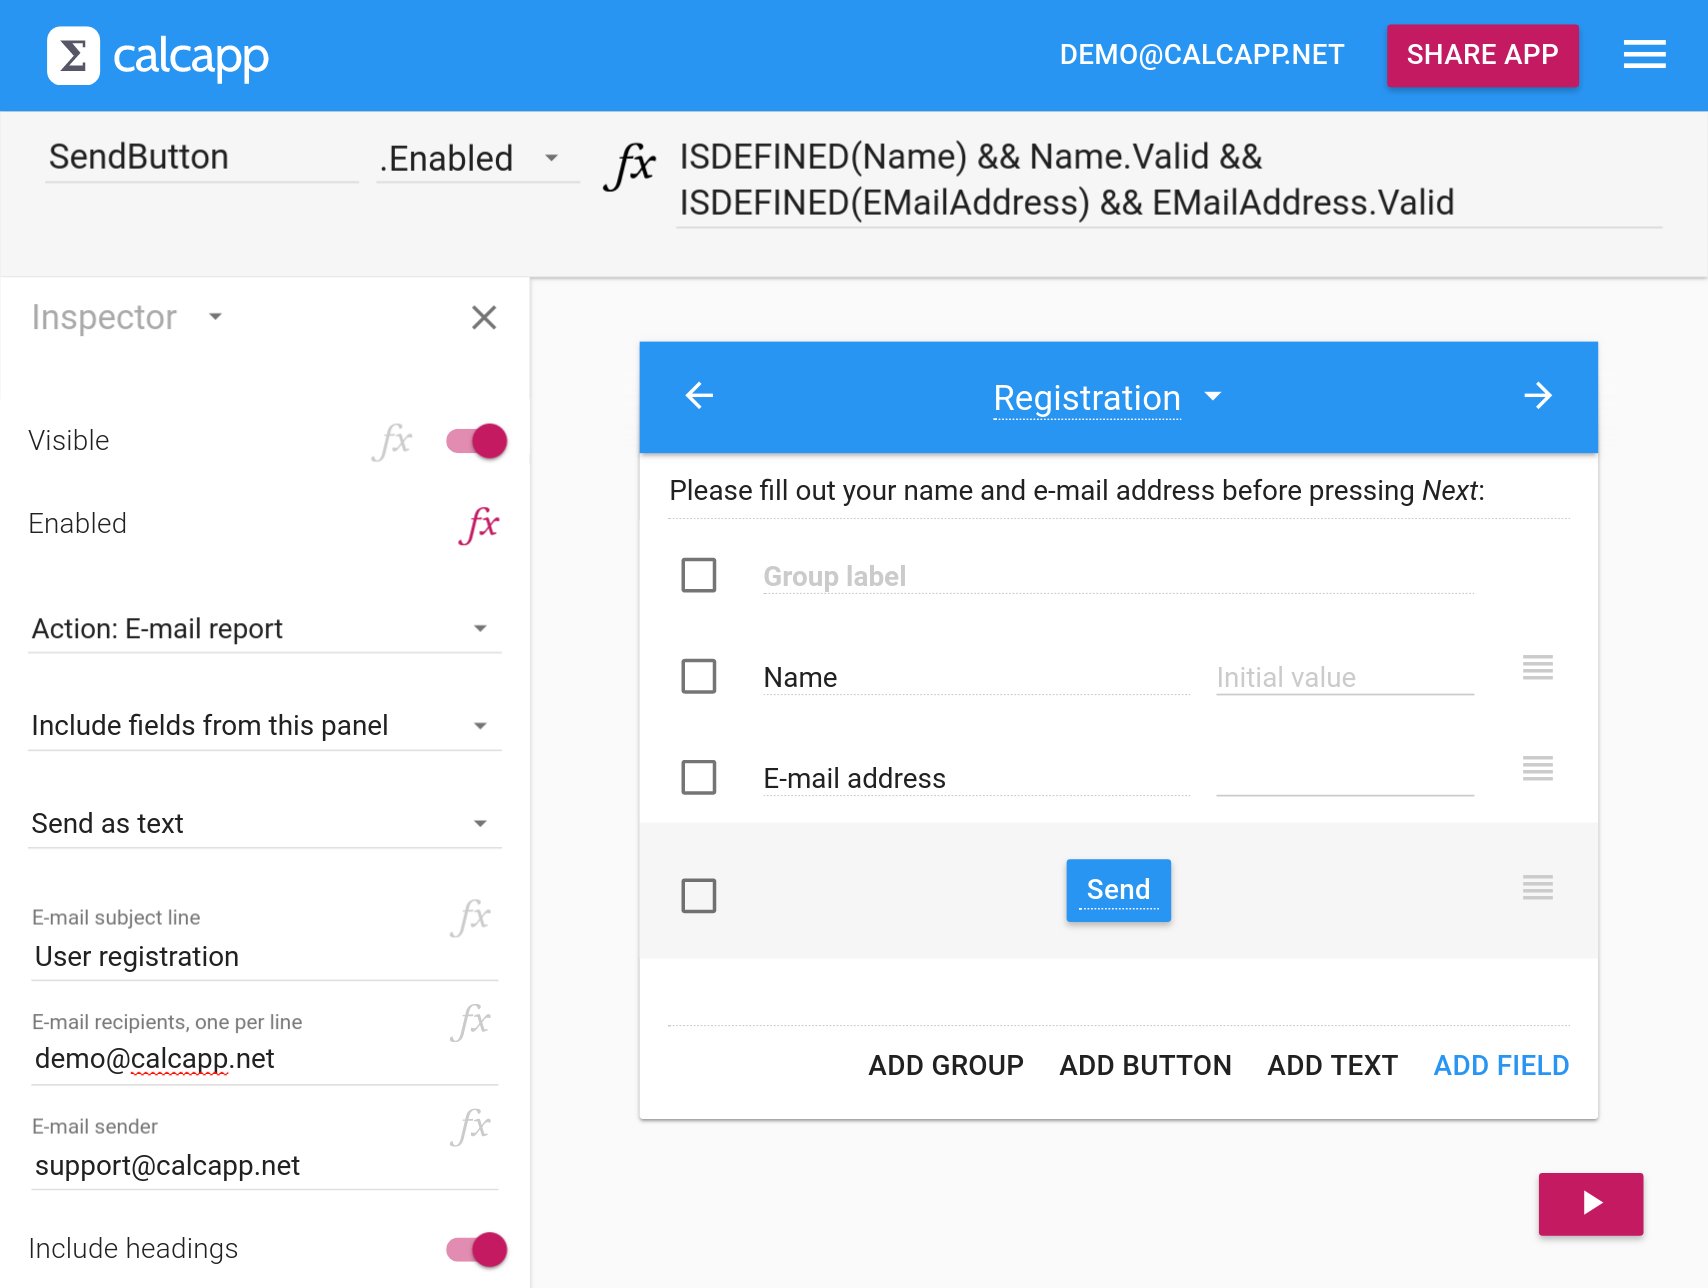
What if you also want to ensure that fields are valid before allowing users to continue? If so, use the following formula instead:
Bonus tip: To validate an email field, associate the
formula REGEXMATCH(EmailAddress,
"^[^@]+@.+\.[^\.$]{2,}$") with the EmailAddress
field’s Valid property. Want to understand how this formula
accomplishes that? Here’s an
introduction.
Preventing users from submitting reports
If you have a reporting button you’d rather not have users press before they have filled out your form correctly, there’s another property you should be aware of, this time belonging to buttons: Enabled. If you associate a formula with this property which evaluates to FALSE, the button will be grayed-out and your users won’t be allowed to submit data to you.
In other words, select your button and associate the following formula with the Enabled property:
If you need to use the same formula fragments from many formulas, considering adding a hidden field so you don’t have to repeat yourself.
Do you want to share a tip with other Calcapp users through this blog? Let us know!