One of the most common uses of Calcapp is to create cost estimator apps. We were recently commissioned to create such an app. We have created this sample app based on that work.
This sample app is meant to be used by licensed builders when assessing how much a build will cost. As input, the area of the site is entered, either in square meters or in squares (a unit in use in the US, Canada and Australia). The app then calculates how much this build will cost, adds a margin and presents what the customer should be charged. Optionally, the app can be instructed to itemize all the costs and allow the user to edit the calculated costs.
Here’s a screenshot:
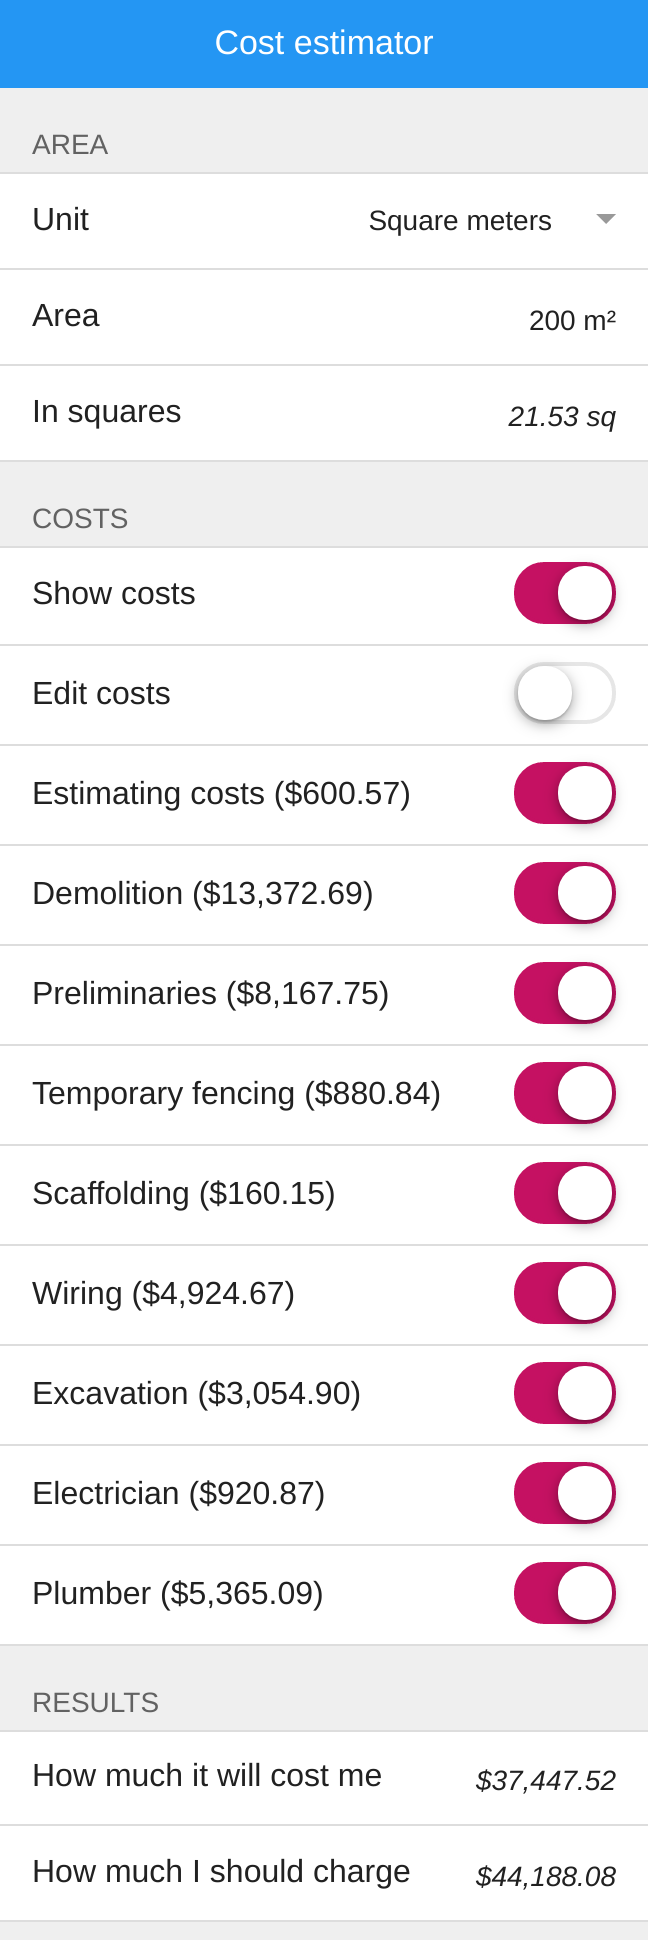
The itemized costs are only shown if the Show costs switch field is toggled on. To prevent a cost from being included in the total, the user may switch off the corresponding toggle switch.
The calculated costs are based on the entered area and on a cost-specific markup. To save space, these costs are displayed as part of the label.
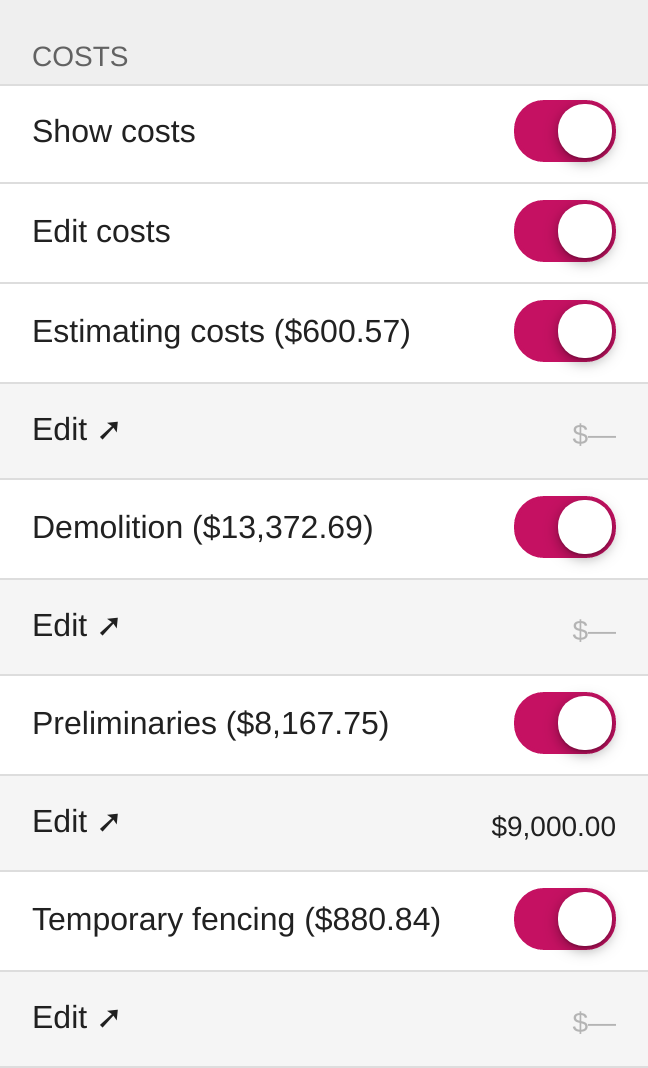
The user may override the calculated cost by enabling the Edit costs switch field. If the user does so, an additional row is displayed below the cost, allowing the user to enter a new value:
Run the app here. This app is available as the Sample: Cost estimator template in Calcapp Creator and you are encouraged to experiment with it as you read this blog post.
Entering the area
The first field of the app, named Unit, is a text drop-down field allowing the user to select what unit to use: squares (the Squares value) or square meters (the Square meters value). Other parts of the app reference this drop-down field to determine what fields to make visible and what calculations to perform.
The next field, Area, enables the user to enter the area, with the unit determined by the Unit field. To make the proper unit appear after the entered area, this formula is associated with the Label property of the Area field:
IF(Unit = "Square
          meters", " m²", " sq")
The next two fields, InSquareMeters and InSquares, are output fields containing the entered area converted to square meters and squares, respectively.
This is the formula for the InSquareMeters field:
IF(Unit = "Square
          meters", Area, Area * 9.29030399999976)
The area is left untouched if it is already in square meters. Otherwise, it is converted.
This is the similar formula for the InSquares field:
IF(Unit =
          "Squares", Area, Area / 9.29030399999976)
The InSquareMeters field is only shown if the selected units is squares. To achieve this, the following formula is associated with its Visible property:
Unit =
          "Squares"
Similarly, the InSquares field is only shown if the selected units is square meters. To achieve this, the following formula is associated with its Visible property:
Unit = "Square
          meters"
Itemized costs
The overall cost, shown at the bottom of the app, is the sum of all itemized costs. These are only shown if the ShowCosts switch field is toggled on:
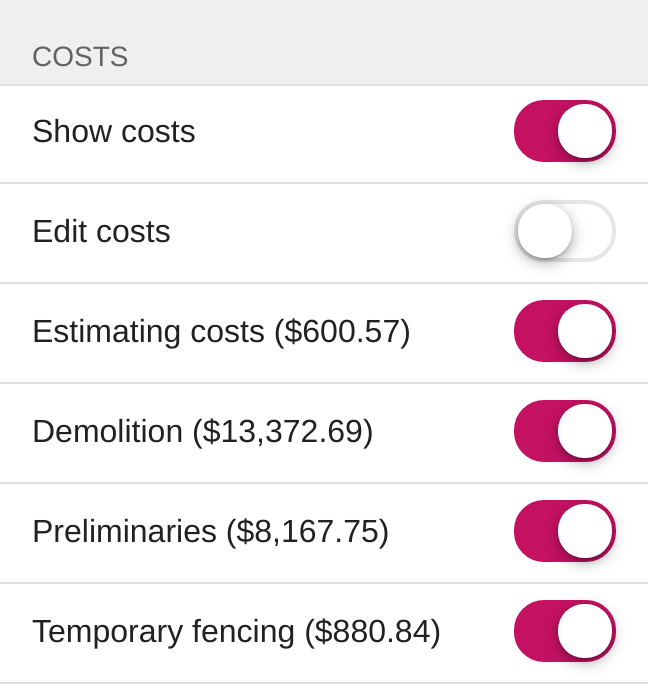
Individual costs are calculated based on the entered area and on a markup applied to the cost. Again, the costs are part of the labels and the user may elect not to have a cost contribute to the overall cost by toggling the corresponding switch field.
The user is given the opportunity to edit this cost (effectively overriding the calculated cost) if he or she toggles the EditCosts field:
(An arrow, ➚, is used as part of the label for the field. This arrow is known to display correctly on iOS, Android and desktop computers.)
In the screenshot above, the user has entered $9,000 for the Preliminaries cost, instead of the calculated cost of $8,167.75. When the costs are added together, the edited cost is used instead of the calculated value.
Dissecting the Demolition cost
A number of visible and hidden fields are used for every cost. Here’s what the Demolition cost looks like in the app designer:
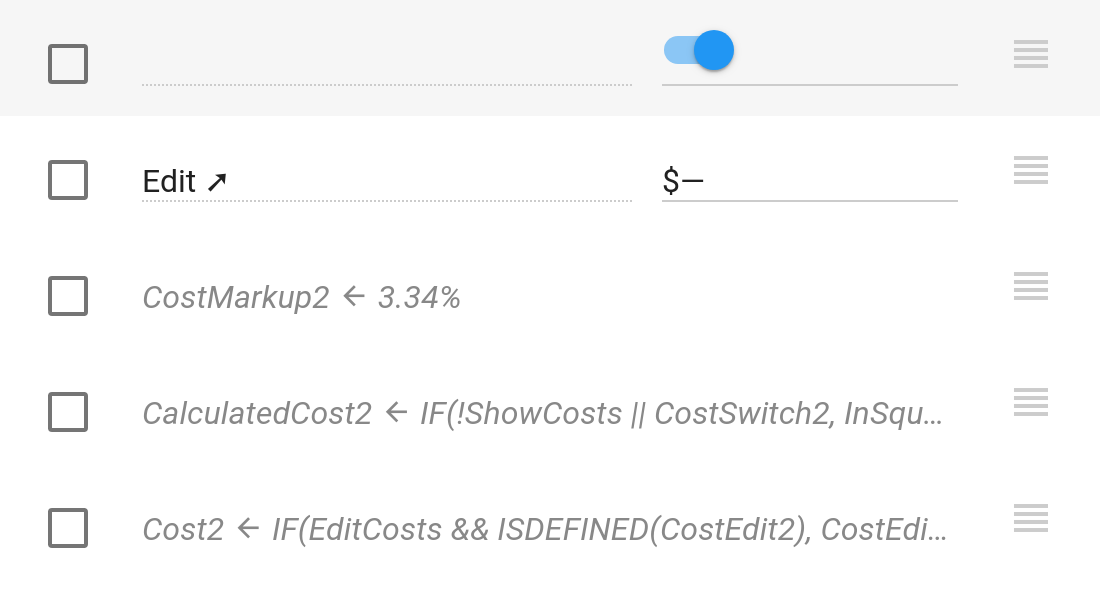
First, there’s the switch field, CostSwitch2, which holds not only the label and allows the user to exclude the cost from the sum total, but also the calculated cost.
The Demolition switch field is only shown if the user has asked for it to be shown. As such, the following formula is associated with its Visible property:
ShowCosts
You may have noticed that there is no defined label in the app designer. That’s because the label is set through a formula:
"Demolition" &
          IF(CostSwitch2, " (" & FORMATNUMBER(CalculatedCost2, 2, 2, FALSE, 1,
          TRUE, "$") & ")")
This formula sets the label to “Demolition”, followed by the calculated cost if, and only if, the switch field is toggled on by the user (thereby including it in the sum total). The calculated cost is made up of an opening parenthesis, the formatted cost and a closing parenthesis. The & symbol joins text strings together.
To format the cost, the FORMATNUMBER formula function is used. Its first parameter is the CalculatedCost2 hidden field (discussed below). The second and third parameters are both set to 2, which ensures that the cost is formatted with two decimal places. The fourth parameter is set to FALSE to ensure that thousands separators are used (9,000 and not 9000). The fifth parameter is set to 1 to ensure that the number is not padded with leading zeroes (we don’t want it to be formatted as 0009,000). The sixth parameter is set to TRUE to enable accounting style, which formats negative numbers with a parenthesis instead of a leading minus symbol (this depends on the language you have set for your app). Finally, the seventh parameter is set to “$” to ensure that dollar amounts are displayed with a leading dollar sign.
Refer to the reference sidebar for full details on all the parameters expected by the FORMATNUMBER function.
The next field, CostEdit2 allows the user to specify a different cost than the one that has been calculated. It is only shown if the user has asked to show and edit costs and the CostSwitch2 field is toggled on. As such, this is the formula associated with its Visible property:
ShowCosts &&
          EditCosts && CostSwitch2
The next three fields are hidden at all times. First, there’s CostMarkup2, which holds the markup associated with the Demolition cost (3.34%). It is used to calculate the cost.
The next hidden field is CalculatedCost2, with the following formula associated with it:
IF(!ShowCosts ||
          CostSwitch2, InSquares * MarkupConstant * CostMarkup2)
A value is always calculated if the user has elected not to show costs. If the user has elected to show costs, a value is only calculated if the CostSwitch2 switch field has been toggled on. This is achieved using the IF formula function, whose second parameter contains the expression calculating the value, if and only if the first parameter evaluates to TRUE. There is no third parameter, which instructs the IF formula function to return a blank value if the first parameter evaluates to FALSE. (A blank value is interpreted as zero in most contexts.)
The final hidden field, Cost2, is the field actually referenced when adding all the costs together. It references the calculated value if the user has chosen not to edit it. Otherwise, it references the edited value.
To achieve this, the following formula is used:
IF(EditCosts
          && ISDEFINED(CostEdit2), CostEdit2, CalculatedCost2)
The ISDEFINED formula function returns TRUE if, and only if, the given value is not blank, that is, if the user has entered a value in the CostEdit2 field. If the user has done so, the IF formula function returns the edited value. Otherwise, it returns the calculated value.
These five fields are repeated for every cost. We suggest you duplicate them using copy and paste. The markup must be edited for every cost, as well as the label.
Finishing up
The final hidden field of the Costs group is named Sum. Its formula simply adds all the costs together:
SUM(Cost1, Cost2,
          Cost3, Cost4, Cost5, Cost6, Cost7, Cost8, Cost9)
The Results group contains two visible fields. One is labeled How much it will cost me — its formula simply references the Sum hidden field:
Sum
The final visible field is labeled How much I should charge and incorporates not just the cost of the build but also a margin. Here’s its formula:
HowMuchItWillCostMe *
          1.18