Apps centered around checklists are commonly created with Calcapp. These apps are perfect for field operations or the factory floor, where a number of precise steps need to be carried out. Users are expected to complete a number of tasks and then toggle the corresponding switches in the app, thereby ensuring that no steps are missed.
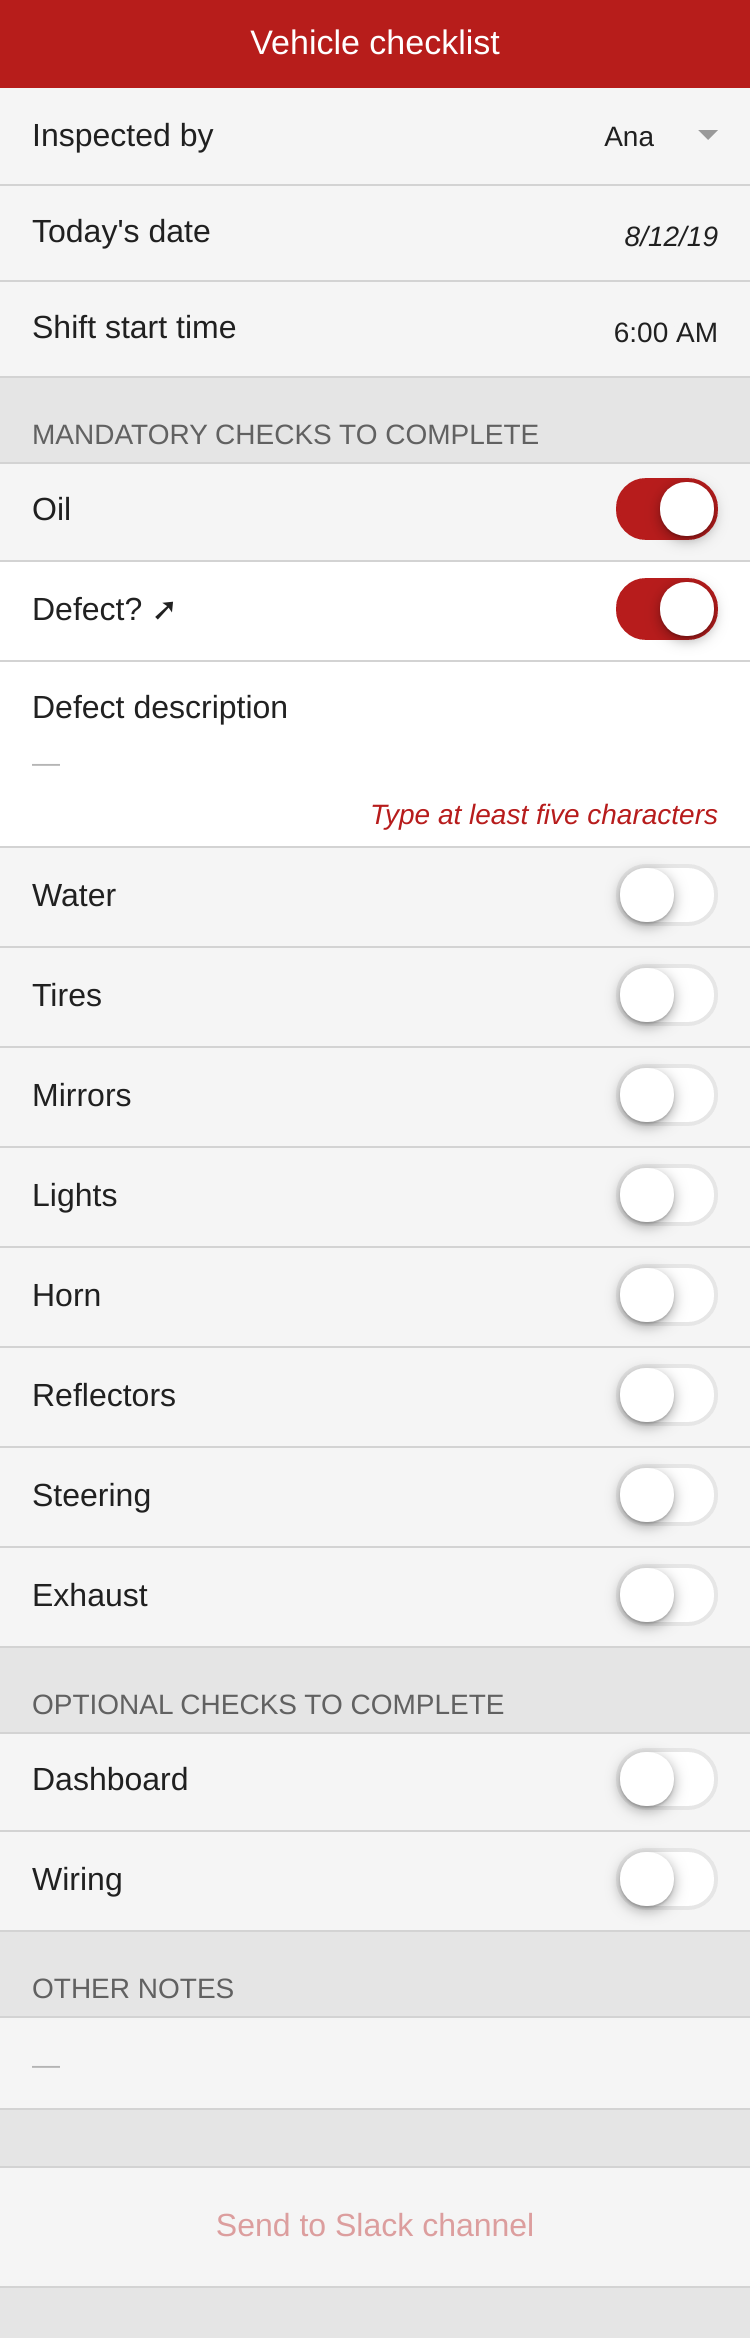
This sample app is meant to be used to perform vehicle inspections by drivers prior to starting their shifts. There are a number of mandatory checks that need to be completed. When a check is completed, the user is given the opportunity to report defects related to said check. If there is a defect, a text field appears where users are expected to describe the defect. If fewer than five characters are entered, an error message appears.
There are also a number of optional checks, and also room for additional notes. A button for sending a report to a shared Slack channel completes the app. It is only enabled if all mandatory checks have been carried out. If any defects have been reported and the descriptions have not been filled out, the button is disabled.
Here’s a screenshot:
Run the app here. This app is available as the Sample: Checklist template in Calcapp Creator and you are encouraged to experiment with it as you read this blog post.
Preliminaries
The user is expected to select his or her name in the Inspected by text drop-down field.
If the app is made private, and therefore requires users to sign in, this field could be made hidden and simply reference the email address of the user. To achieve this, the following formula could be associated with the field:
App.UserEmailAddress
Today’s date does not need to be filled out explicitly. Instead, the field TodaysDate is associated with the following formula:
TODAY()
The start time of the current shift is filled out in the ShiftStartTime field.
Checks
The group containing mandatory checks contains a number of switch fields, each one corresponding to a check the user is expected to carry out. When a switch field is switched on, an additional switch field appears labeled Defect? ➚. If the user switches it on, a text field appears where users are expected to write notes related to the defect.
For the oil check, whose switch field is named Check1, the corresponding defect field Defect1 is made visible only if the oil check has been performed. This is realized by associating the following formula with the Visible property of the Defect1 field:
Check1
The text field where users are expected to fill out more information on the defect is named DefectDescription1. Its Visible property is associated with this formula, ensuring that it is only made visible if the two switch fields just above it are toggled on:
Check1 &&
          Defect1
The DefectDescription1 field is not considered valid unless the user fills out at least five characters. This is accomplished by associating the following formula with its Valid property:
!Check1 ||
          !Defect1 || (LEN(DefectDescription1) >= 5)
In other words, the description field is considered valid if the user has not completed the oil check, if there is no defect associated with the oil check or if the length of the entered text is greater than or equal to five. (|| means “or” and ! means “not.”)
These three fields are repeated for each of the remaining checks, regardless of whether they are mandatory or optional.
Collecting the data
Three hidden fields calculate more information: AllMandatoryChecksPass, MandatoryDescriptionsAreFilledOut and OptionalDescriptionsAreFilledOut. They are referenced by the button sending data to a Slack channel (see below).
AllMandatoryChecksPass evaluates to TRUE if, and only if, all mandatory checks pass. It is associated with this formula:
Check1 &&
          Check2 && Check3 && Check4 && Check5 && Check6 &&
          Check7 && Check8 && Check9
MandatoryDescriptionsAreFilledOut evalutes to TRUE if, and only if, the user has filled out all defect descriptions for mandatory checks. It is associated with this formula:
DefectDescription1.Valid
          && DefectDescription2.Valid && DefectDescription3.Valid
          && DefectDescription4.Valid && DefectDescription5.Valid
          && DefectDescription6.Valid && DefectDescription7.Valid
          && DefectDescription8.Valid &&
          DefectDescription9.Valid
The formula returns TRUE if all Valid properties return TRUE and FALSE otherwise. (Formulas were associated with the Valid properties in the previous section.)
Finally, OptionalDescriptionsAreFilledOut evaluates to TRUE if, and only if, the user has filled out all defect descriptions for optional checks. It is associated with this formula:
OptionalDefectDescription1.Valid
          && OptionalDefectDescription2.Valid
Sending data to Slack through a button
The Send to Slack channel button is grayed-out if the fields at the top are not filled out, if there are mandatory checks not carried out by the user or if there are defect descriptions that have not been filled out.
To achieve this, the Enabled property of the button is associated with this property:
ISDEFINED(InspectedBy) &&
          ISDEFINED(ShiftStartTime) && AllMandatoryChecksPass &&
          MandatoryDescriptionsAreFilledOut &&
          OptionalDescriptionsAreFilledOut
The ISDEFINED formula function returns TRUE only if the value passed as the sole parameter is defined, that is, is not blank.
To send data to Slack, Send data to service (Zapier, …) is selected from the drop-down in the inspector. You’ll need to fill out the Server address field to enable the button to actually send data.
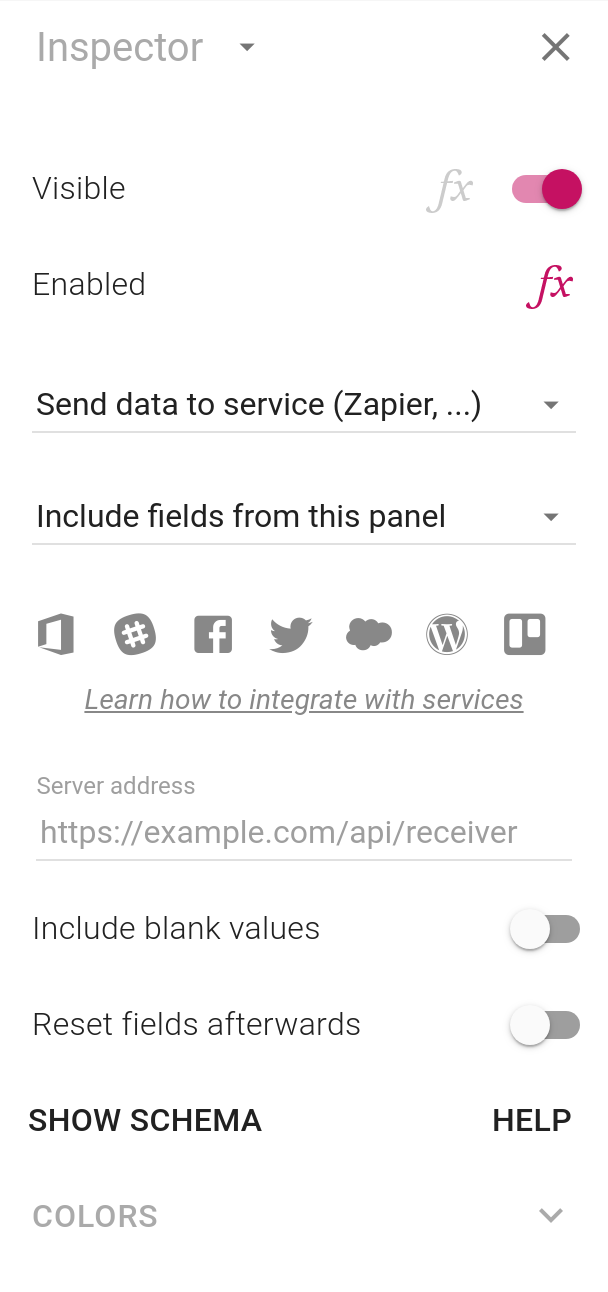
You’ll need to use a third-party service, such as Zapier, Zoho Flow or Microsoft Flow, to set up an action that posts data to a Slack channel. Then, you need to find the server address generated by this service and paste it into the Server address field.
We provide a detailed video tutorial which walks you through the steps of adding rows to a Google Sheets spreadsheet from an app you build with Calcapp using the Zapier service. Zapier also supports Slack, meaning that the steps you need to follow to integrate an app with Slack are very similar to what we show you in the video.