Three and a half years ago, we had started to lose count of how many times we had been asked one particular question: How can I determine what fields to include in a report?
Calcapp didn’t provide much in the way of customization in that area: you could only include all fields of the screen the button was on or all fields of the app, making for reports with lots of unwanted information. An enterprising user was kind enough to teach us a pretty compelling workaround, which we set out to share in a blog post back in 2018.
The technique described in the post simply asks app authors to put their report buttons on separate screens (configured to only include the fields of that screen), and then add hidden fields. These hidden fields use formulas referencing the fields containing the actual information.
The end result is a single, lone button on a screen. The downside is that you can’t really have any real fields on that screen (they would get included in the report), but the upside is that the button can include an arbitrary set of fields.
The IncludedFields property
With our new release, and a formula engine that supports arrays, that awkward workaround is no longer necessary. Enter the new IncludedFields property of email report buttons and open report buttons, which must be set through a formula.
In order for the formula to be picked up by Calcapp, you must configure your email or open report button to include fields set through a formula. Choose Select fields using formula from the drop-down menu in the inspector when your button is selected, and then on the fx button next to Included fields to edit the formula:
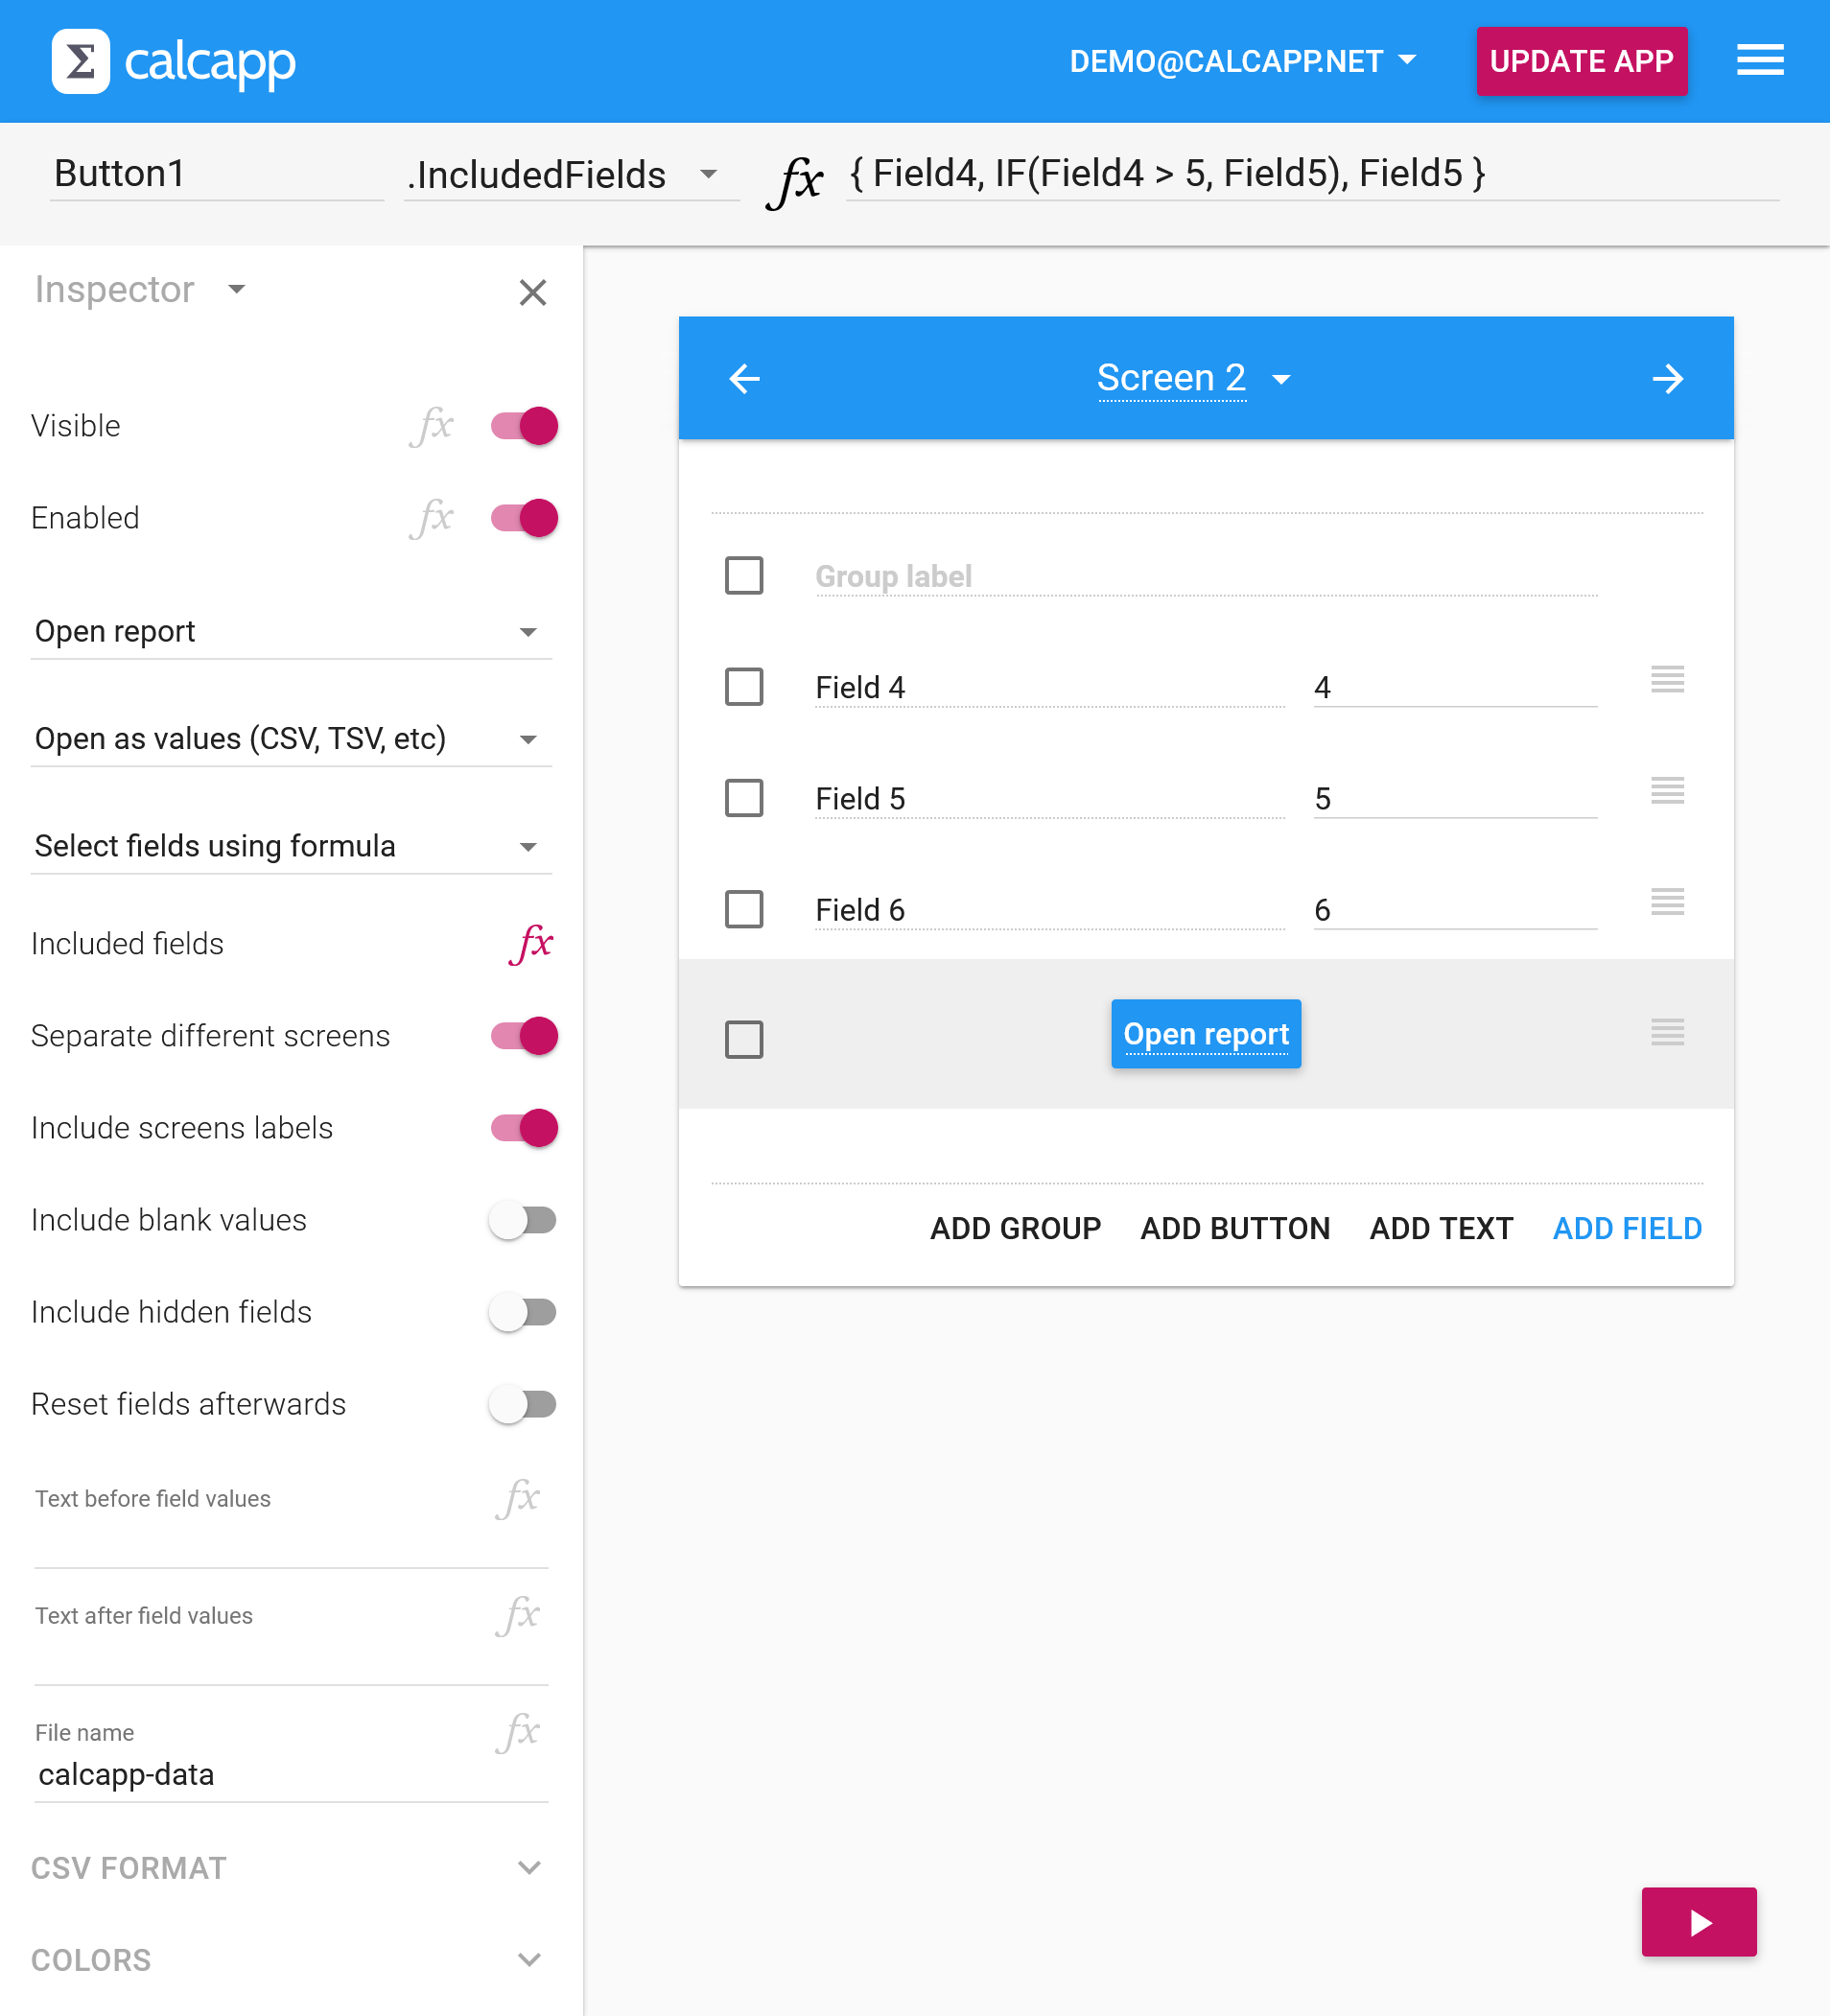
This formula includes Field1, Field2 and Field3:
Ranges enable a large number of fields to be referenced in a compact way. This formula includes the fields Field1 and Field5, as well as all fields that appear between them:
This formula includes Field1, Field3 and Field5, as well as the fields that appear between Field3 and Field5:
You can also include all fields of a screen simply by referencing the
screen in the array, include all fields of your app by referencing
the App
object and conditionally include fields using IF. You can even reference all
fields of a screen, and only include those whose values are greater
than 5 (say) using the FILTER function.
For more on how to use the IncludedFields property, including lots of examples, refer to our newly-expanded property documentation for email report buttons and open report buttons.
Other new report features
There are two other new report features that warrant discussion. First, you can now leave out hidden fields from reports simply by toggling the new Include hidden fields option. Previously, hidden fields were always included.
This option affects what fields are included even if a formula is
used to determine the set. In other words, if the IncludedFields formula
elects to include Field1, it won’t actually be included if
it is hidden and the Include hidden fields option is
toggled off.
Second, you can now elect not to present fields belonging to different screens separately by toggling the Separate different screens option.
This is the result when fields are separated by screen:
| Screen 1: | |
| Field 1 | 1 |
| Field 2 | 2 |
| Field 3 | 3 |
| Screen 2: | |
| Field 4 | 4 |
| Field 5 | 5 |
| Field 6 | 6 |
This is the result when fields are not separated by screen:
| Field 1 | 1 |
| Field 2 | 2 |
| Field 3 | 3 |
| Field 4 | 4 |
| Field 5 | 5 |
| Field 6 | 6 |
By not separating fields by screen, you can produce reports that do
not mirror the structure of your app. If you determine what fields to
include using the IncludedFields
property, the report will reflect exactly the fields you include in
the array, in the exact order they are specified there.
You can also customize the CSV files sent through your apps and add text before and after field values using formulas.