When we look at apps created by the Calcapp community, various trends have started to emerge. In November, we wrote about a design pattern for protecting reset buttons from being pressed inadvertently. Now, we’ll highlight another popular design pattern we see used with increasing frequency: letting users control the number of fields that are shown.
Use this pattern when you expect users to enter values for a given number of things, but when you don’t know how many values are needed. In other words, you want your users to be able to control the number of available fields. The primary reason for giving users this control is that you can present an uncluttered user interface to most users, and only present lots of fields for users that really need them.
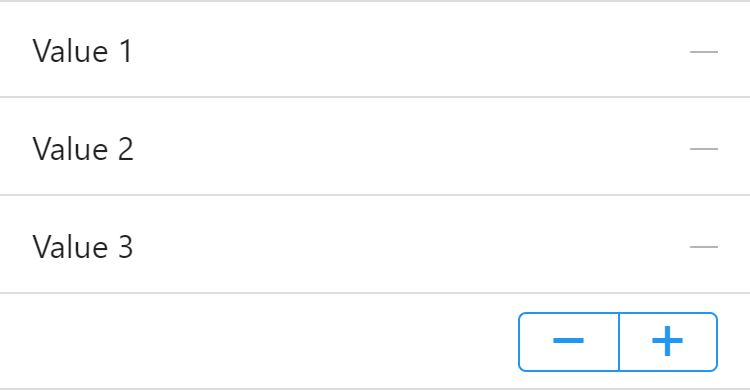
In this post, we’ll present an app that uses a stepper to add and remove fields:
A sample app for calculating a grade point average
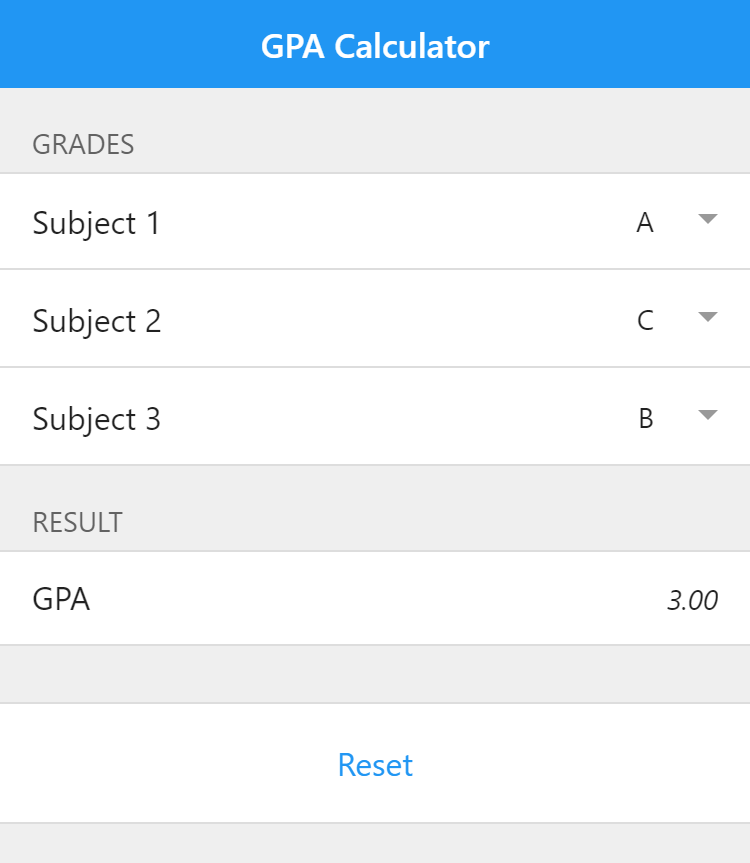
The sample app used here is a calculator for working out the Grade Point Average (GPA) for a student where the available grades are A (four points), B (three points), C (two points), D (one point) and E or F (zero points). A student taking only three classes and receiving one A, one C and one B would get a GPA of 3.00.
Here’s a calculator for working out the GPA for three subjects:
If you wanted to enable users to enter grades for ten different subjects, your first response would probably be to add seven additional fields. The problem is that you would then wind up with a cluttered app for students interested in entering grades for fewer subjects. (This problem would be made far worse if additional data should be entered for every subject, such as a weight to assign to the grade, the name of the subject, etc.)
What if you could show just three subjects by default and enable students looking for more fields to just press a button to add them? With Calcapp, you can, by making use of the Visible property, which determines whether a field is visible. The key here is that you can associate a formula with that property, so that visibility is determined when your app is run.
You could ask a student to simply enter the number of subjects to show in a number field or use a drop-down field. Here, we’ll use a number field with a stepper and a hidden value, placed below the last subject. The stepper enables students to press the minus button to remove a field and the plus button to add one.
Here’s how it looks:

Run the app here. You are encouraged to inspect the app and its formulas in Calcapp Creator while you read this tip. When you create a new app, select the Sample: Grade calculator template.
Adding fields for subjects and their grades
The field with the stepper is named Subjects and the stepper is configured to allow the numbers one through ten. The initial value is set to three and the field value is made hidden:
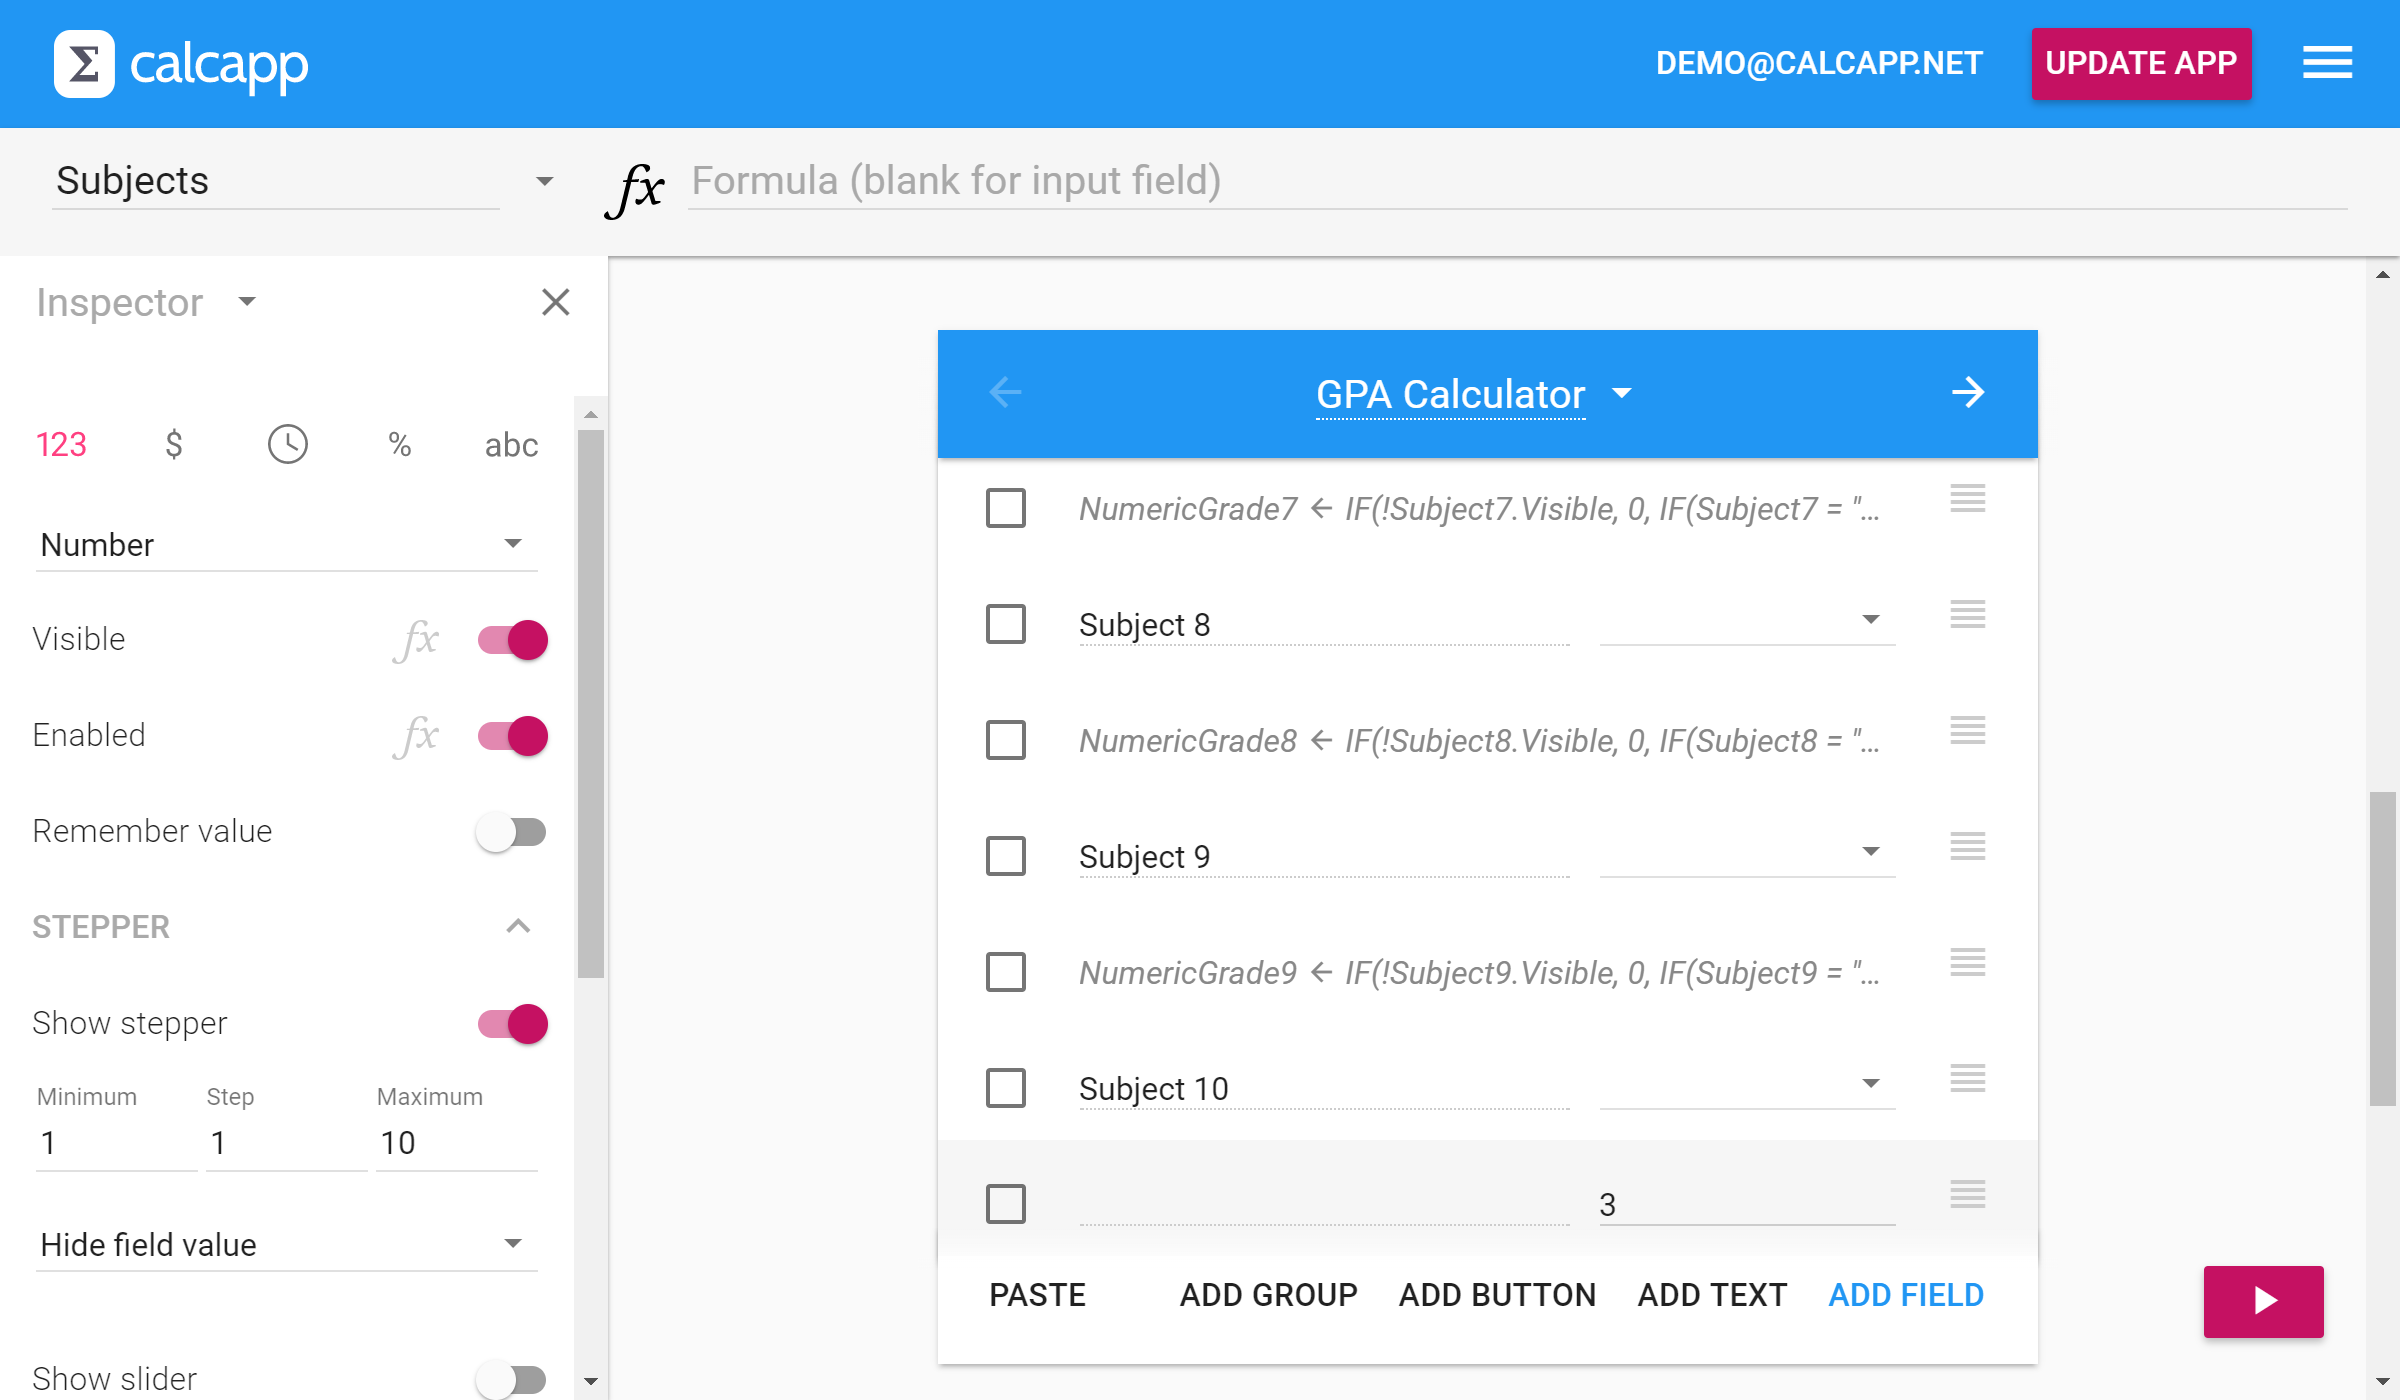
Every subject is associated with a drop-down field for text strings, whose values are A, B, C, D and E or F. Following each drop-down field is a hidden field which assigns a numeric value to every grade. Here is the formula for the field NumericGrade1:
This formula states that if the first subject is not visible, the numeric grade is zero. If an A has been awarded, the numeric grade is four, if a B has been given, the numeric grade is three, and so on. (If you’re not used to seeing an exclamation point in formulas, it is equivalent to the NOT formula function, which negates the value, that is, turns TRUE to FALSE and vice versa.)
This brings us to the Visible property, which determines whether the field is shown. Remember, the name of the field determining the number of fields to be displayed is named Subjects, meaning that in order to determine if the field for the first subject should be shown, we use this formula:
(Show the formula for the Visible property by pressing the faint fx symbol next to the Visible label in the inspector.)
It is actually redundant for the field of the first subject to have a formula associated with the Visible property, as the first subject is always shown. It is always shown because the stepper associated with the Subjects field has a minimum value of one.
If you imagine that equivalent formulas are used for the fields for the other subjects, we have an app that enables a user to show only the number of fields he or she wishes.
Calculating the grade point average
To calculate the grade point average, we use three additional fields, two of which are hidden. The first hidden field, named NumericGradeSum adds all numeric grades together:
To calculate the grade point average, we divide the value of that field by the number of grades:
The tricky part is figuring out the number of subjects the user has entered grades for. This is harder than it may seem, because a subject should not be counted if its field is not visible or if the user has not filled out a grade for it. (Invisible fields still retain their values.)
To determine if a user has filled out a grade for a subject and the associated field is visible, this formula can be used:
(If you’re not used to seeing the && operator in
formulas,
it is equivalent to the AND formula function. ISDEFINED(Subject1) is
equivalent to NOT(ISBLANK(Subject1))
and returns whether the user has filled out a value.)
We’re interested in counting only fields for which the above formula
evaluates to TRUE. In other words, if the formula evaluates to TRUE
for a field, we’d like to add one to the NumberOfGrades
value and zero otherwise. While we could use the formula IF(Subject1.Visible &&
ISDEFINED(Subject1), 1, 0), we’ll use the new TONUMBER formula
function, which does the same thing: TONUMBER(Subject1.Visible
&& ISDEFINED(Subject1)).
Putting it all together, this is the formula for the NumberOfGrades field:
TONUMBER(Subject1.Visible && ISDEFINED(Subject1)) +
TONUMBER(Subject2.Visible && ISDEFINED(Subject2)) +
TONUMBER(Subject3.Visible && ISDEFINED(Subject3)) +
TONUMBER(Subject4.Visible && ISDEFINED(Subject4)) +
TONUMBER(Subject5.Visible && ISDEFINED(Subject5)) +
TONUMBER(Subject6.Visible && ISDEFINED(Subject6)) +
TONUMBER(Subject7.Visible && ISDEFINED(Subject7)) +
TONUMBER(Subject8.Visible && ISDEFINED(Subject8)) +
TONUMBER(Subject9.Visible && ISDEFINED(Subject9)) +
TONUMBER(Subject10.Visible && ISDEFINED(Subject10))
Run the app here.Again, you are encouraged to inspect the app and its formulas in Calcapp Creator. When you create a new app, select the Sample: GPA Calculator template.