Prior to our last big release, determining what fields to include in a report or what fields to reset was difficult or impossible. That’s why we introduced the new IncludedFields property of email report buttons, open report buttons, server relay buttons and reset buttons.
(Refer to our blog posts from 2021 for all the details, covering reports and reset buttons.)
The only downside was that you had to use formulas to determine what fields to include. That approach is powerful, because it enables you to determine what fields to include based on information entered in the app and calculated by the app.
Typically, though, what fields to include does not change. Requiring you to use formulas for something as basic as selecting what fields to use arguably isn’t particularly user-friendly, especially for apps that contain few other formulas.
For that reason, our new release introduces a field picker.
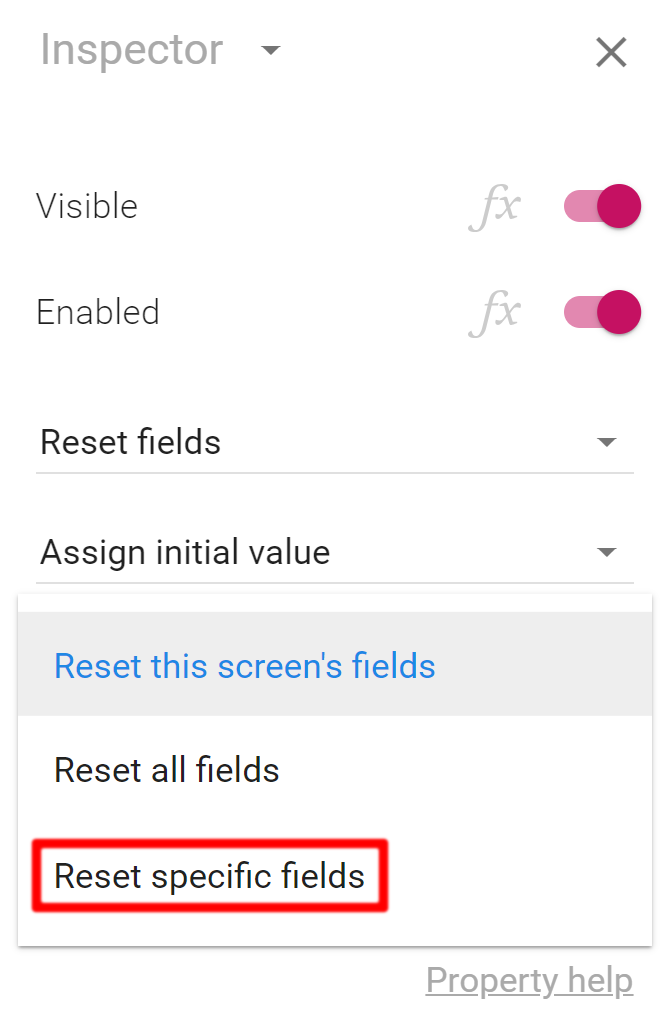
To determine what fields to reset using a field picker, select Reset specific fields from the drop-down in the inspector when a reset field is selected:
Fields to reset appears in the inspector, along with a button for selecting the fields:
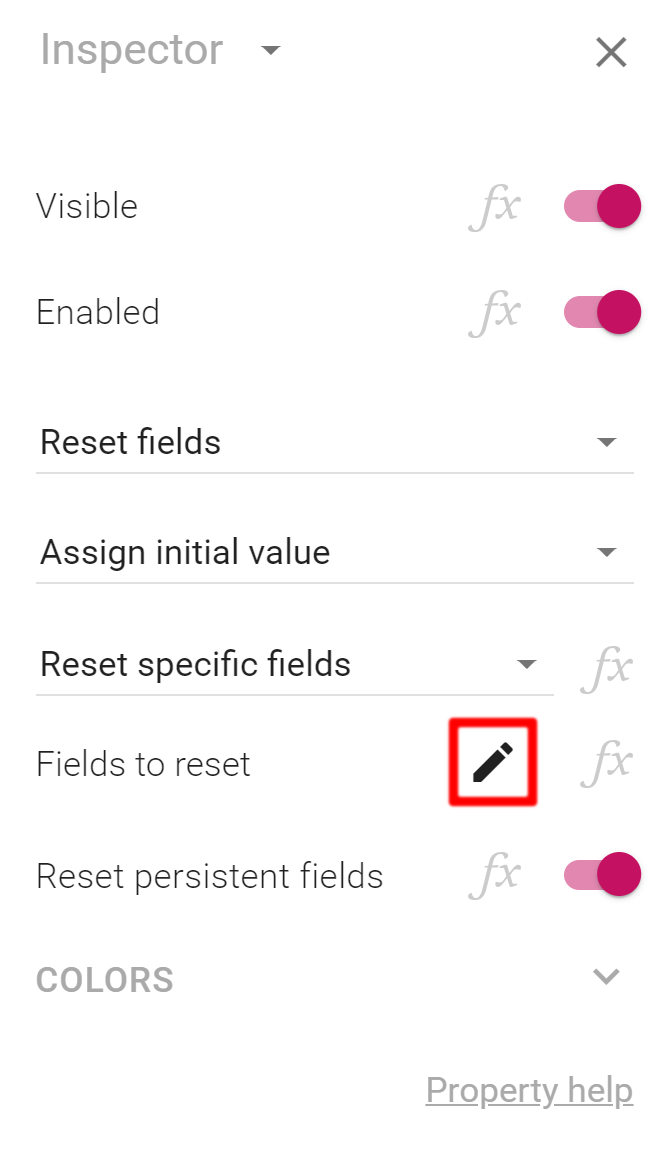
Click the pen button, and this field picker appears:

The left-hand side of the field picker contains all screens. Press a screen, and the right-hand side of the field picker displays all fields of the selected screen. Make sure that the fields you wish to reset all checked, and then press Save.
Press the button in the upper-left corner to check all fields and the button to uncheck all fields.
The order of the fields isn’t important when resetting fields, or when sending them to a third-party service like Zapier through a server relay button. However, when fields are included in reports, the order matters.
For that reason, the field picker has a second page where you decide what fields to include in a report:

The grayed-out text on the right contains the name of the screen the field is part of, as well as the name of its form group. If there is no grayed-out text, the field is part of the same screen and form group as the field above it.
Drag the handle to change the order of the fields and press the button to go back to the original order. When you’re done, press Save.