Publishing apps
Use Calcapp Connect to preview the apps you’re building and to run your own apps. When you’re ready to let others use your apps, you need to publish them.
Publishing creates a stable link that you can share through email, social media or by embedding in websites. You can also create multiple variations of the same app using launch options.
Publishing options
A published app is available to anyone with access to a link you create using Calcapp Creator. You have several options for sharing:
- Email sharing - Send app links directly to specific users.
- Link and QR code sharing - Share on social media or discussion forums.
- Website embedding - Integrate apps into your own website.
- Launch options - Create multiple variations from a single app.
Apps can also require users to sign in, which is appropriate for internal apps containing sensitive information. Published apps can be used offline.
When you publish an app, subsequent changes you make are not automatically reflected in the published version. This means you can work on improvements without interfering with your users. When ready, update the published version to make your link reflect the new work.
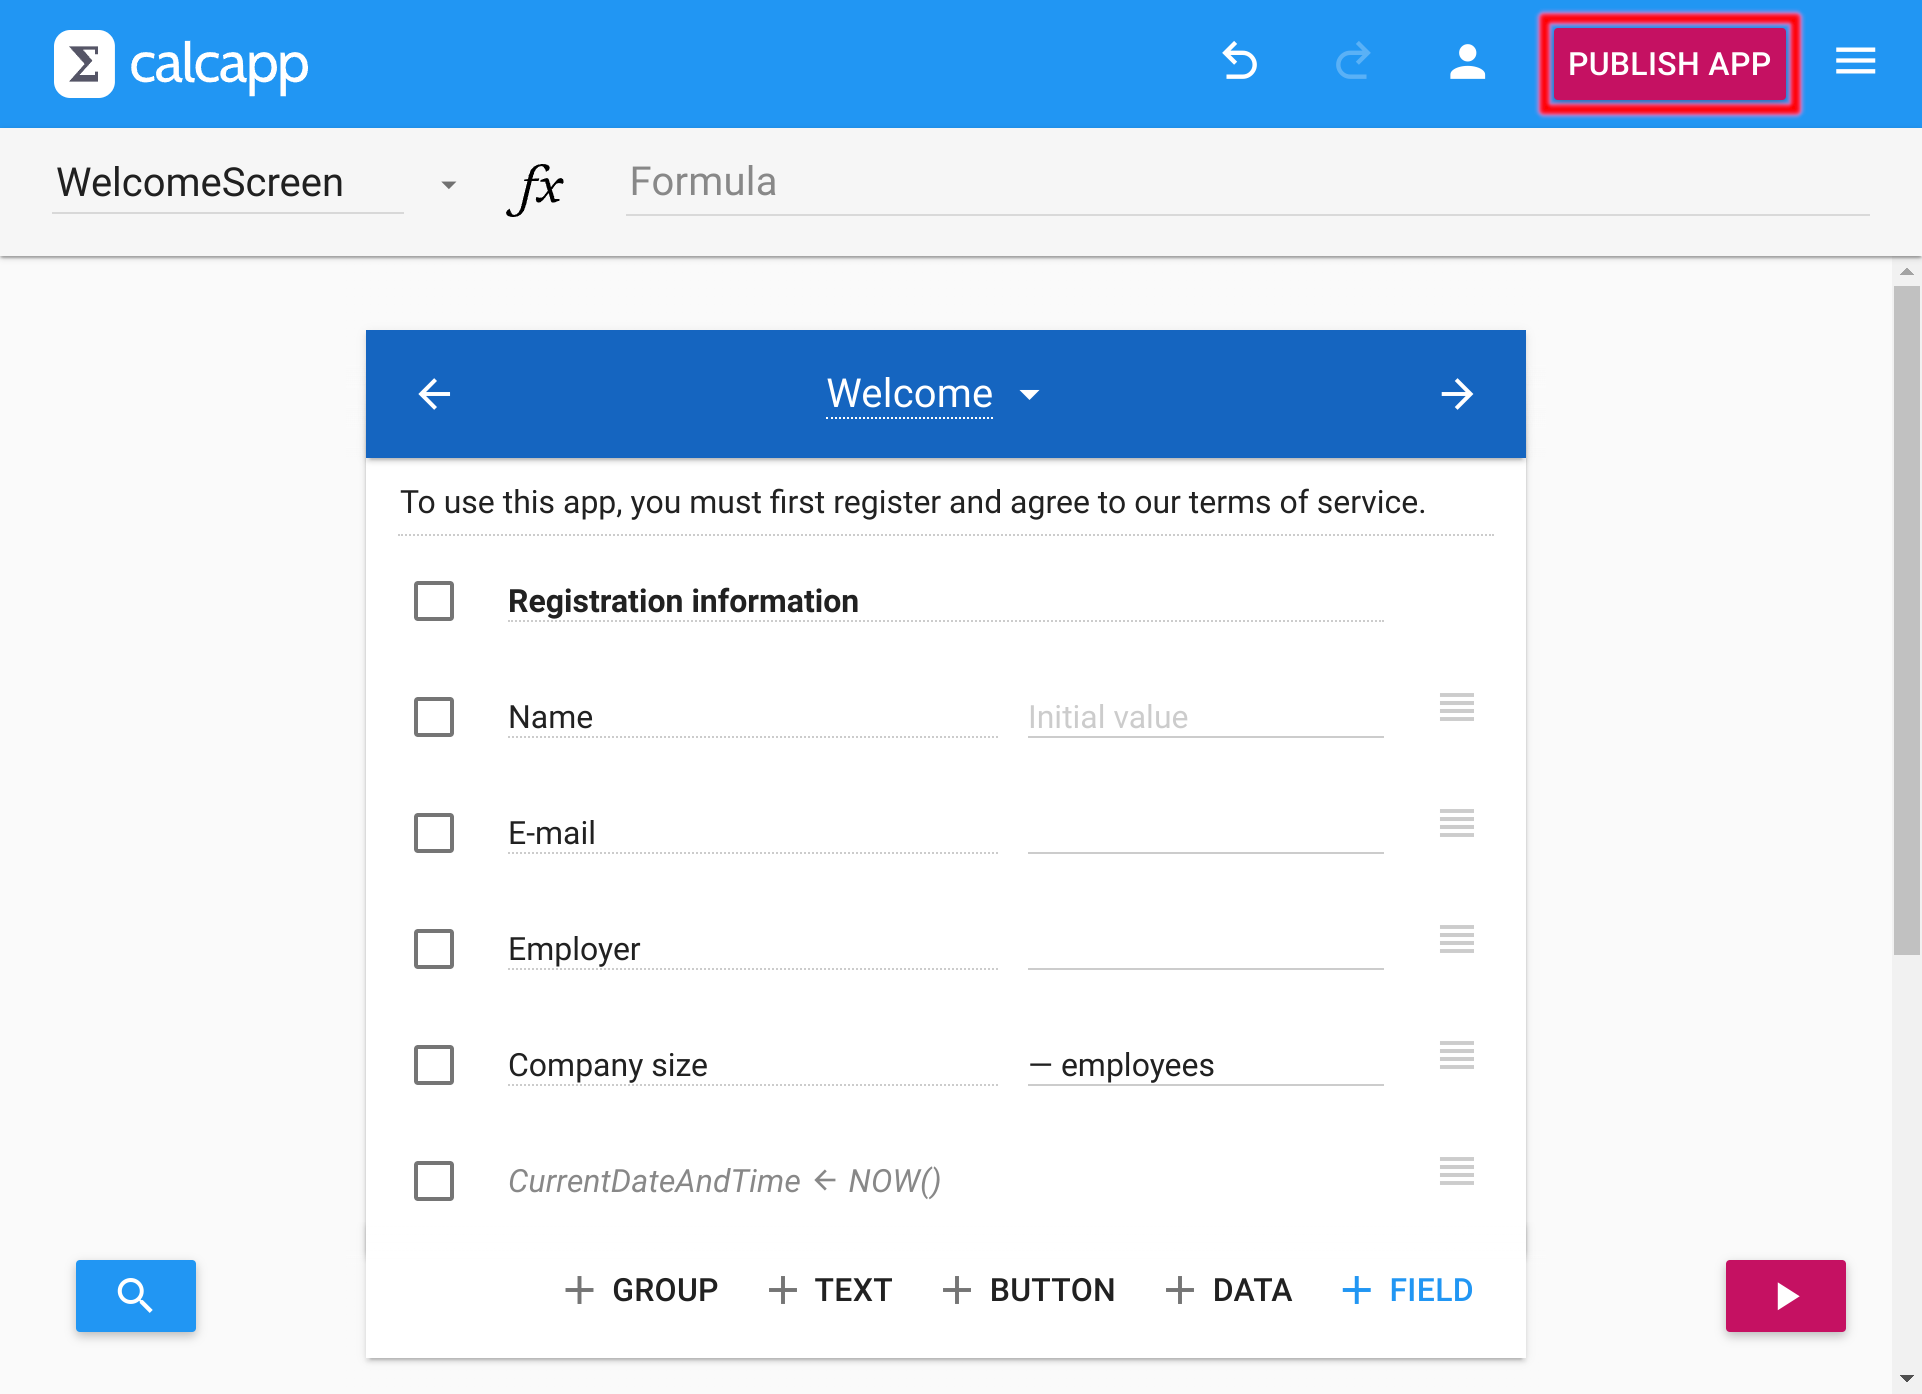
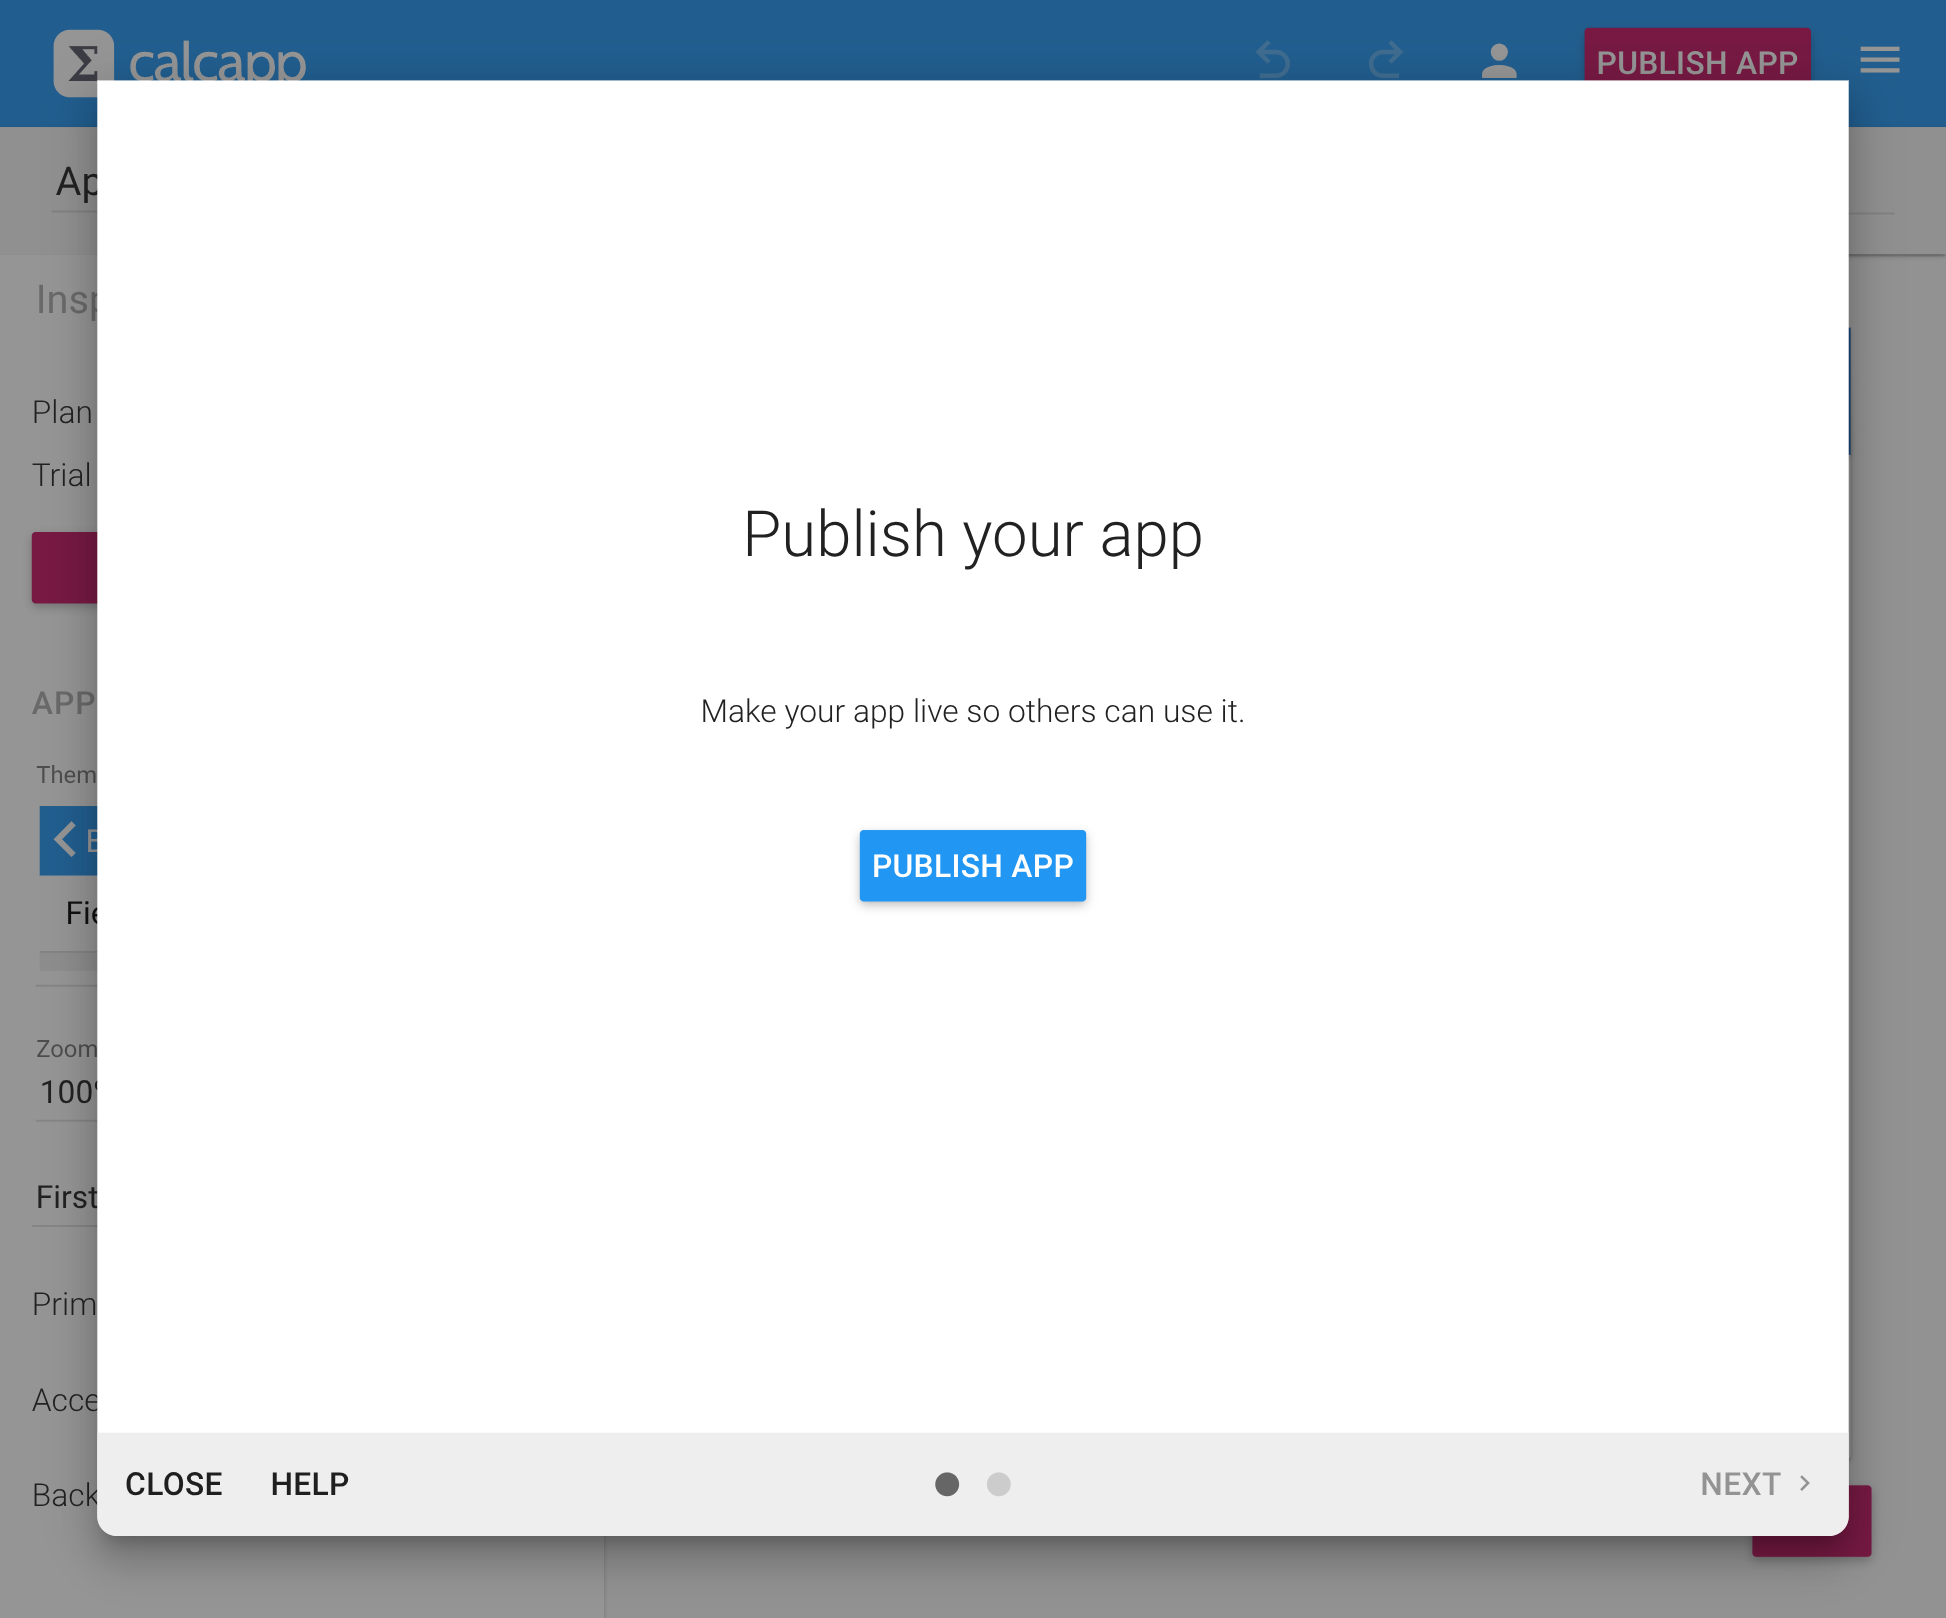
To publish an app, press the Publish app button:
You are greeted by this window:
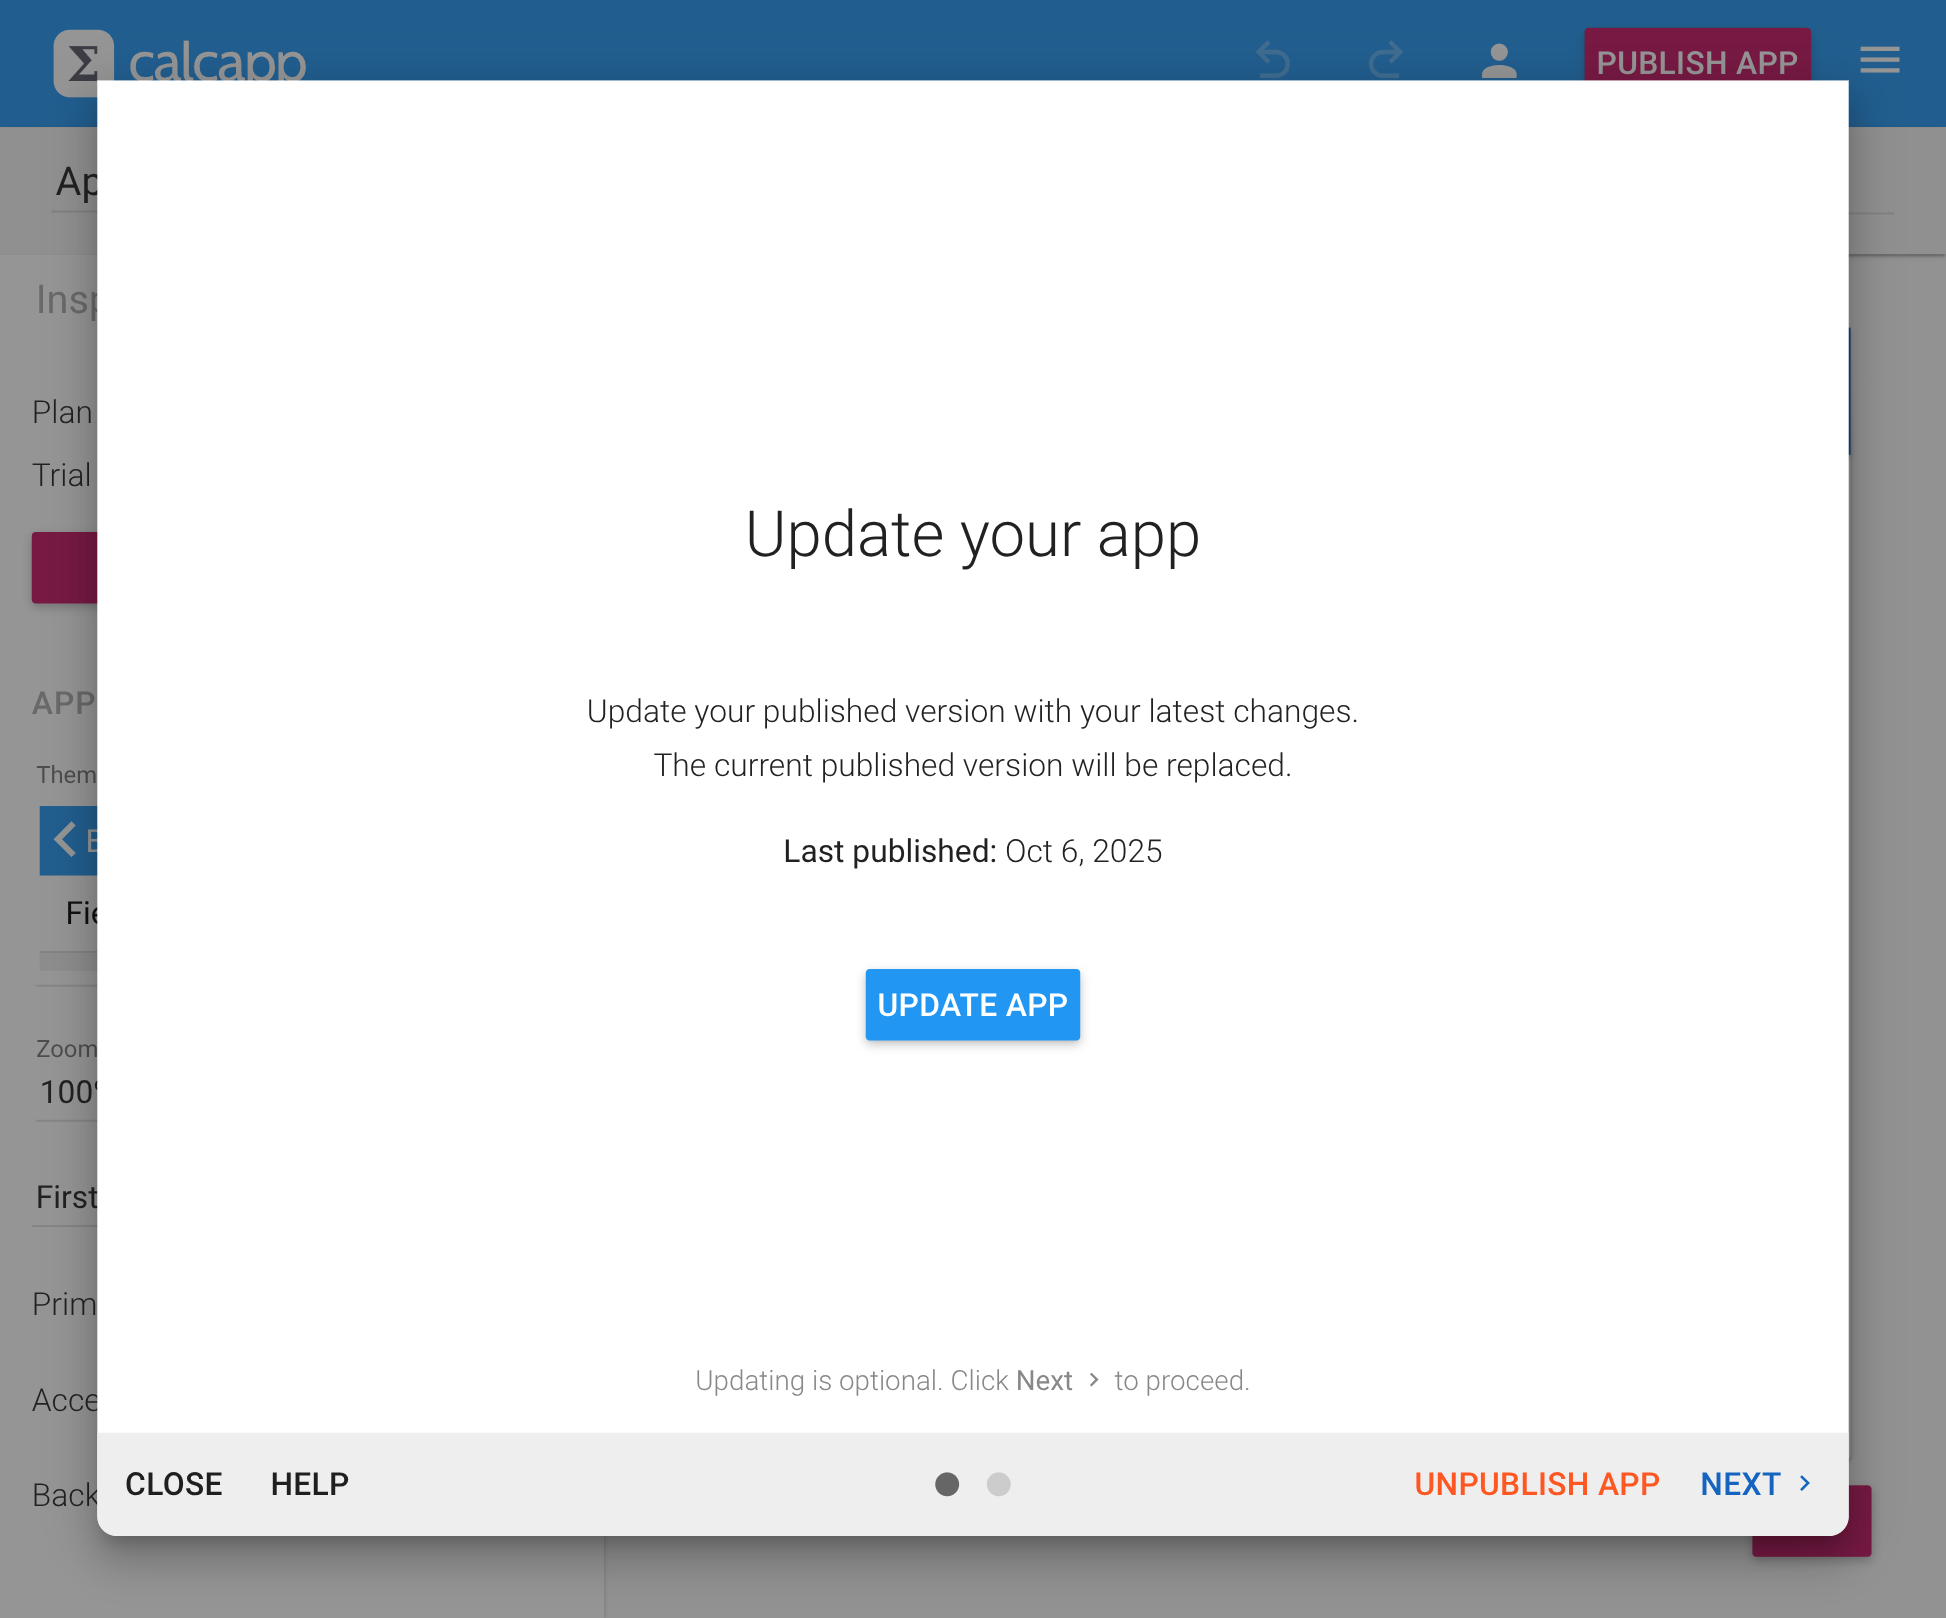
Once the app has been published, the window looks like this instead:
The next step of the window allows you to share apps through email, social media or embed them on your website. You don’t need to update your published app in order to reach these features, simply click Next in the bottom-right corner.
Sharing your published app
Once your app is published, you can share it through several methods. You are presented with three tabs for different sharing approaches.
Sharing apps through email
The first tab enables you to share apps through email:
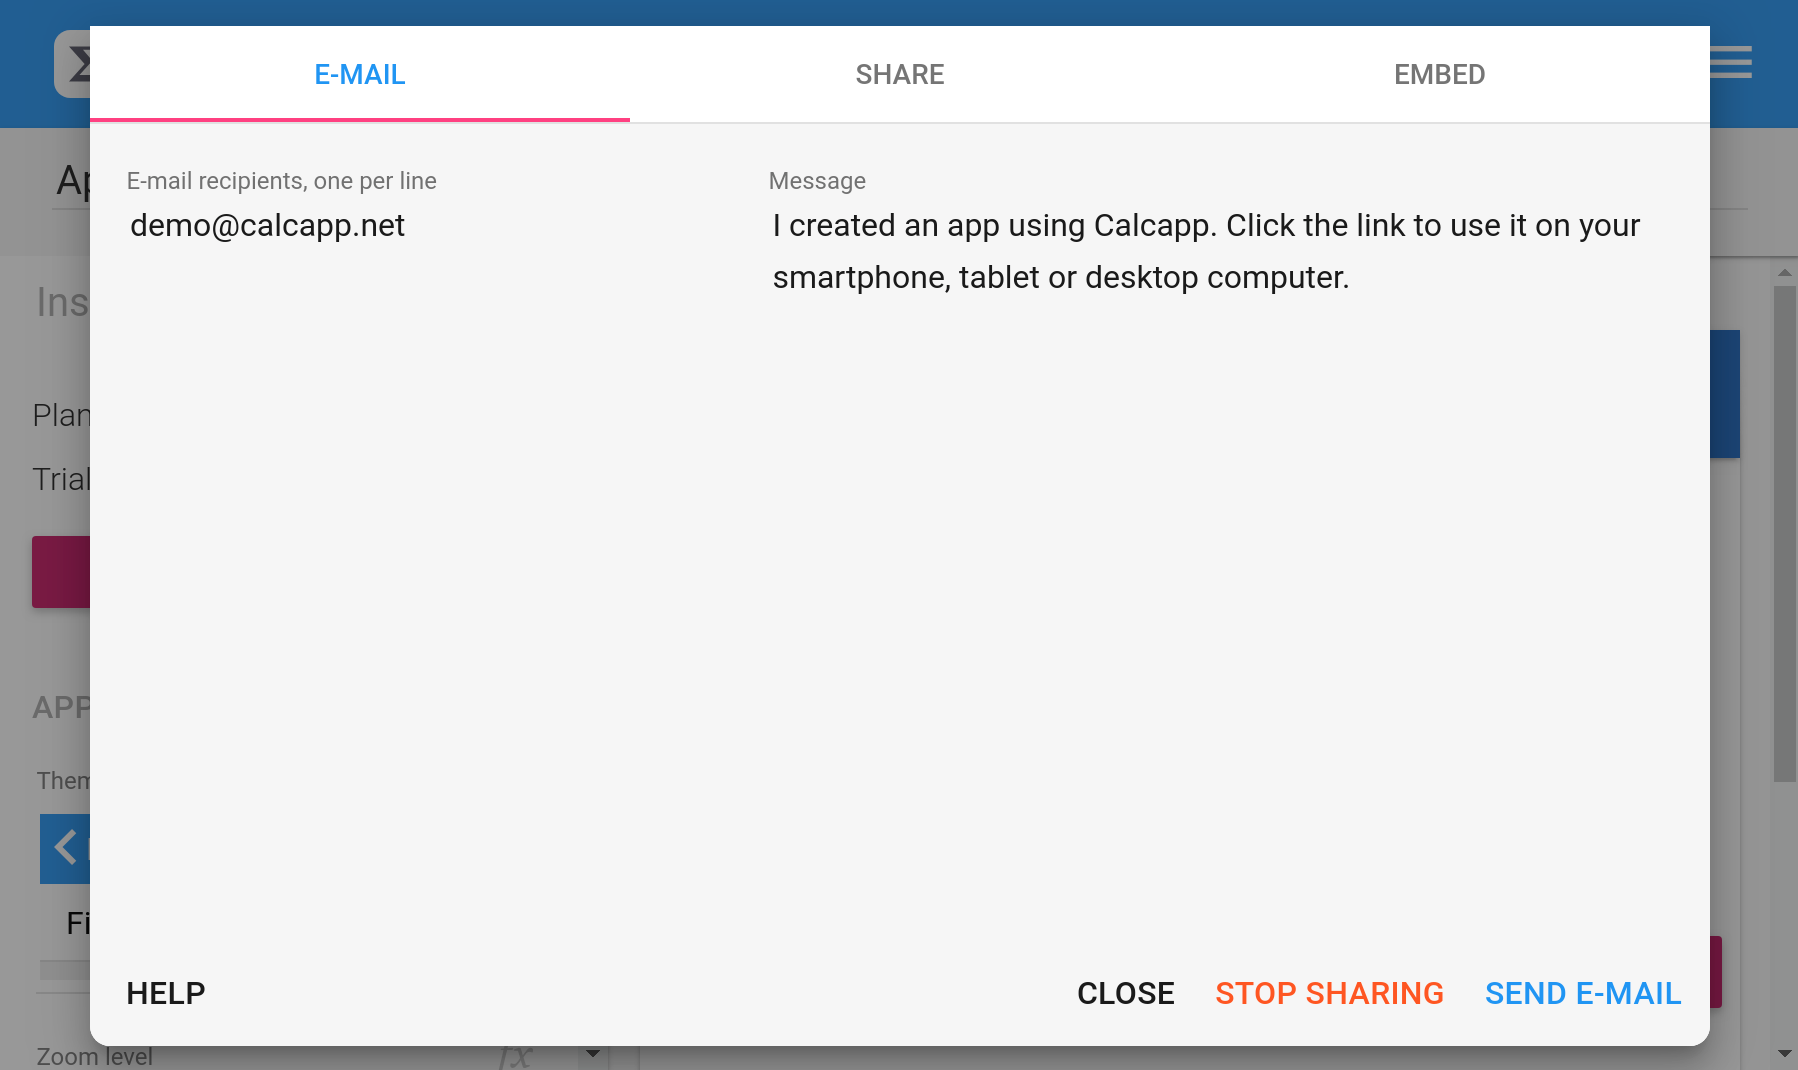
Enter the email addresses you want to send the app to in the box to the left and optionally a personalized message in the box to the right before pressing the Send email button. This is likely the easiest way to share apps with coworkers.
(Separate multiple email addresses by putting each address on its own line. You can also separate them using commas or semicolons.)
Sharing apps by sending links or QR codes
The second tab presents you with a link you can share:
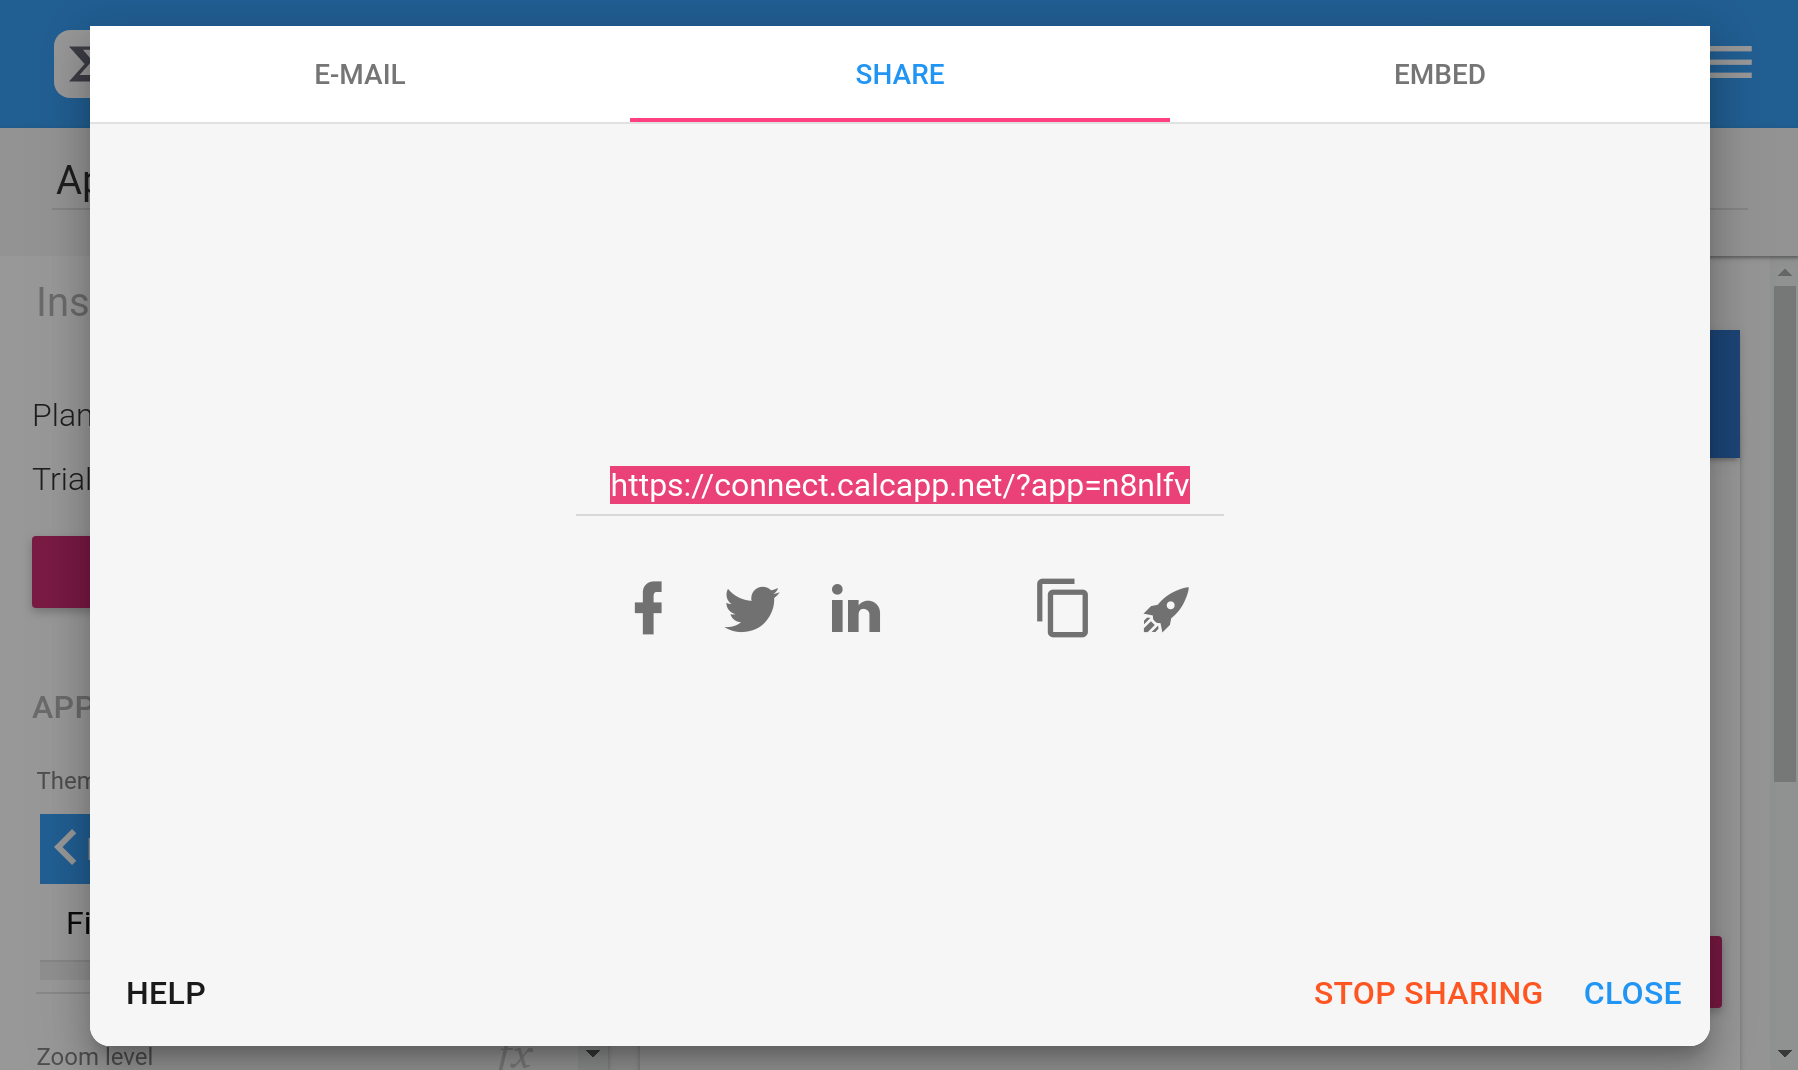
The link you’re presented with is the exact same link that is sent when you email apps. You can launch your shared app by pressing the rocket ship button or share it on social media.
You can also copy the link to your clipboard by pressing the button to the left of the rocket ship button. That way, you can share your app using other means, such as by pasting it into email messages or posts on discussion forums.
Finally, you can point your cell phone camera at the QR code to easily launch it. Hover over the code to get a download button to download the QR code. Put the downloaded QR code on your website for easy access, or use it in flyers or ads.
Embedding apps in your website
The third tab enables you to embed your app in your own website:
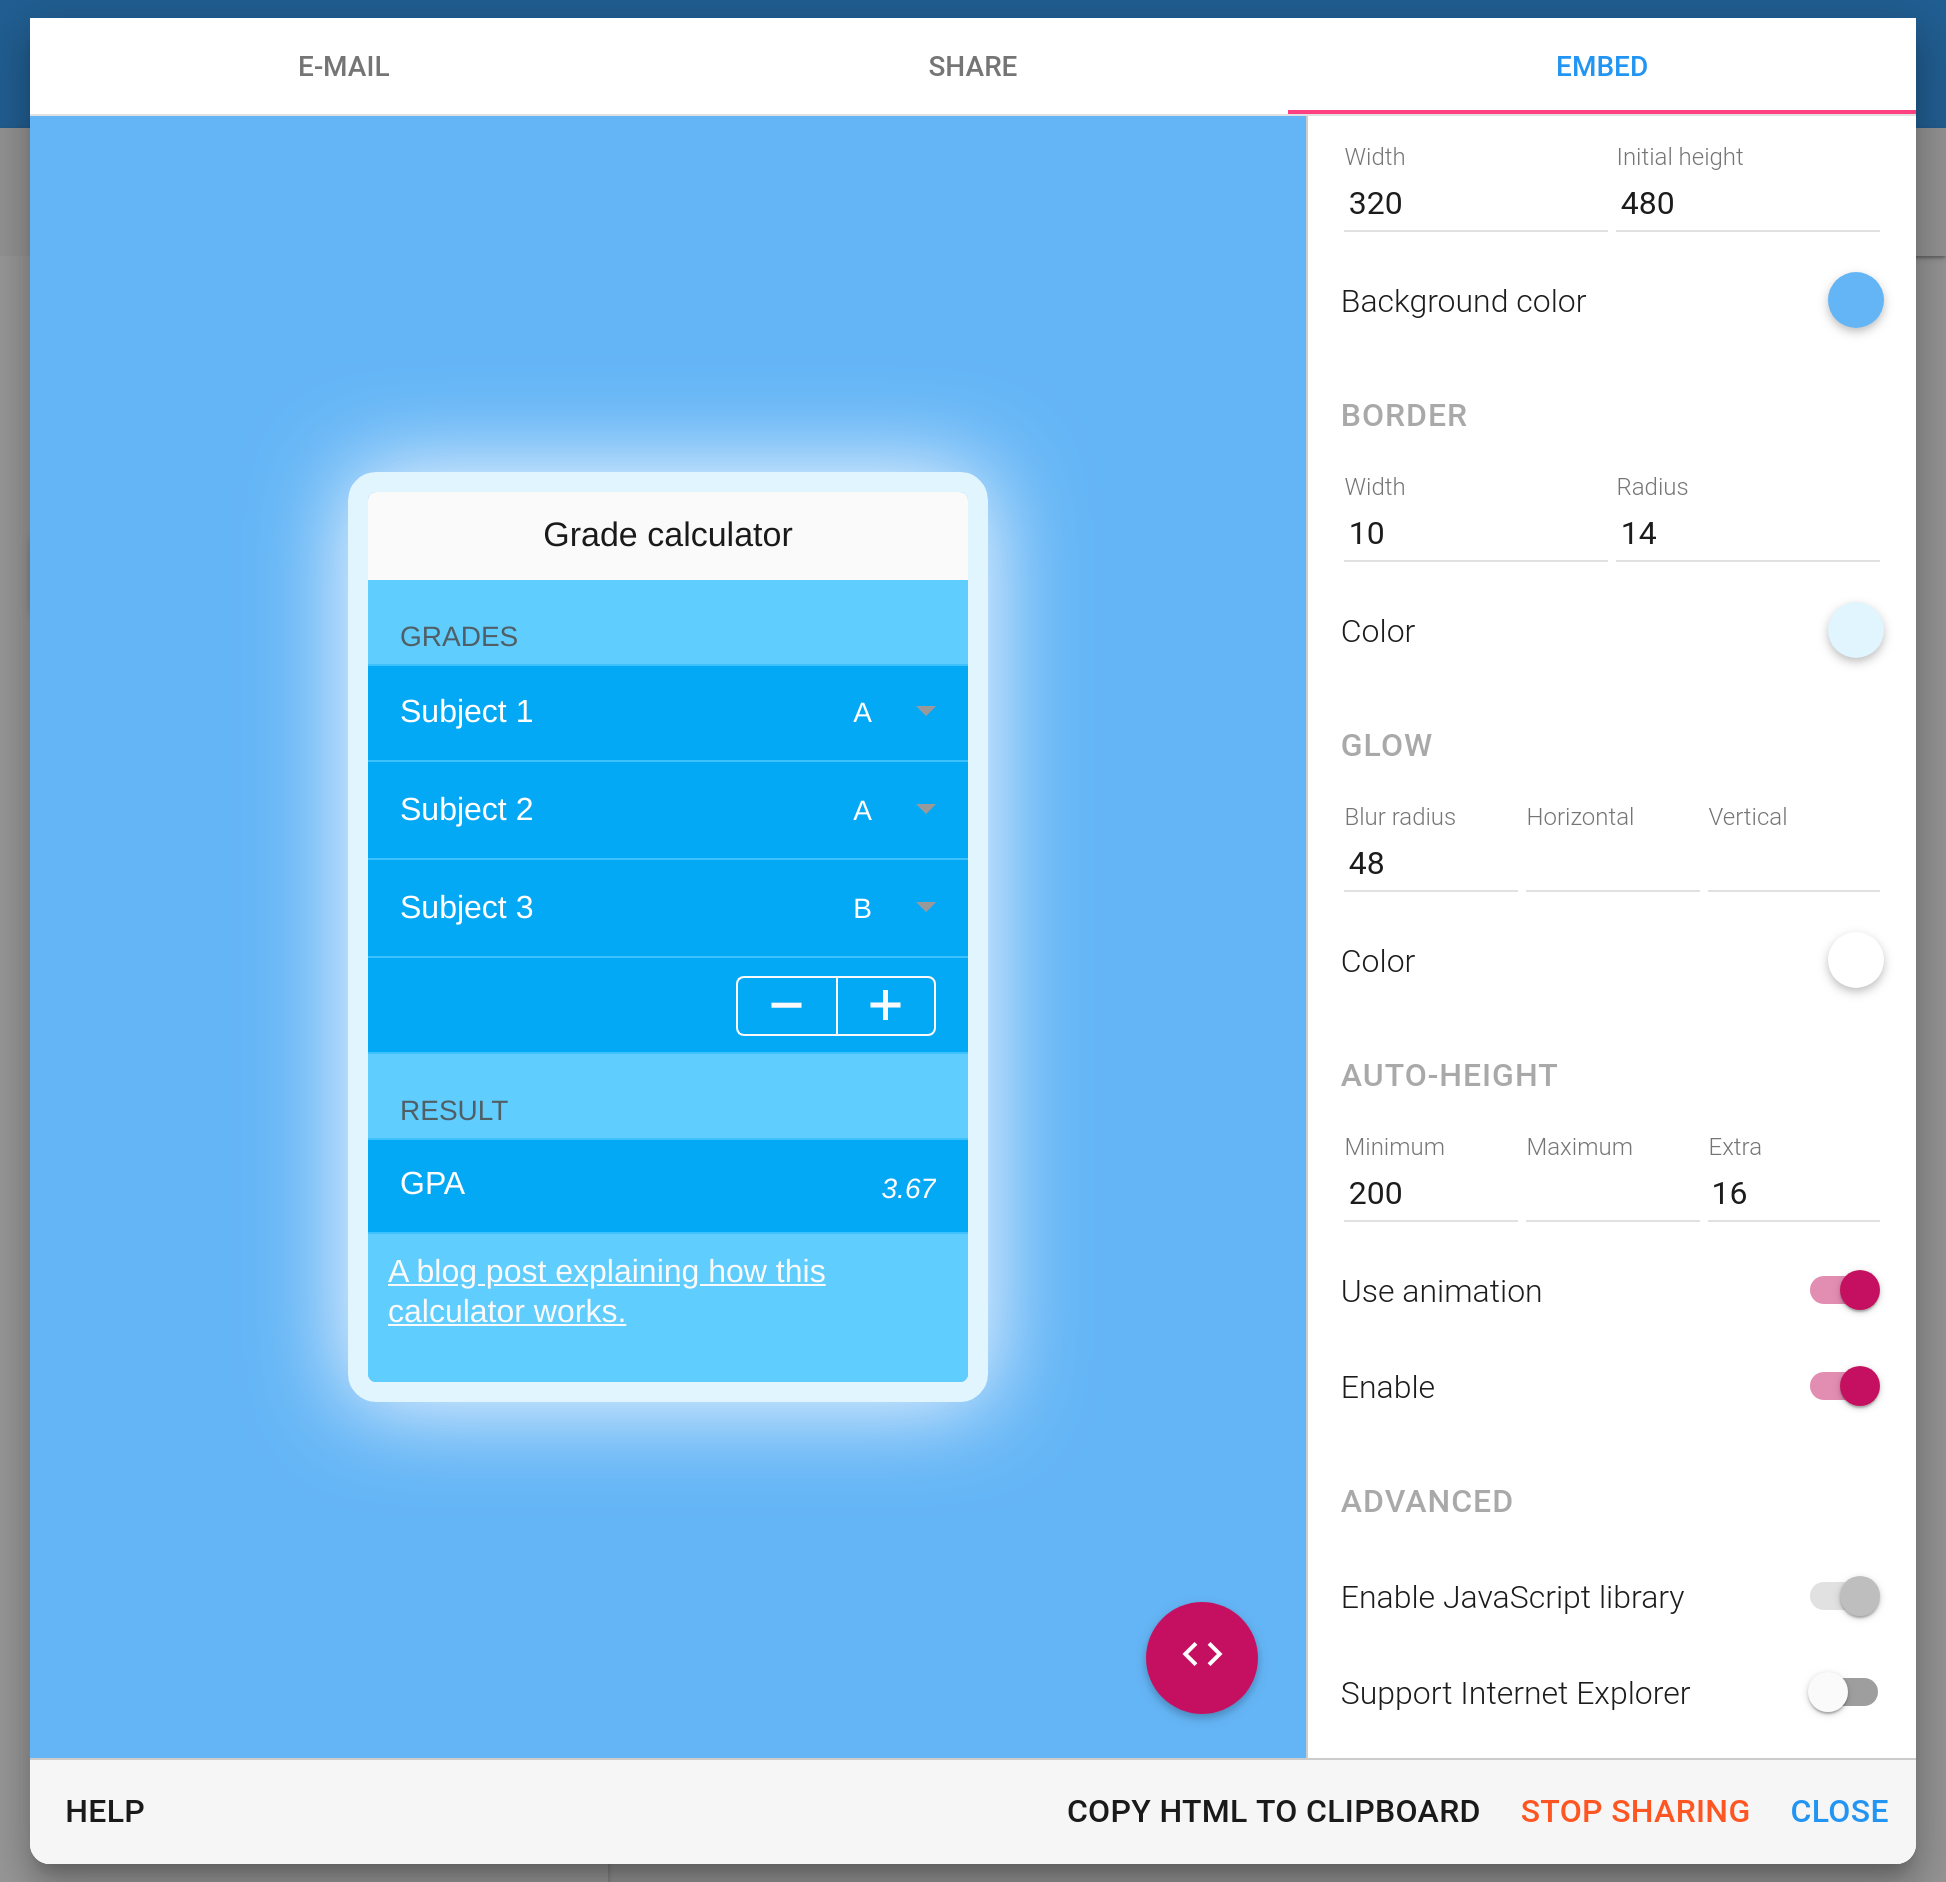
Embedding places your app in a rectangular area (iframe) on your website. Use the embed tab options to customize appearance with borders, rounded corners, glows or shadows.
Auto-height makes the iframe automatically adjust to your app’s height. Optionally set Minimum, Maximum and Extra height values for more control.
(Auto-height requires loading our JavaScript library, which also enables retrieving app values from the host page. See our iframe library reference.)
Copy HTML to clipboard gives you the markup to embed the app. Switch to HTML view using the button:
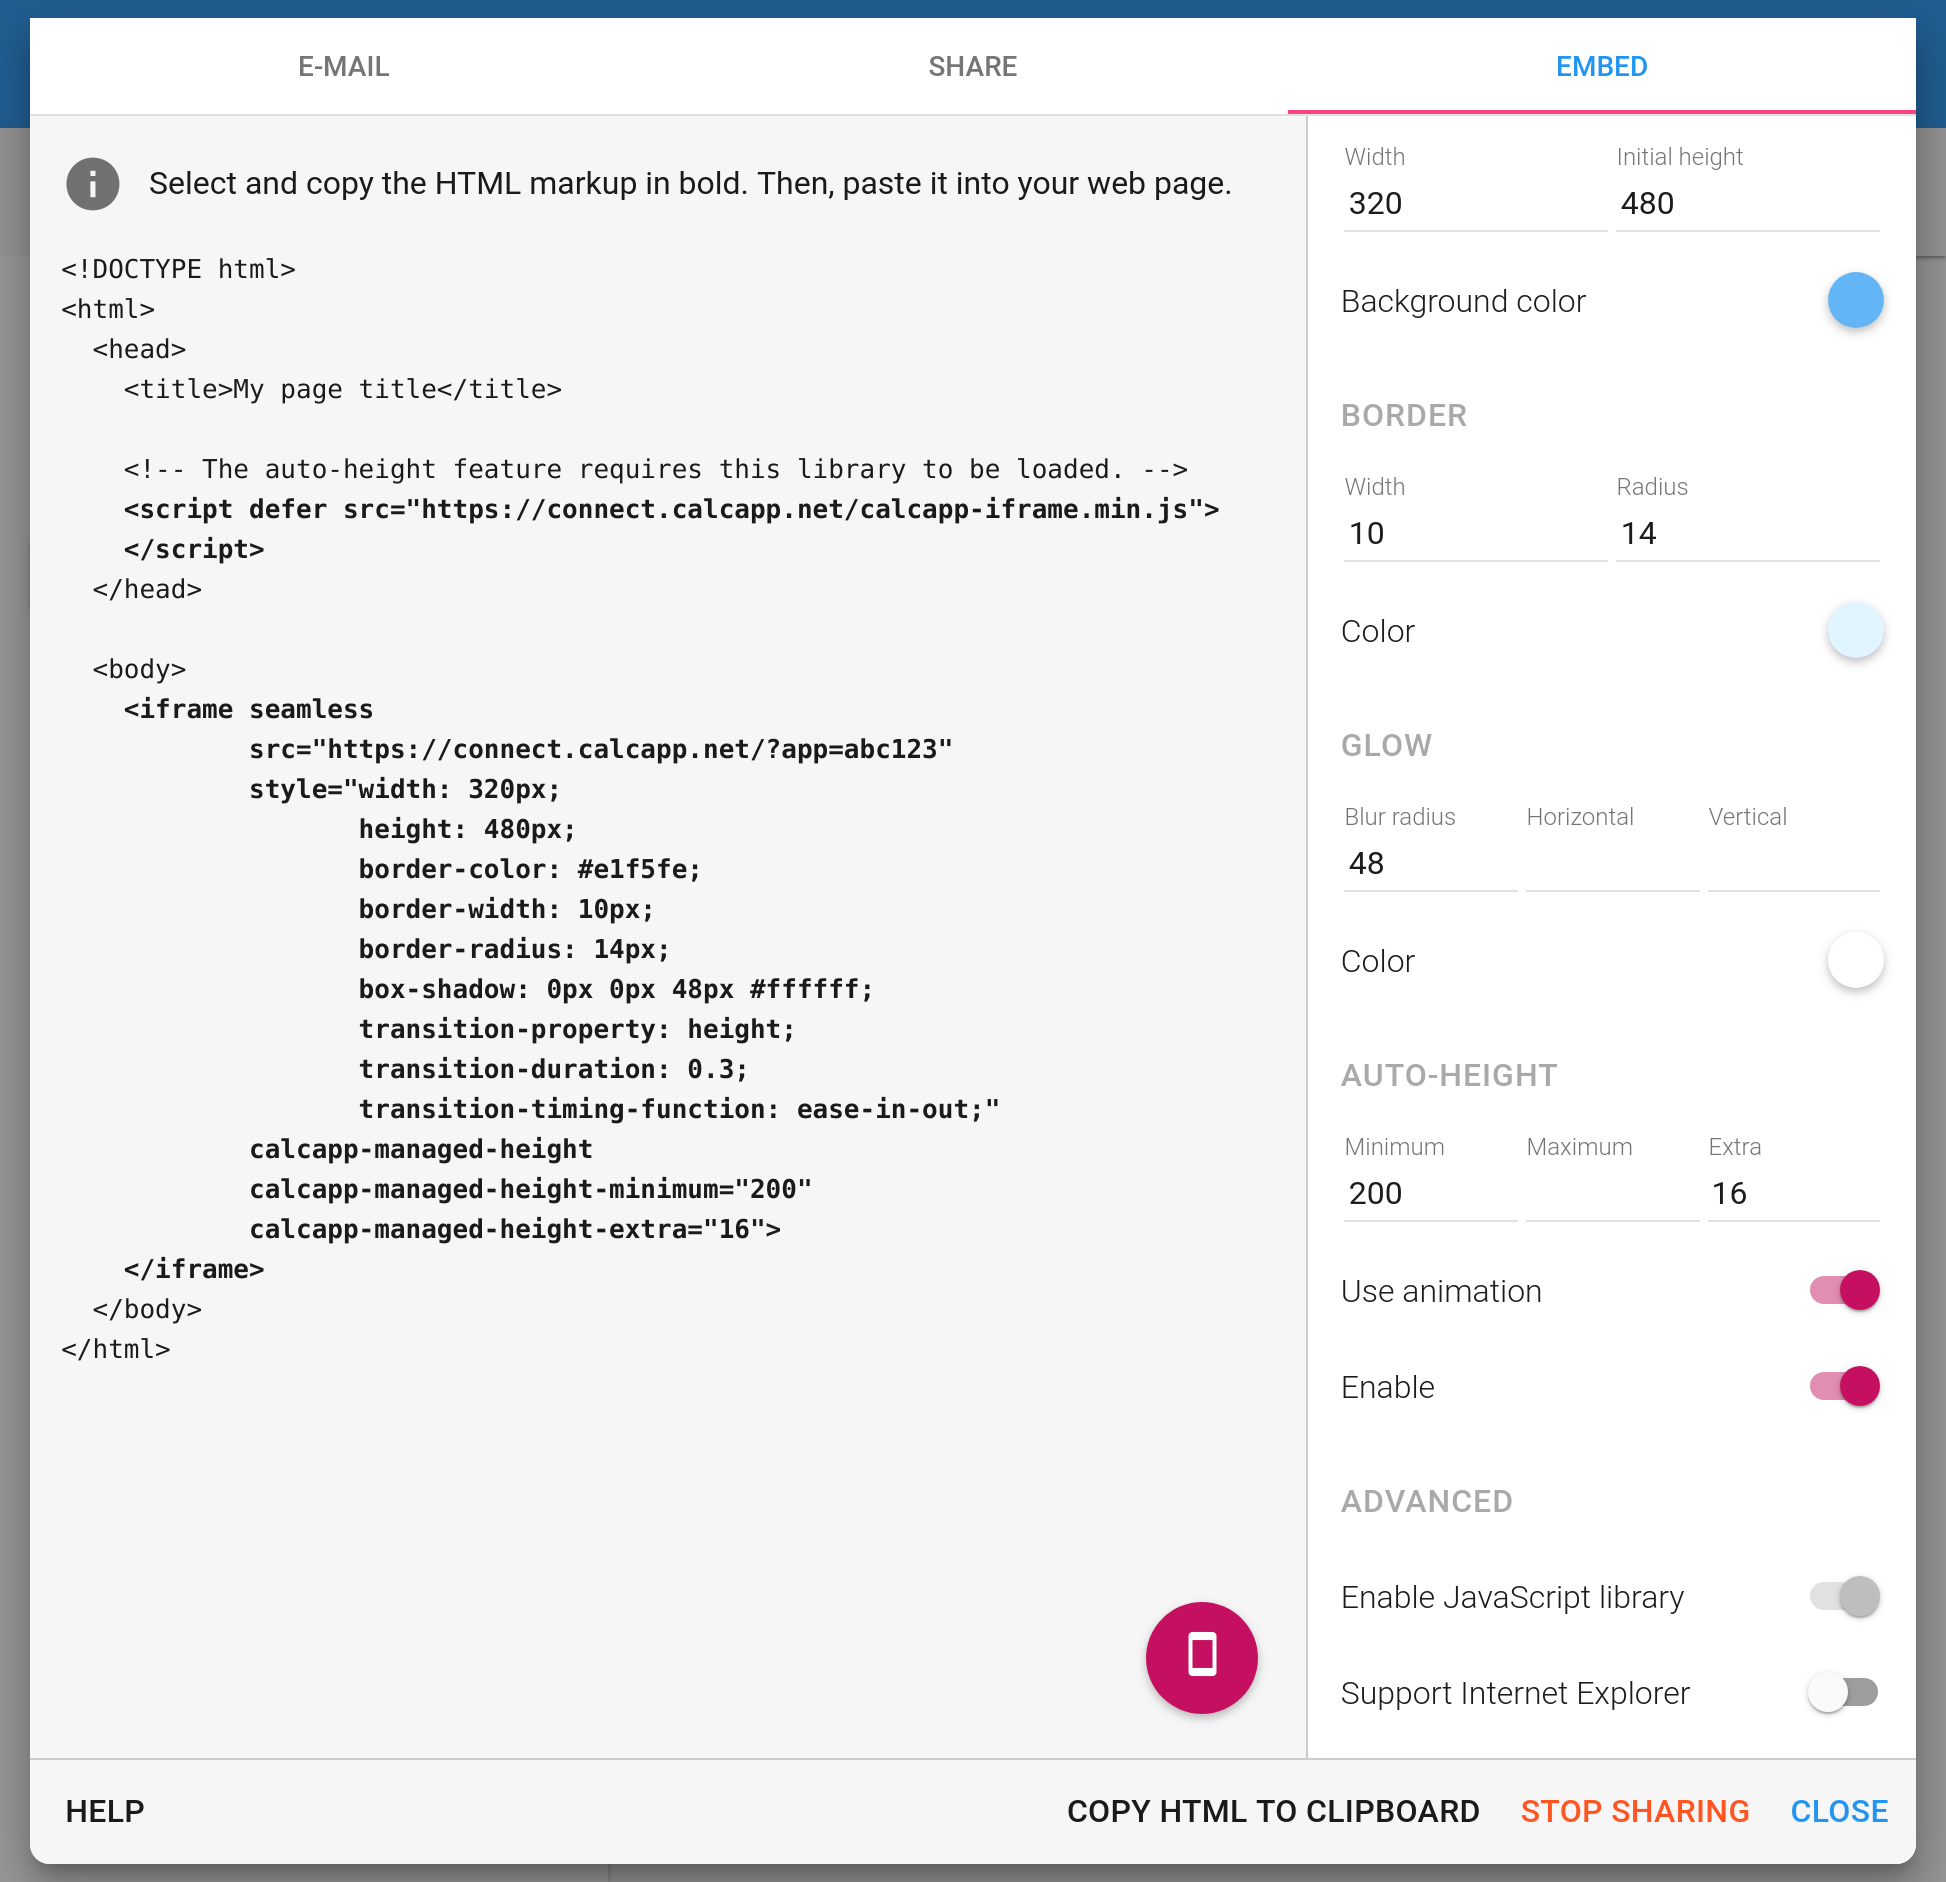
Embedding works easily if you control your website’s HTML. For platforms like WordPress or Wix, you may need technical assistance or iframe plugins.
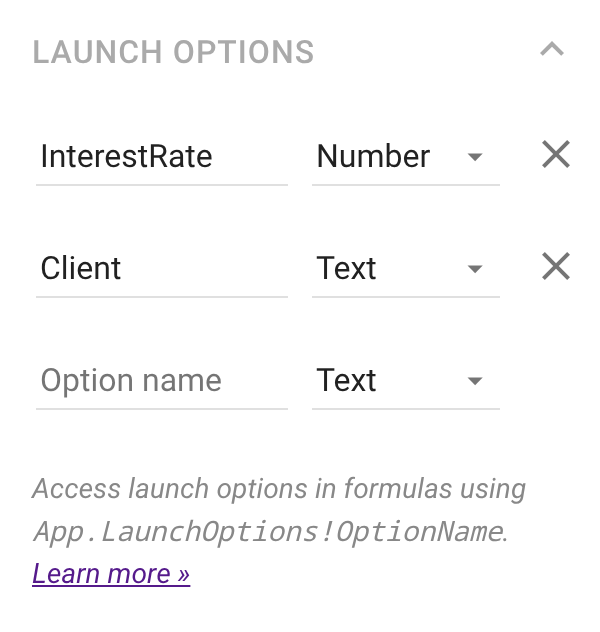
Setting launch options
Launch options let you build one app that adapts to different contexts through its address, eliminating the need to maintain multiple copies of the same functionality. This feature is only available in our White Label plans.
Instead of creating separate apps for different clients or divisions, you can customize a single app’s behavior using launch options. Here’s how a standard app address looks:
connect.calcapp.net/?app=abc123
And here’s the same app with launch options:
connect.calcapp.net/?app=abc123#Client=Acme&InterestRate=3.5
Your single app can now display Acme branding and use their specific interest rate.
To add launch options, define them in the inspector when you first open your app in Creator:
When you publish an app with launch options, you’ll see an additional step for setting their values:
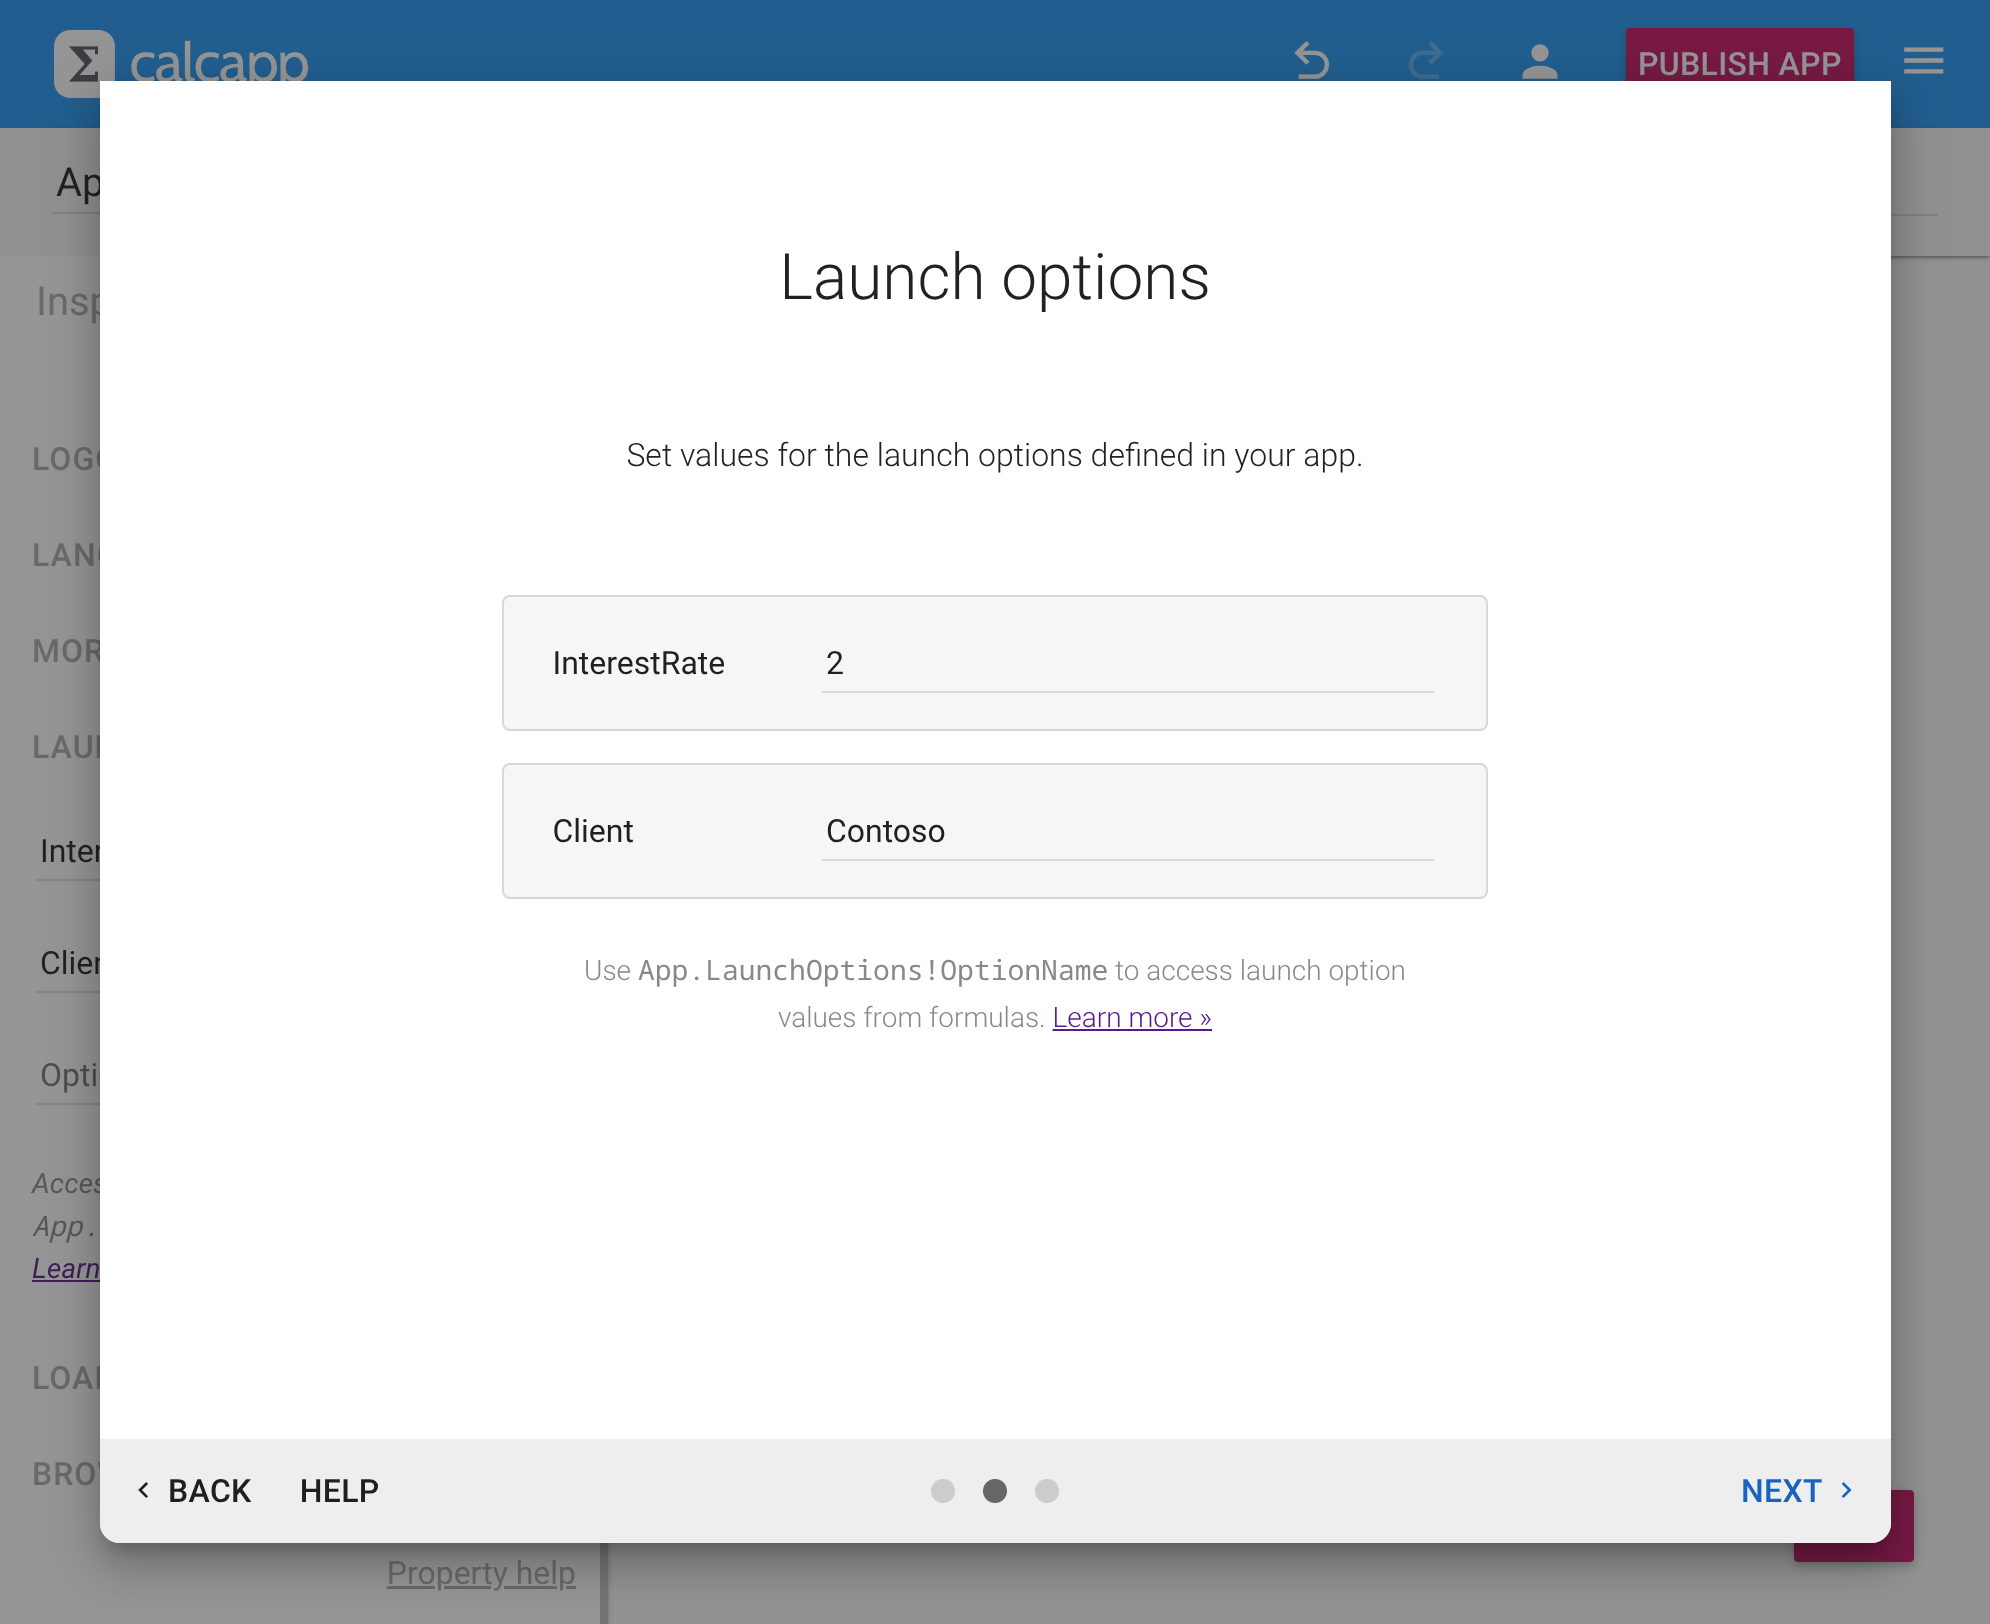
Access launch option values in formulas using LaunchOptions:
Use these values to customize app behavior, branding or calculations based on context. When you fix a bug or add a feature, every variation benefits immediately.
Advanced: Publishing to app stores
Our apps are Progressive Web Apps (PWAs). We don’t currently offer built-in support for publishing them to app stores, but you can experiment with third-party services such as Microsoft’s free PWABuilder or Median.
Because our apps run on the calcapp.net domain, these services may not produce fully native-looking results, and store acceptance can vary.
Now that you’ve learned how to publish your apps, continue reading about running them »