Requiring sign-in
By default, apps are public, meaning anyone with a link can access them. This makes it difficult to revoke access from former employees or contractors. Public apps may also appear in search engine results.
For organizational use, especially with sensitive information, we recommend private apps. These require users to sign in and let you control exactly who can use your app. Private apps can accommodate tens of thousands of users.
How private apps work
When users start a private app, they see a sign-in screen. You can customize this screen if your apps are on the White Label plan:
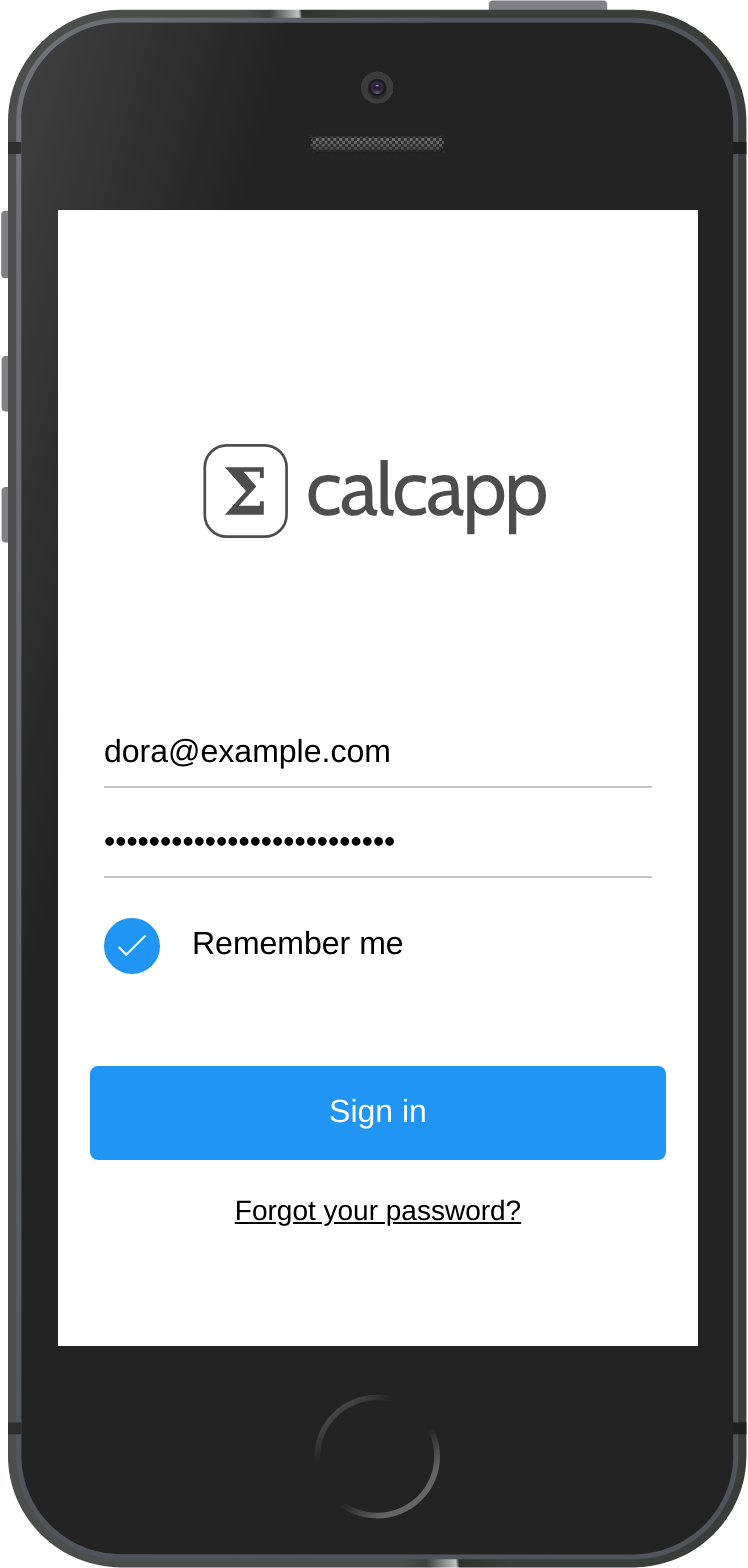
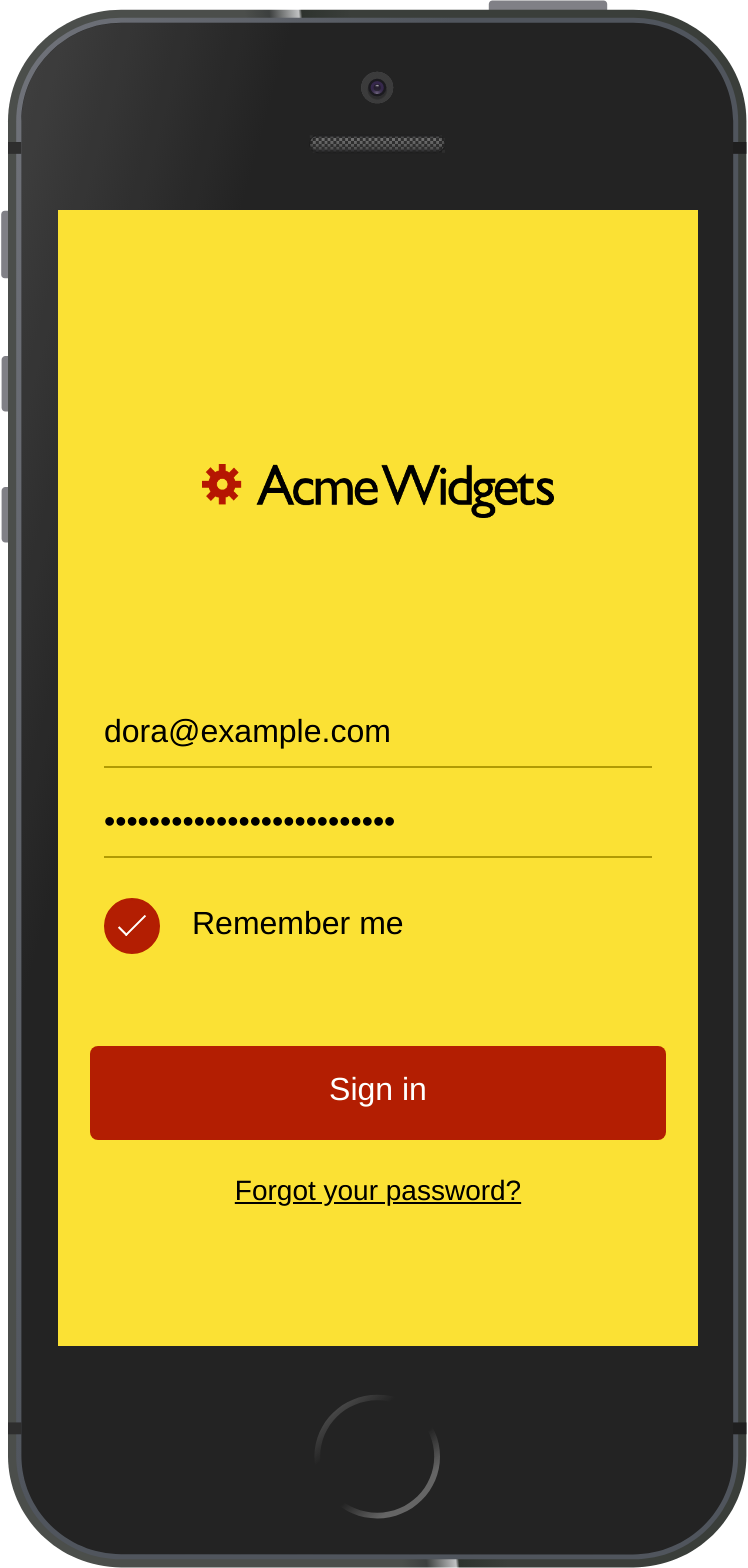
The user name and password are stored locally, so users don’t need to sign in every time. Apps work offline after the initial sign-in, but users must sign in at least once every 30 days.
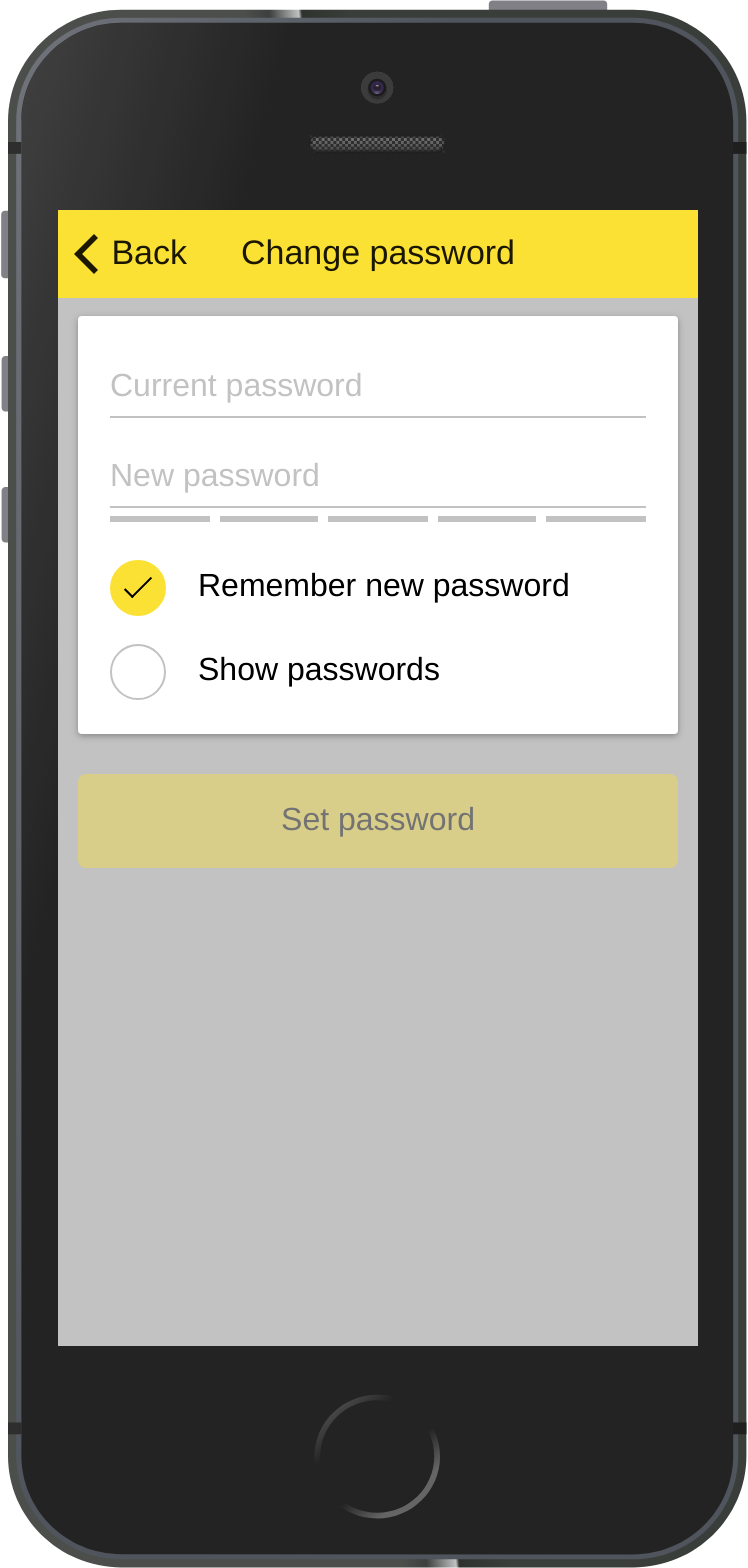
Users select their password when they first access the app through a special link you send them via Calcapp Creator. The app’s sidebar lets them change their password, sign out or reset their password:
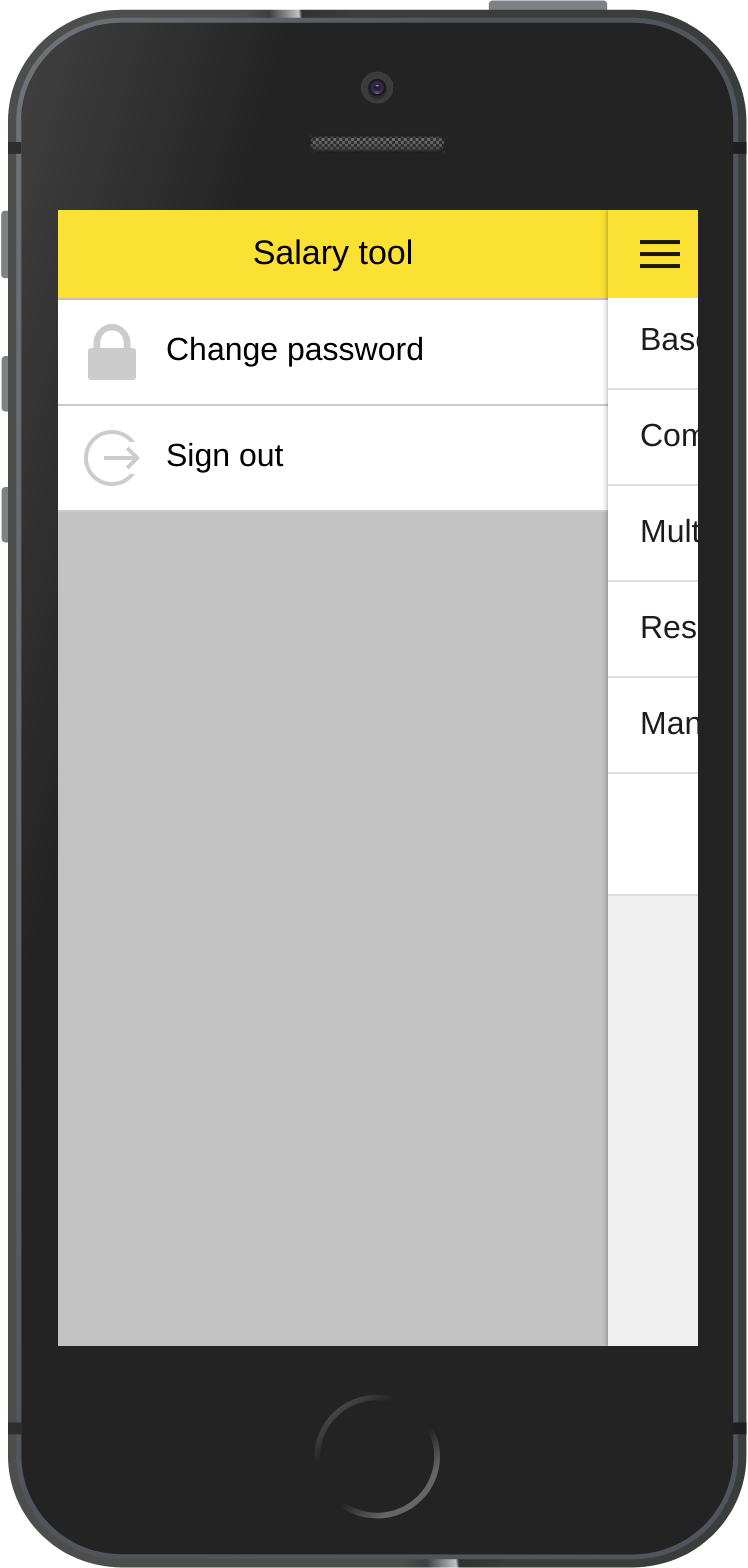
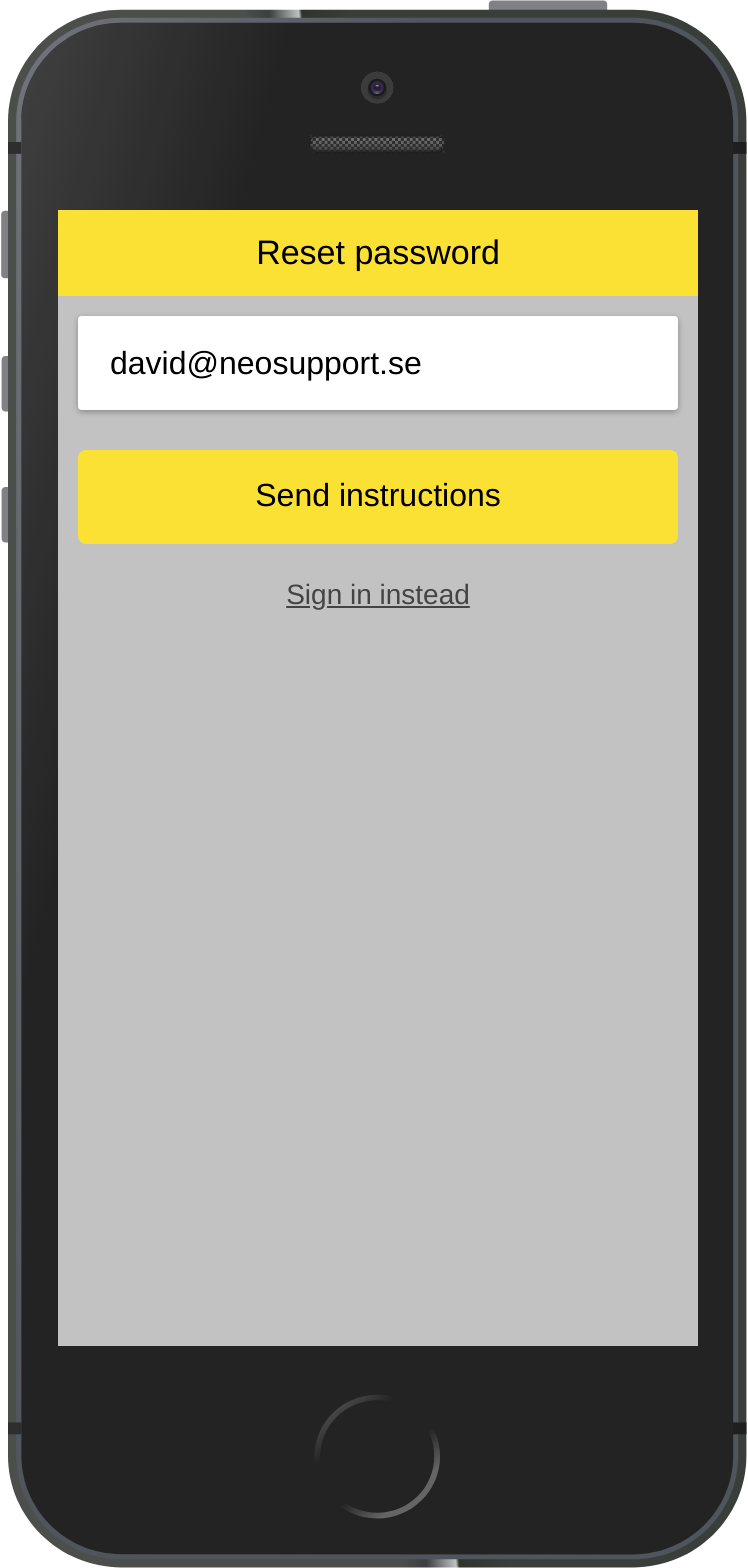
These user interface elements follow the theme colors you have defined and appear in the language you have selected for your app.
Making an app private
Make an app private by selecting a private plan for it. This window appears when you select Change plan… from the main menu :
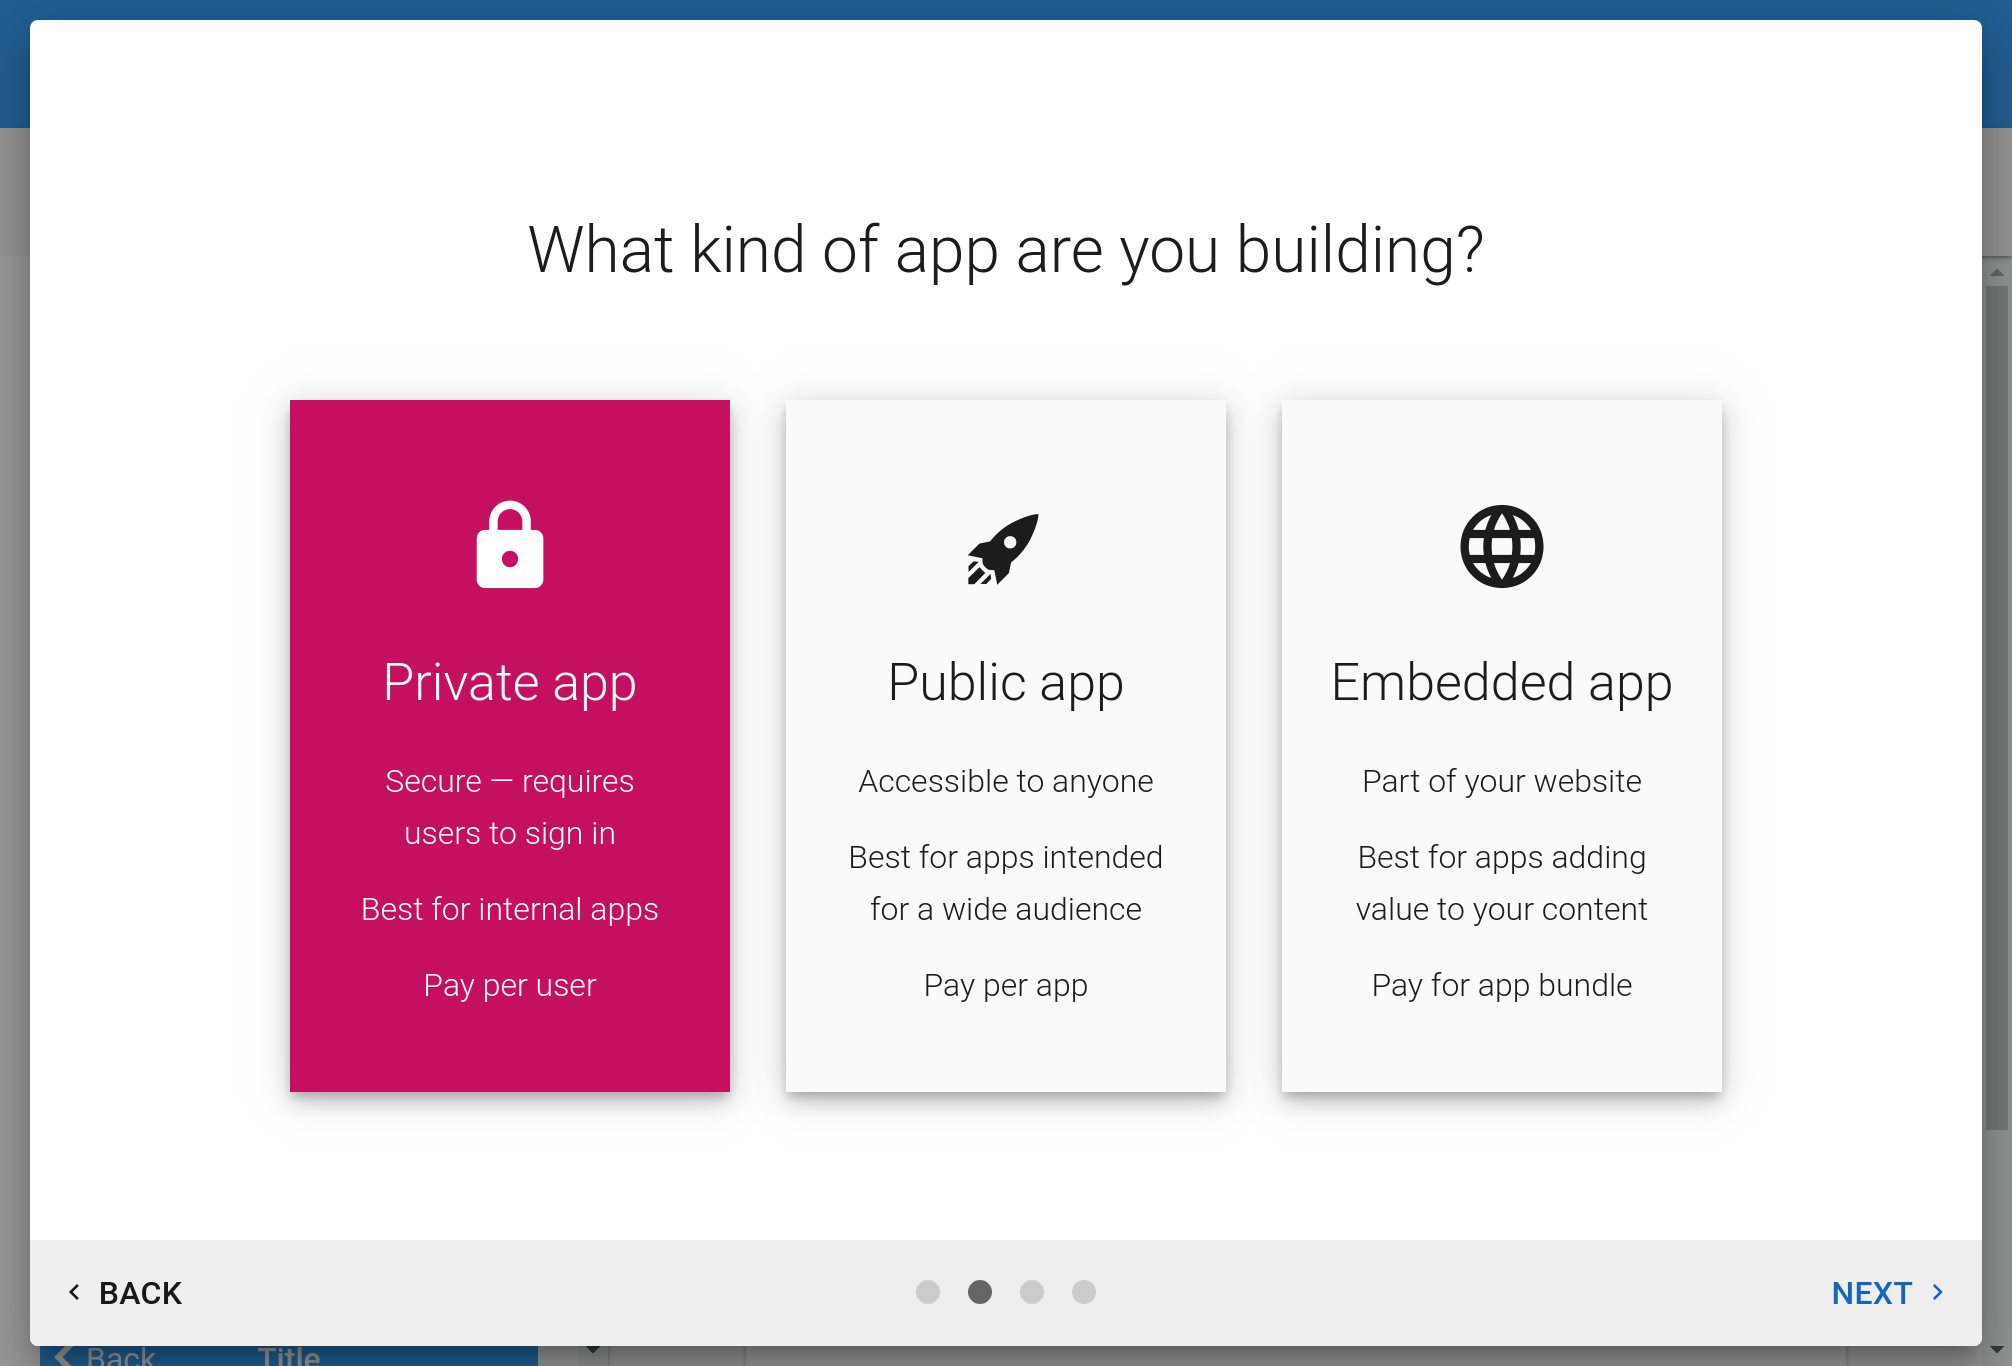
The next guide covers selecting a plan. For testing purposes, you can go with the Free plan.
Defining users
When your app is private, the inspector includes options for managing users:
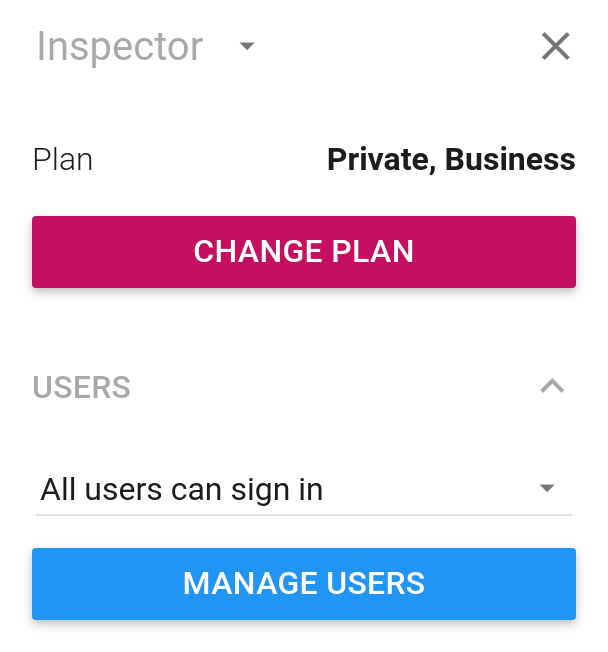
Press Manage users to choose who can sign into your app:
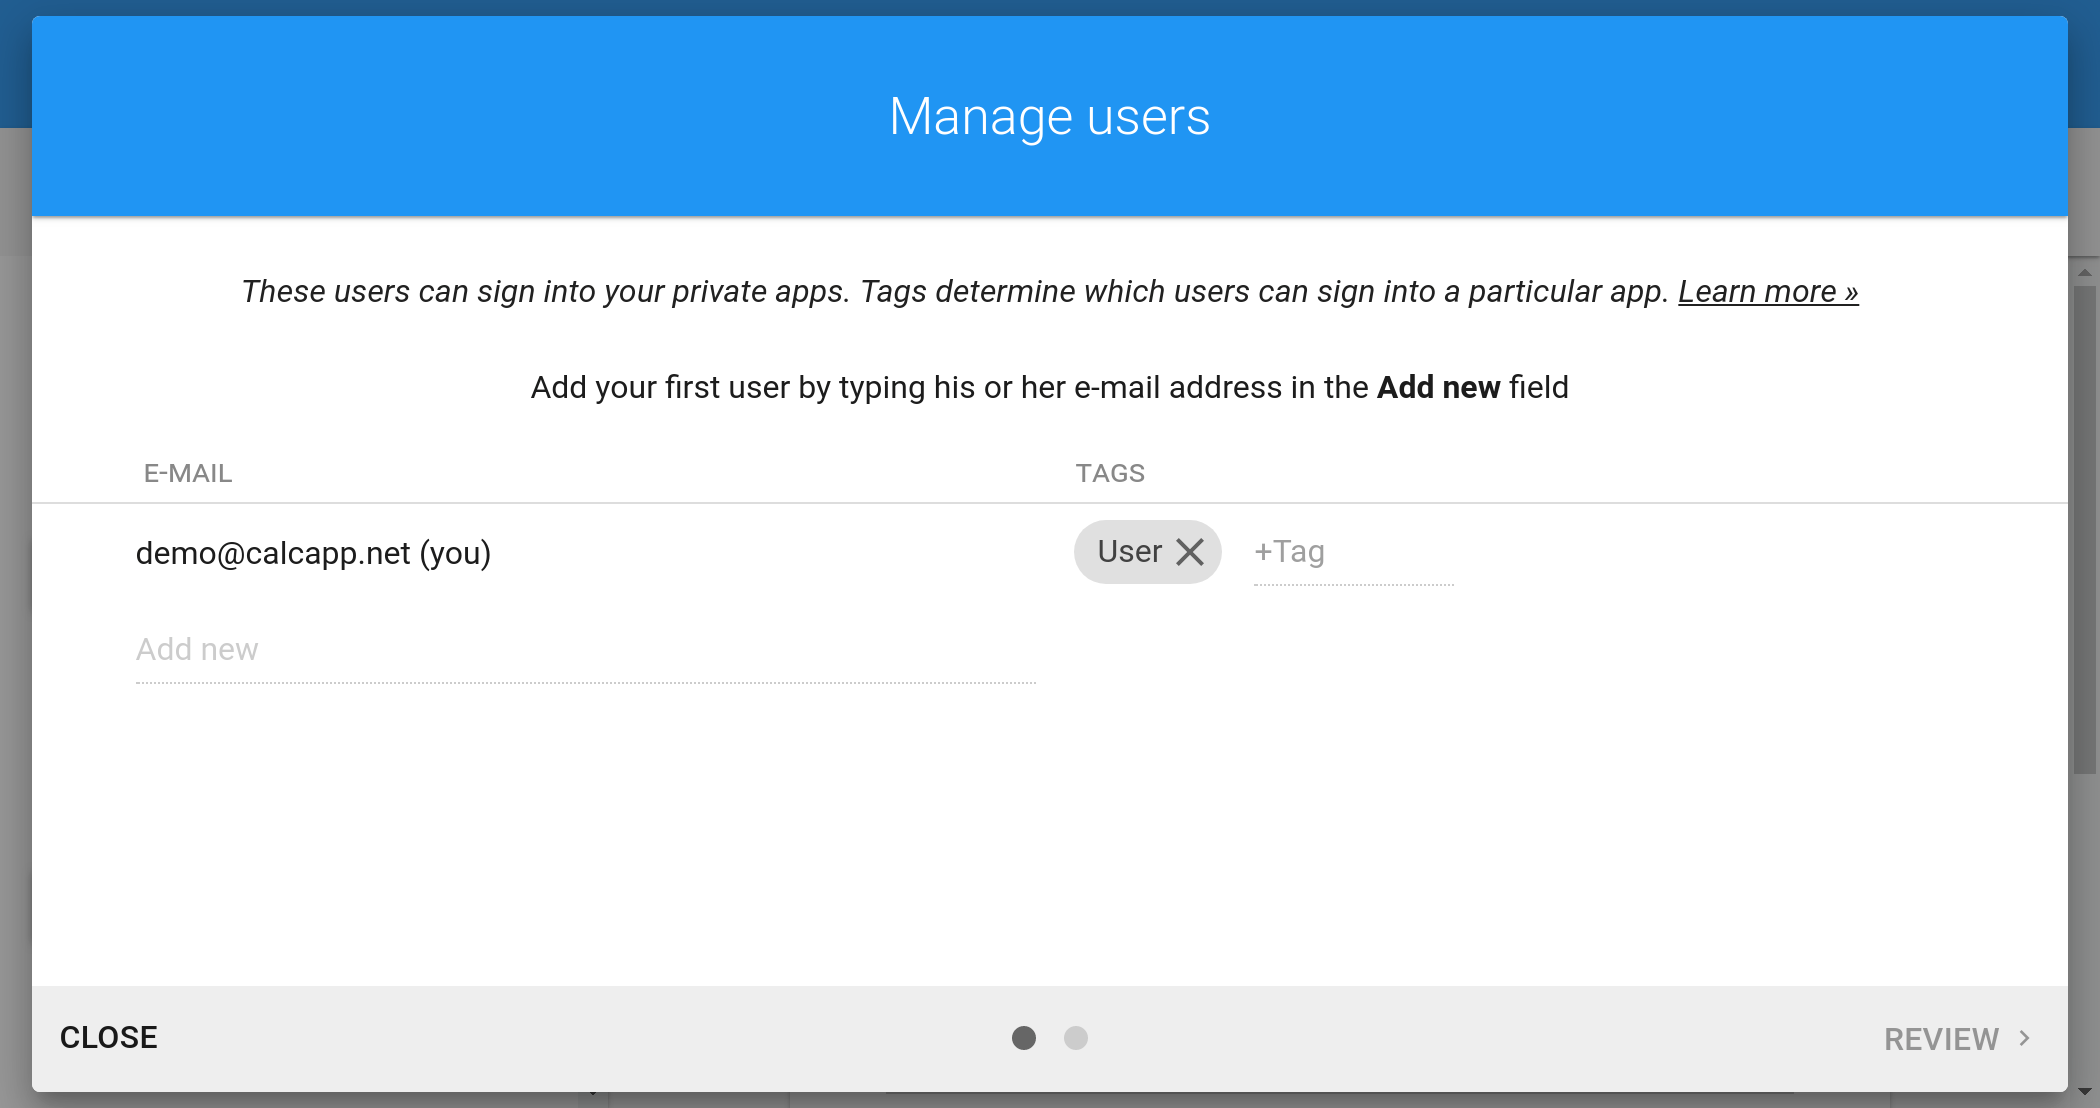
Add users by typing their email addresses in the Add new field.
Inviting new users
To get your users started, you need to invite them via email. Press the Publish app button in the top bar:
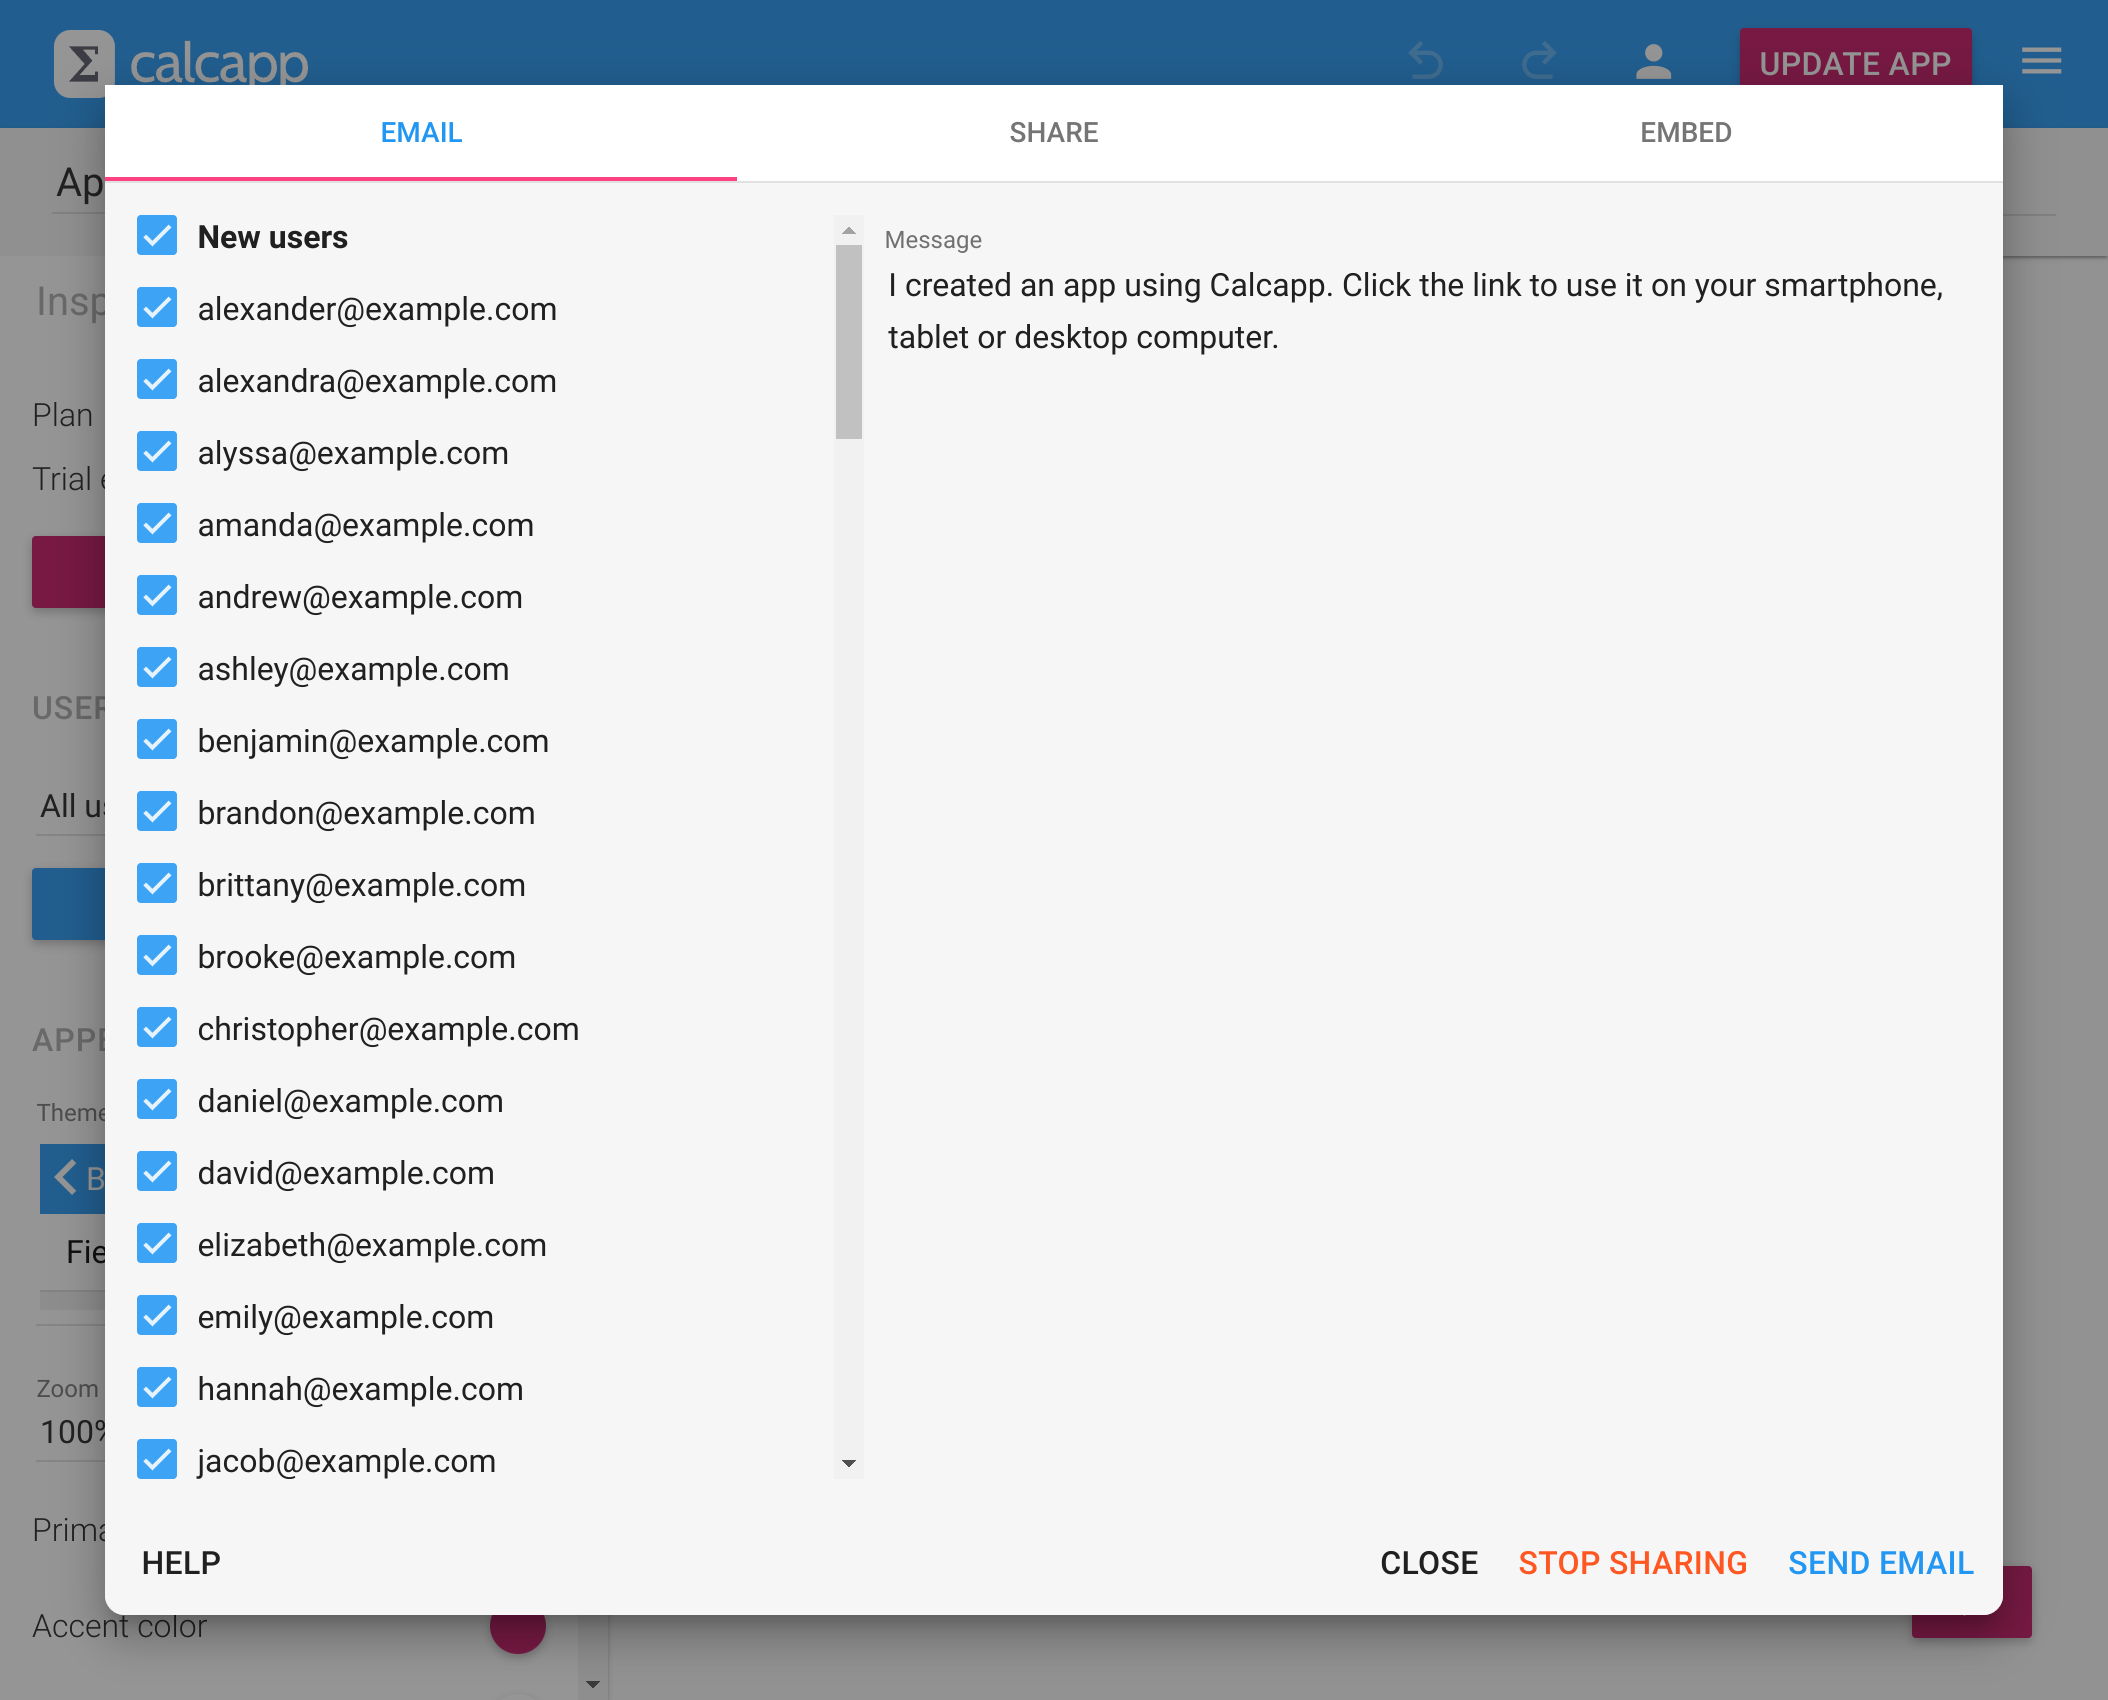
For private apps, you can’t manually type a list of email recipients. Instead, all authorized users appear on the left side with checkboxes to include them as recipients.
Users who haven’t signed in yet are listed as “new users.” Click the New users heading to quickly select all new users.
Existing users receive a regular app link, while new users get a special link that automatically signs them in and lets them choose their password.
Defining tags
Users can have one or more tags, which are simple text labels you create. Tags primarily control app access but have other uses too.
Assign tags in the Manage users window. Every user gets the default User tag. To add a tag, type in the +Tag field next to a user. Remove tags by clicking the symbol:
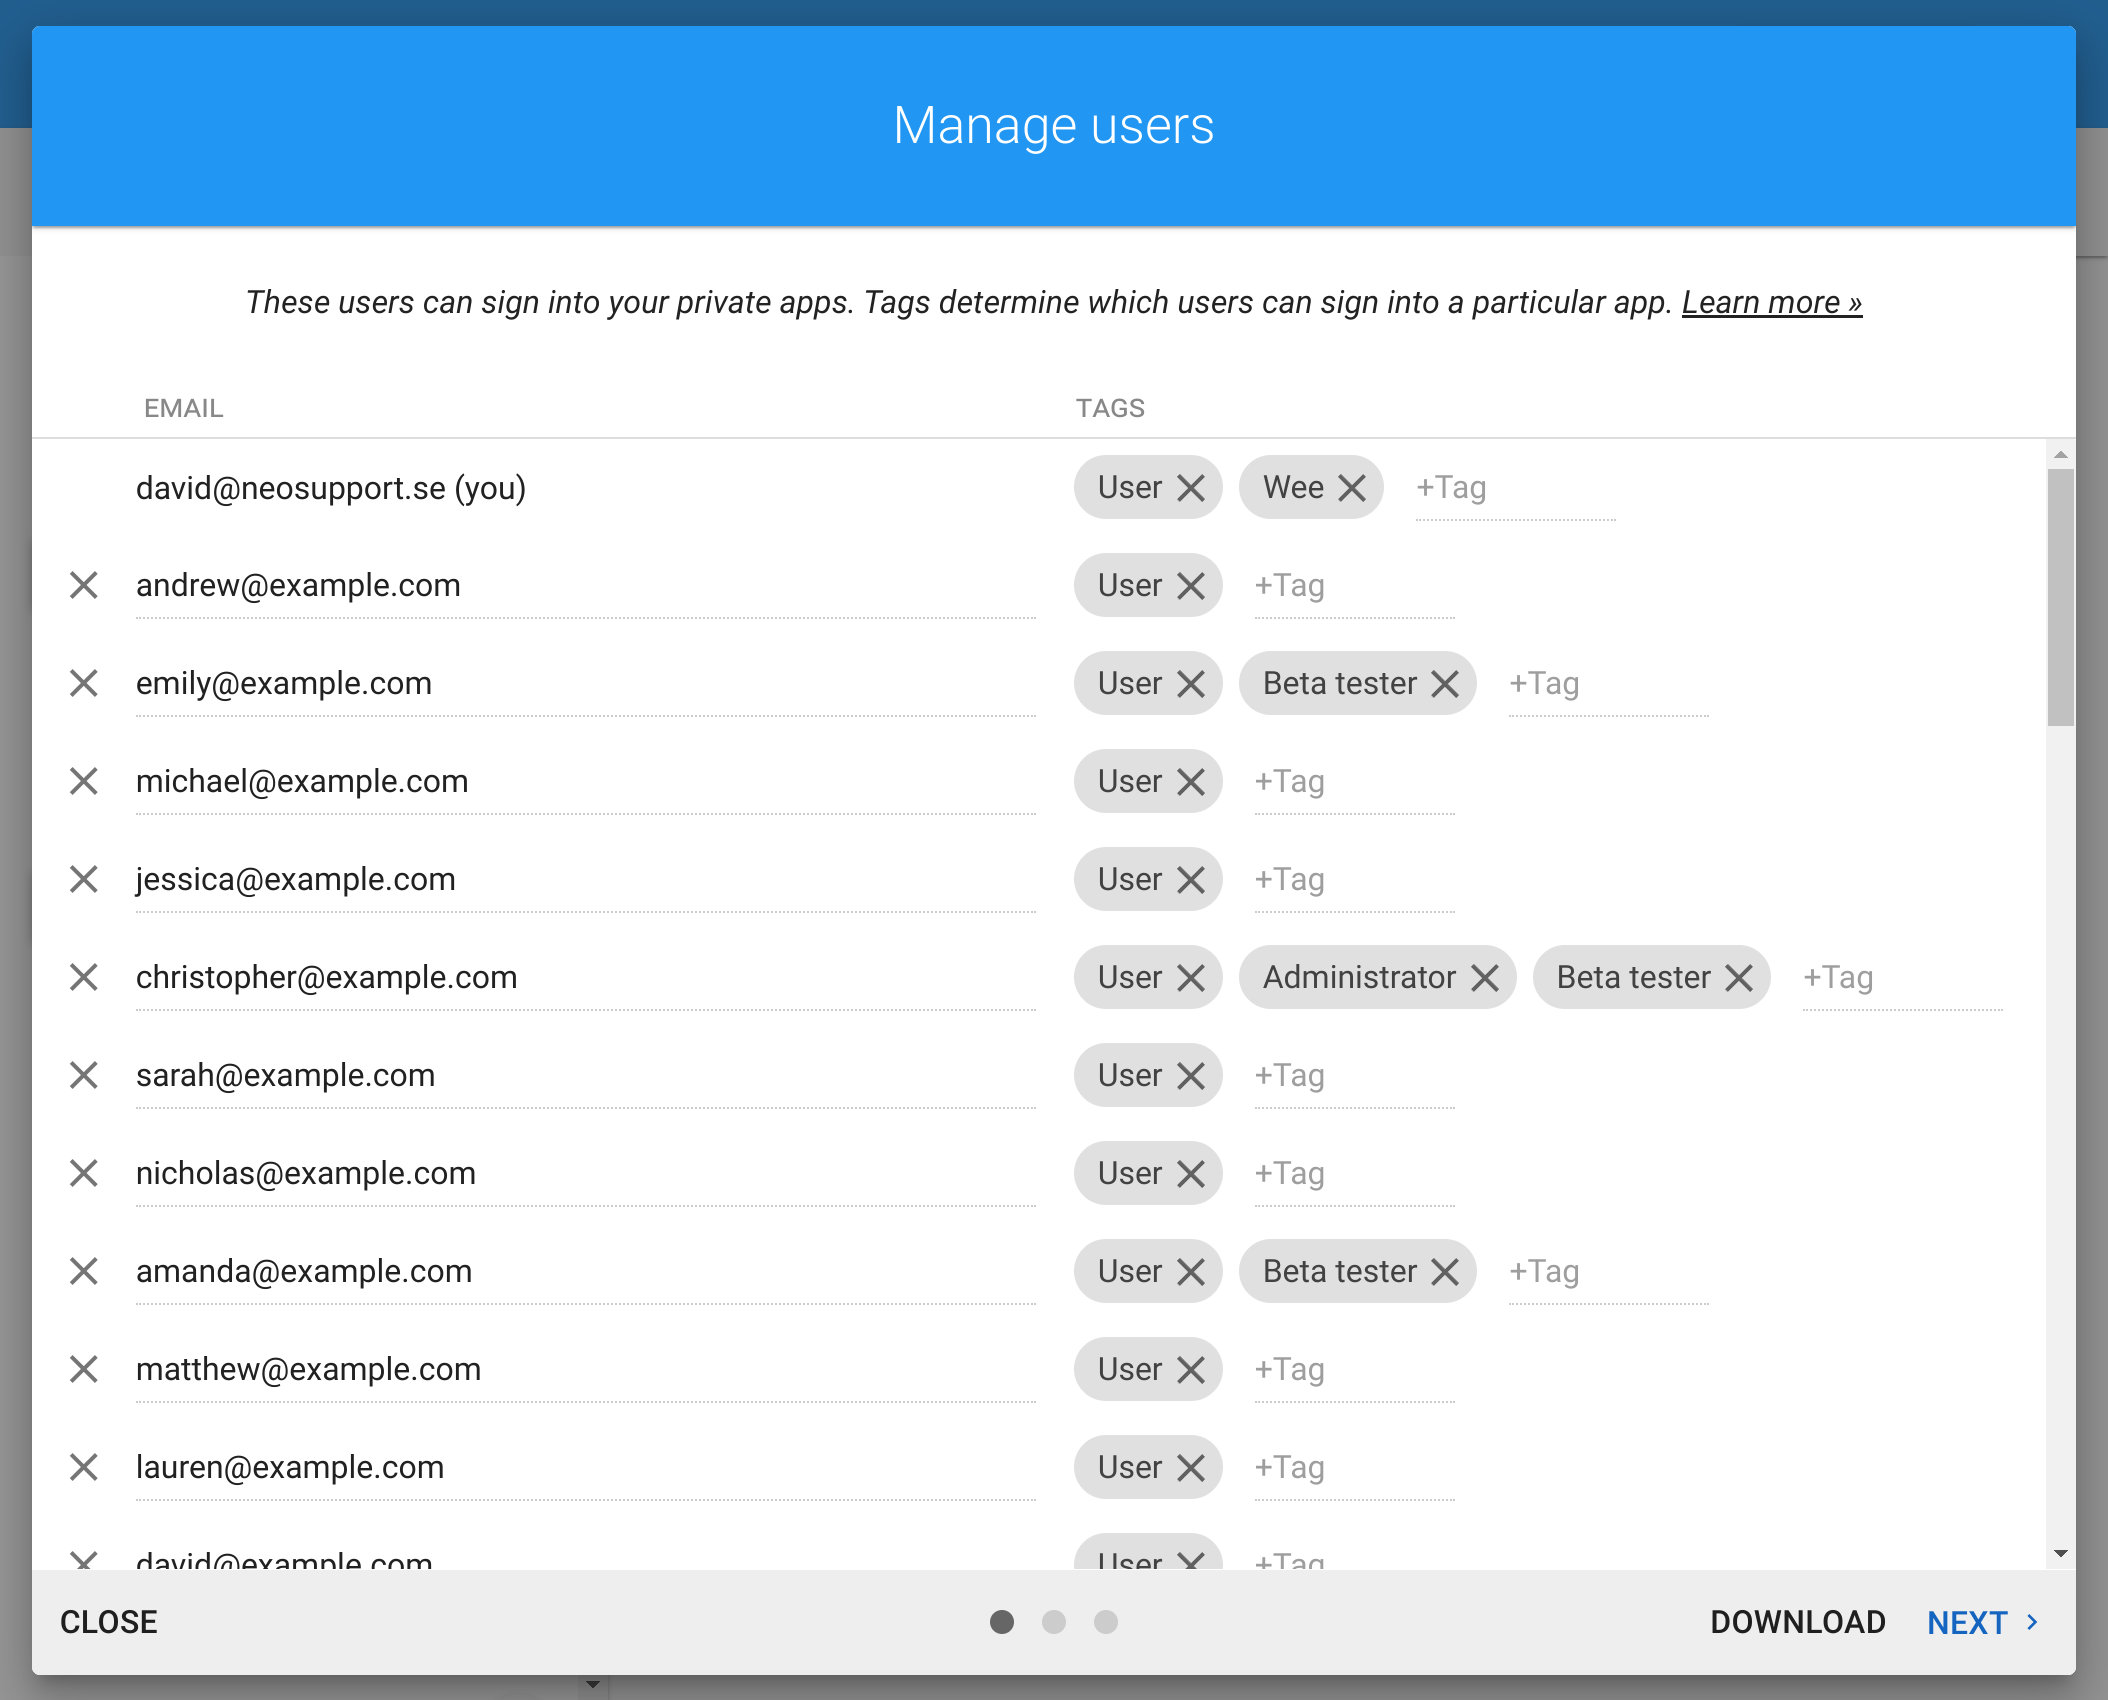
In this example, most users have only the default User tag, while three users also have the Beta tester tag and one has the Administrator tag.
Using tags to control who can sign in
By default, all users you define can sign into any private app you create, since the user list is shared across apps. To restrict access to specific users, go to the Users section in the inspector and change the dropdown from All users can sign in to Only some users can sign in:
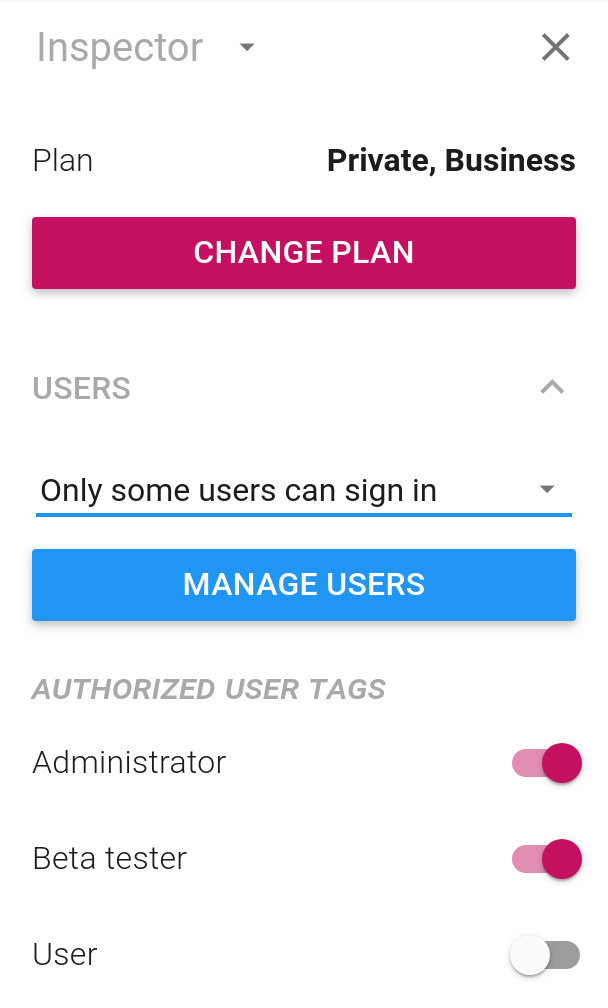
The app shown above is a beta version, so only administrators and beta testers can sign in. Notice that the User tag has been disabled.
Tags are flexible—use them however works best for you. For example, if you have three private apps with completely different user groups, create one tag per app and configure each app to only allow users with the appropriate tag.
Using tags when sharing app links
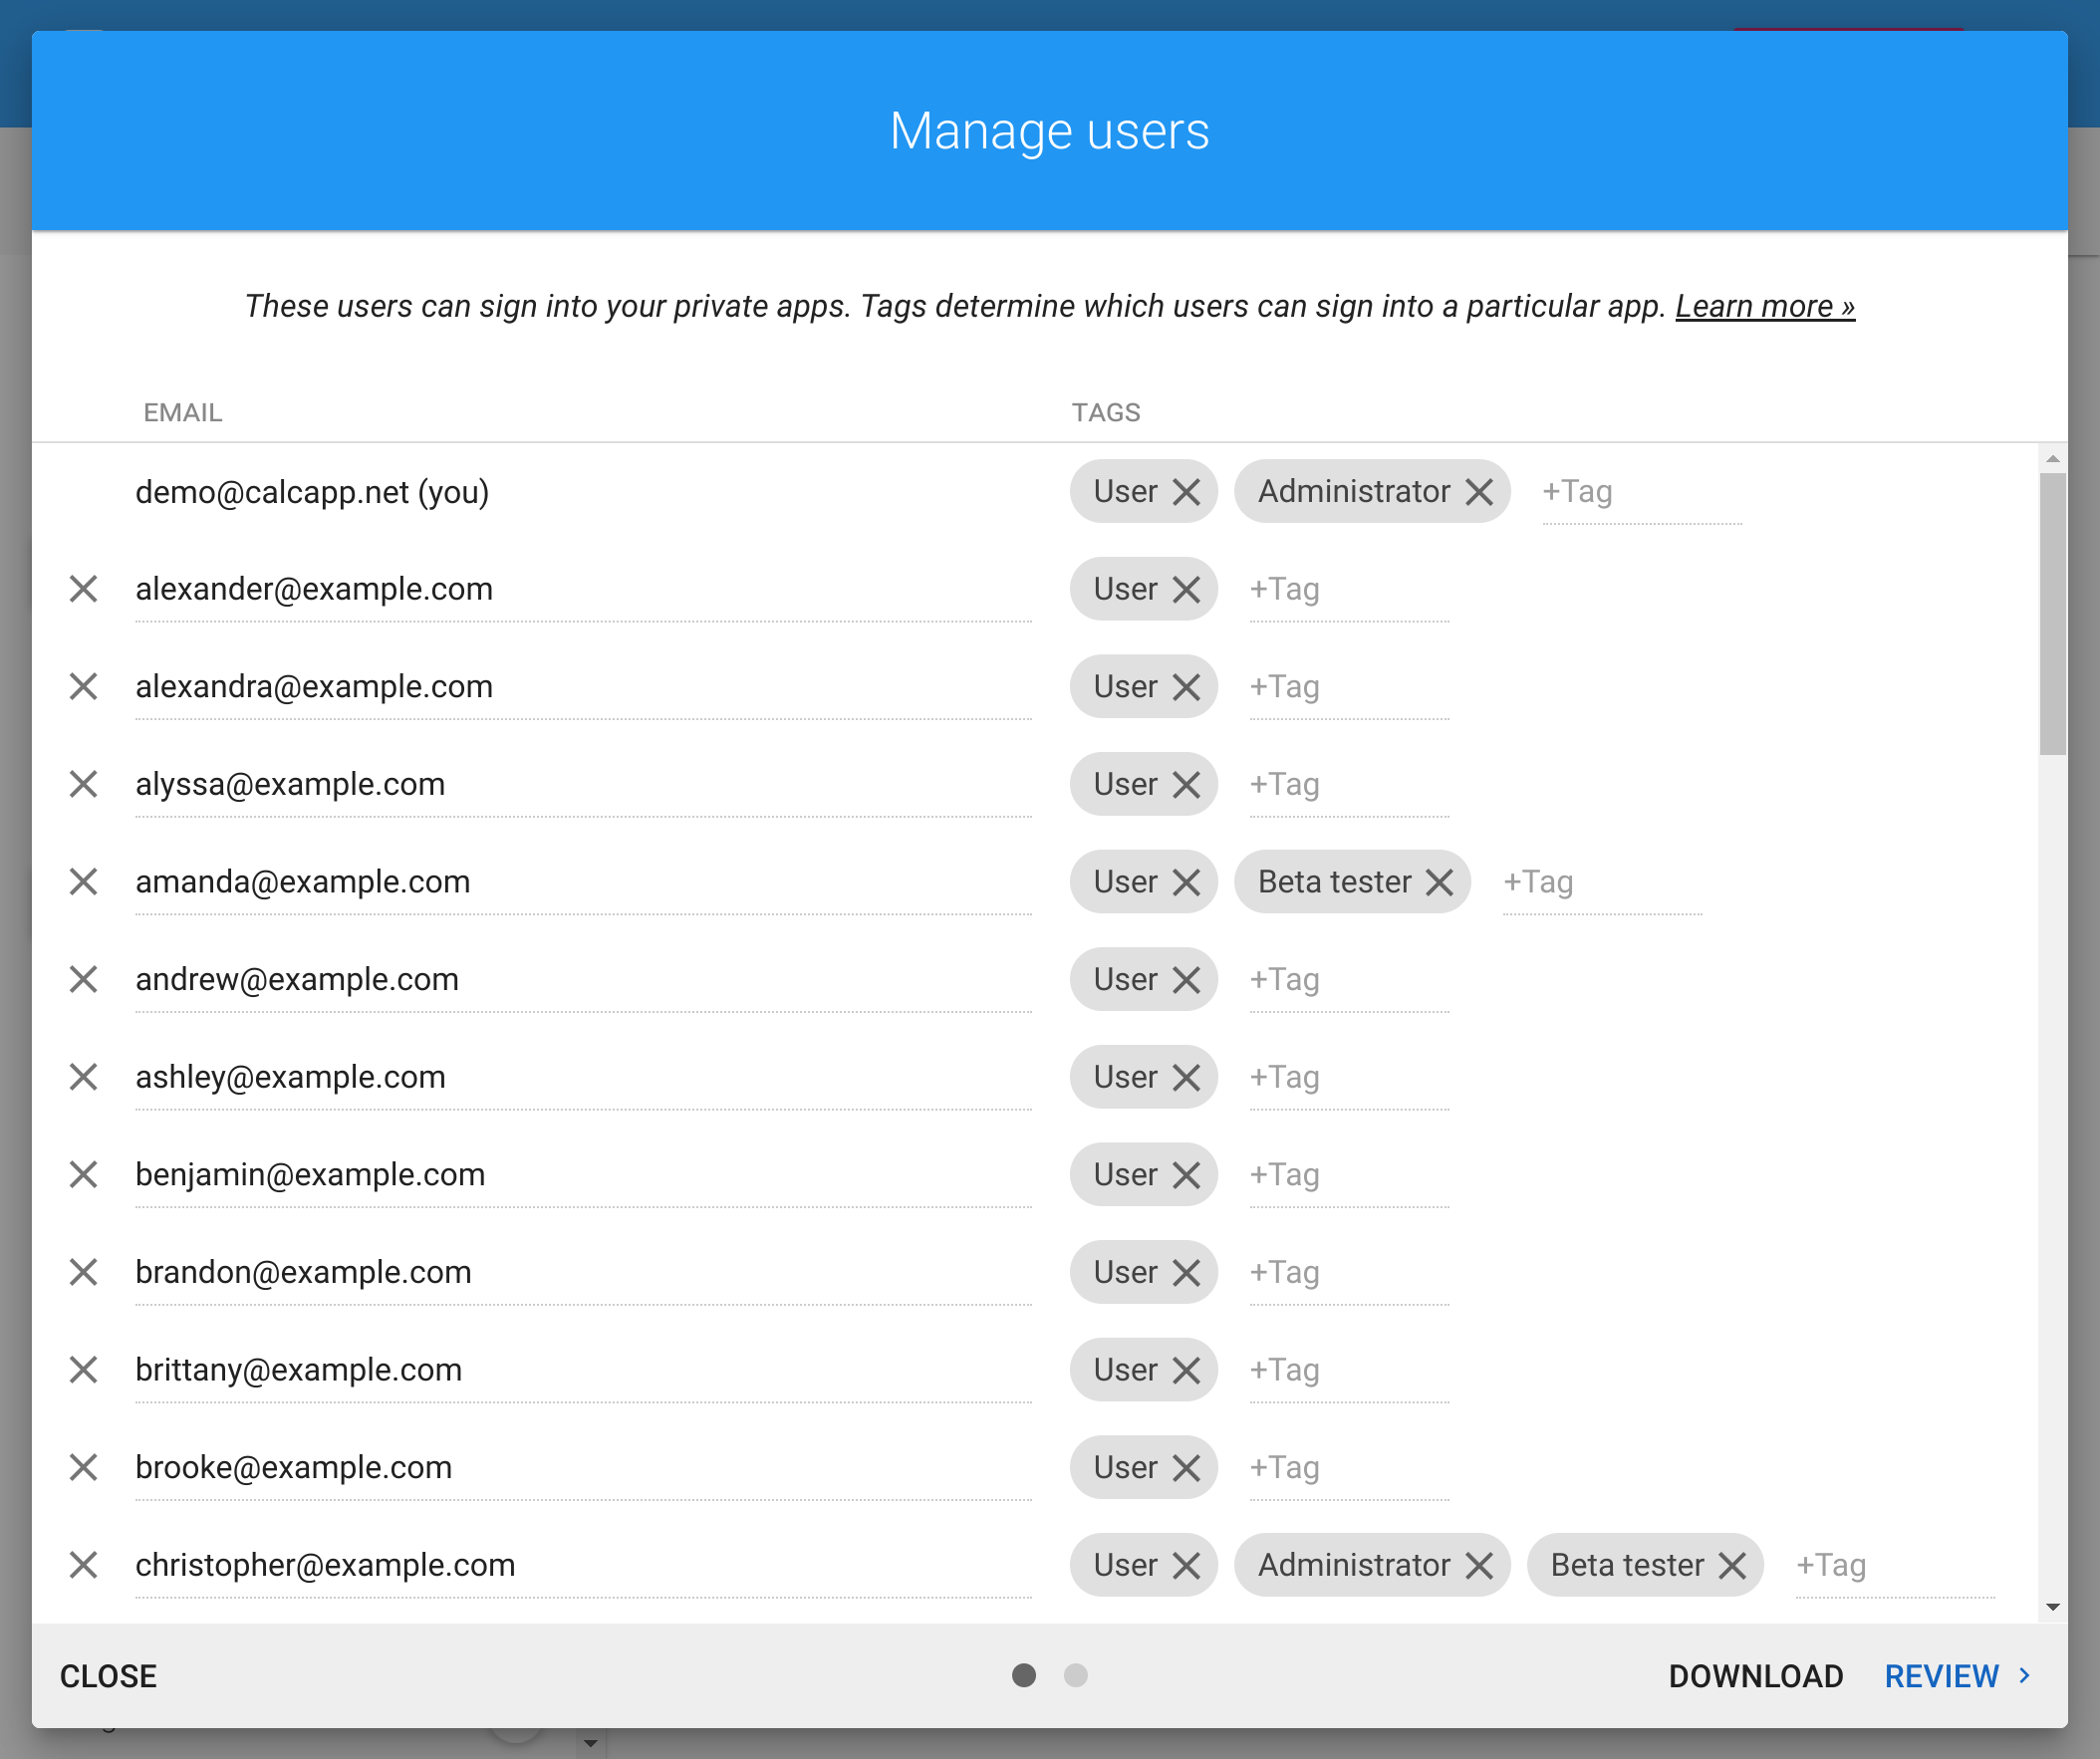
The window that appears when you press Publish app lists users by tag. Since users can have multiple tags, the same user may appear under different tag headings. Click a tag heading to select or unselect all users with that tag.
Here’s an example with all users tagged with Beta tester selected:
Consider adding tags specifically for email notifications. For example, an app might be accessible to thousands of users in your organization, but only a few hundred want notifications about updates. Use a special tag for these users to easily send email to them exclusively.
Using tags through formulas
You can restrict parts of your app to specific user groups. For example, you might want trusted users to add rows directly to Google Sheets while requiring others to send emailed reports for review.
Use tags with the USERHASTAG function to accomplish this. This function takes a tag as its parameter and returns TRUE if the signed-in user has that tag, FALSE otherwise.
Examples of what you can do:
- Show fields only to beta testers: use USERHASTAG("Beta tester")USERHASTAG("Beta tester") with the Visible property.
- Restrict navigation: apply the same formula to the Visible property of navigators.
- Control screen access: use it with the NextScreen or NextScreenAvailable properties.
- Determine the first screen seen: apply a formula like IF(USERHASTAG("Contractor"), ContractorNotice, MainScreen)IF(USERHASTAG("Contractor"); ContractorNotice; MainScreen) with the FirstScreen property (shown when first opening the app in Creator).
If you’d rather base decisions on the user’s email address, write App.UserEmailAddressApp,UserEmailAddress in your formulas to access the address.
Next, learn about selecting a plan for your app »