Adding more screens
In the previous guides, you built a simple calculator using fields, formulas and the inspector—all on a single screen. Real-world apps often need multiple screens to organize functionality and guide users through complex workflows.
Calcapp apps can contain any number of screens. Keep individual screens focused and concise, using additional screens for related but separate functionality.
The navigation bar in Calcapp Creator controls how screens connect:
Adding screens
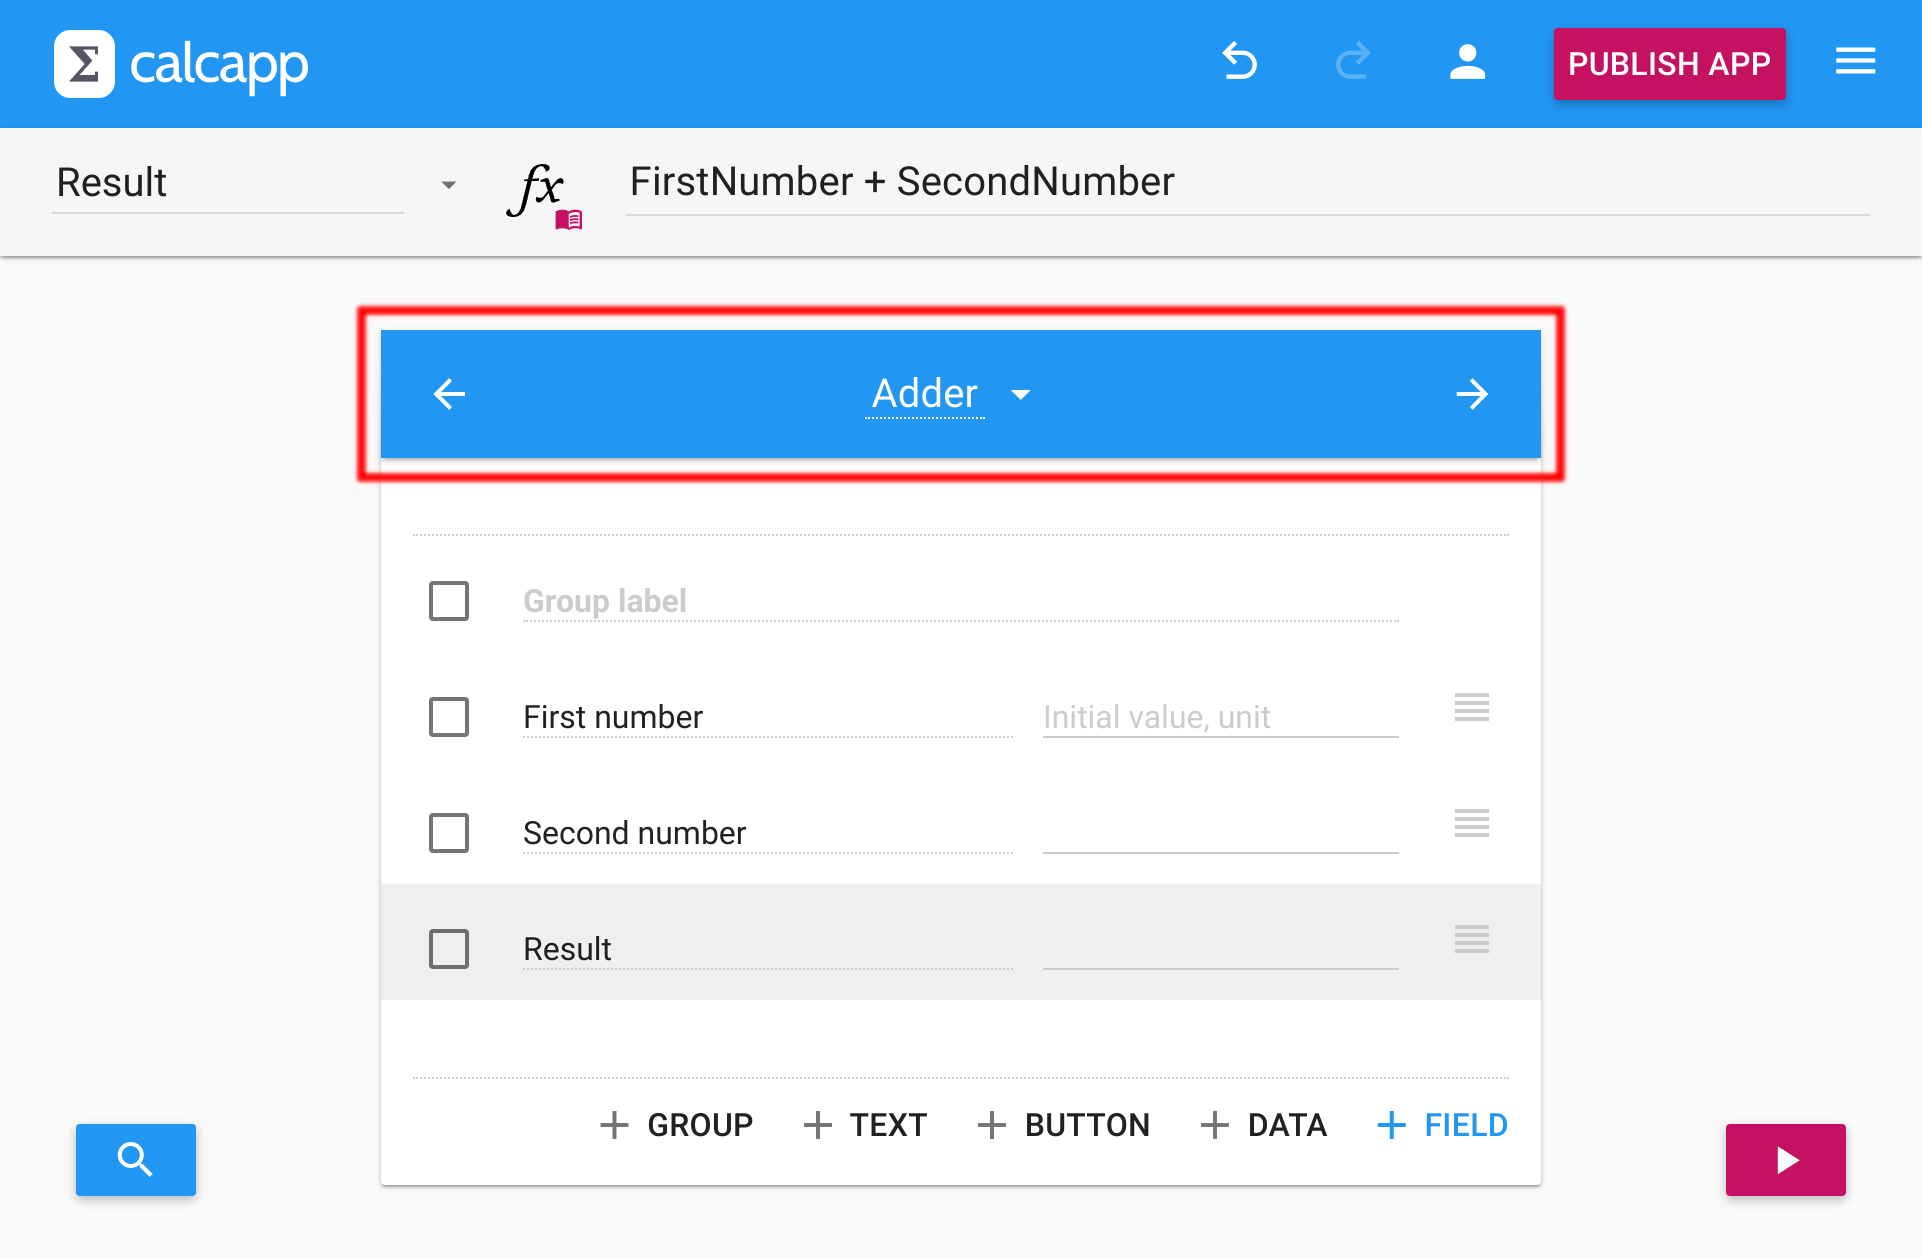
The simple app from the getting started guide has only one screen. The left arrow is grayed out (no previous screen), while the right arrow is enabled. Press it to create another screen:
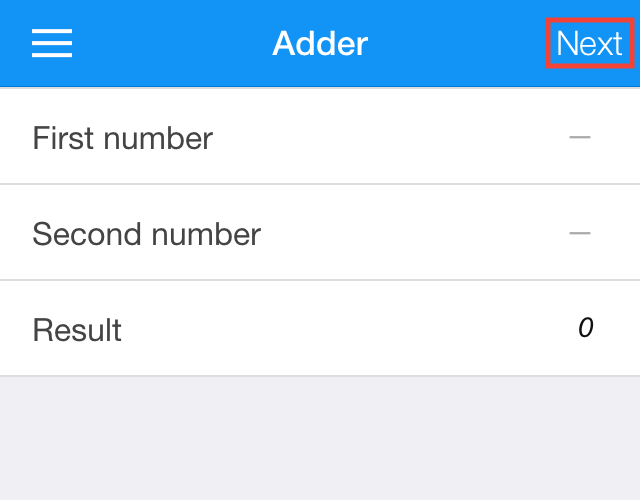
When you add another screen, a Next button appears in the top right corner:
On the new screen, a Back button replaces the menu button :

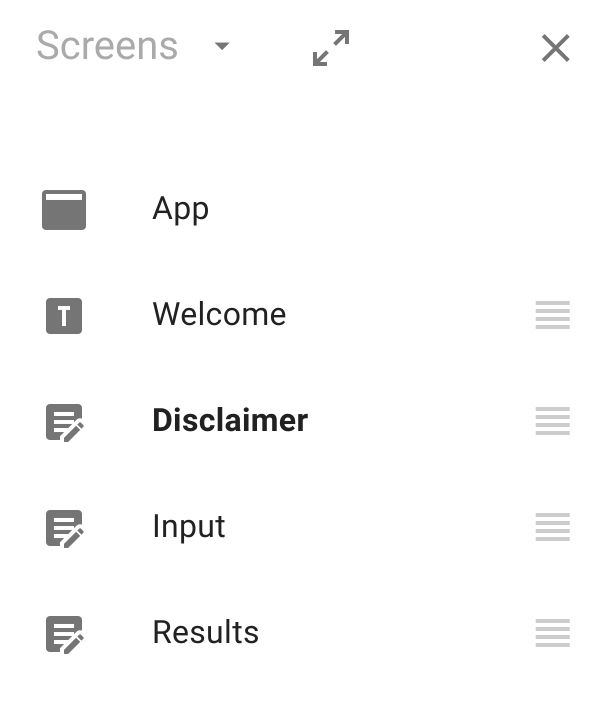
The Screens sidebar shows your app structure. Access it from the sidebar menu:
Creating navigation menus
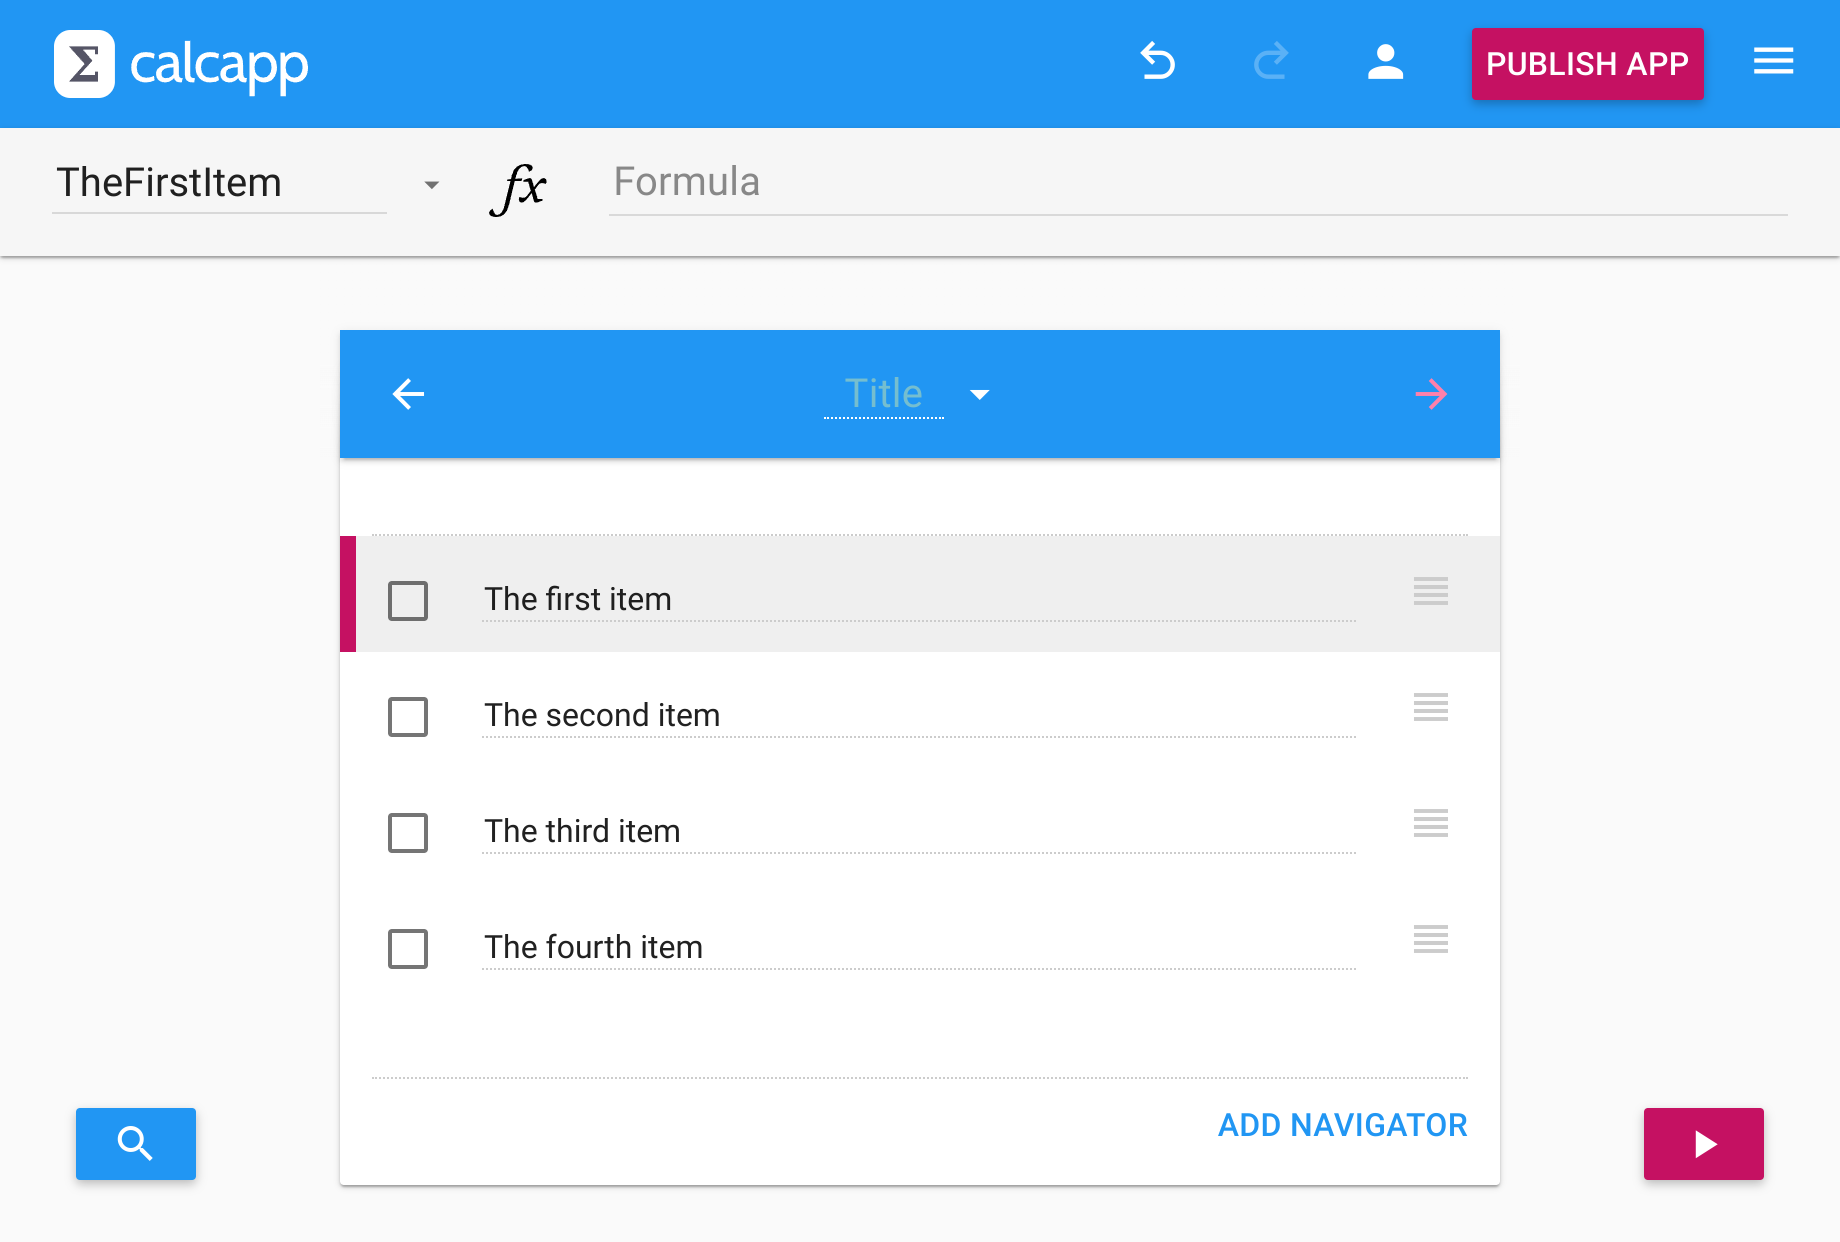
While you can link form screens sequentially, apps with many screens benefit from navigation menus. Calcapp uses list screens containing navigators to present choices to users.
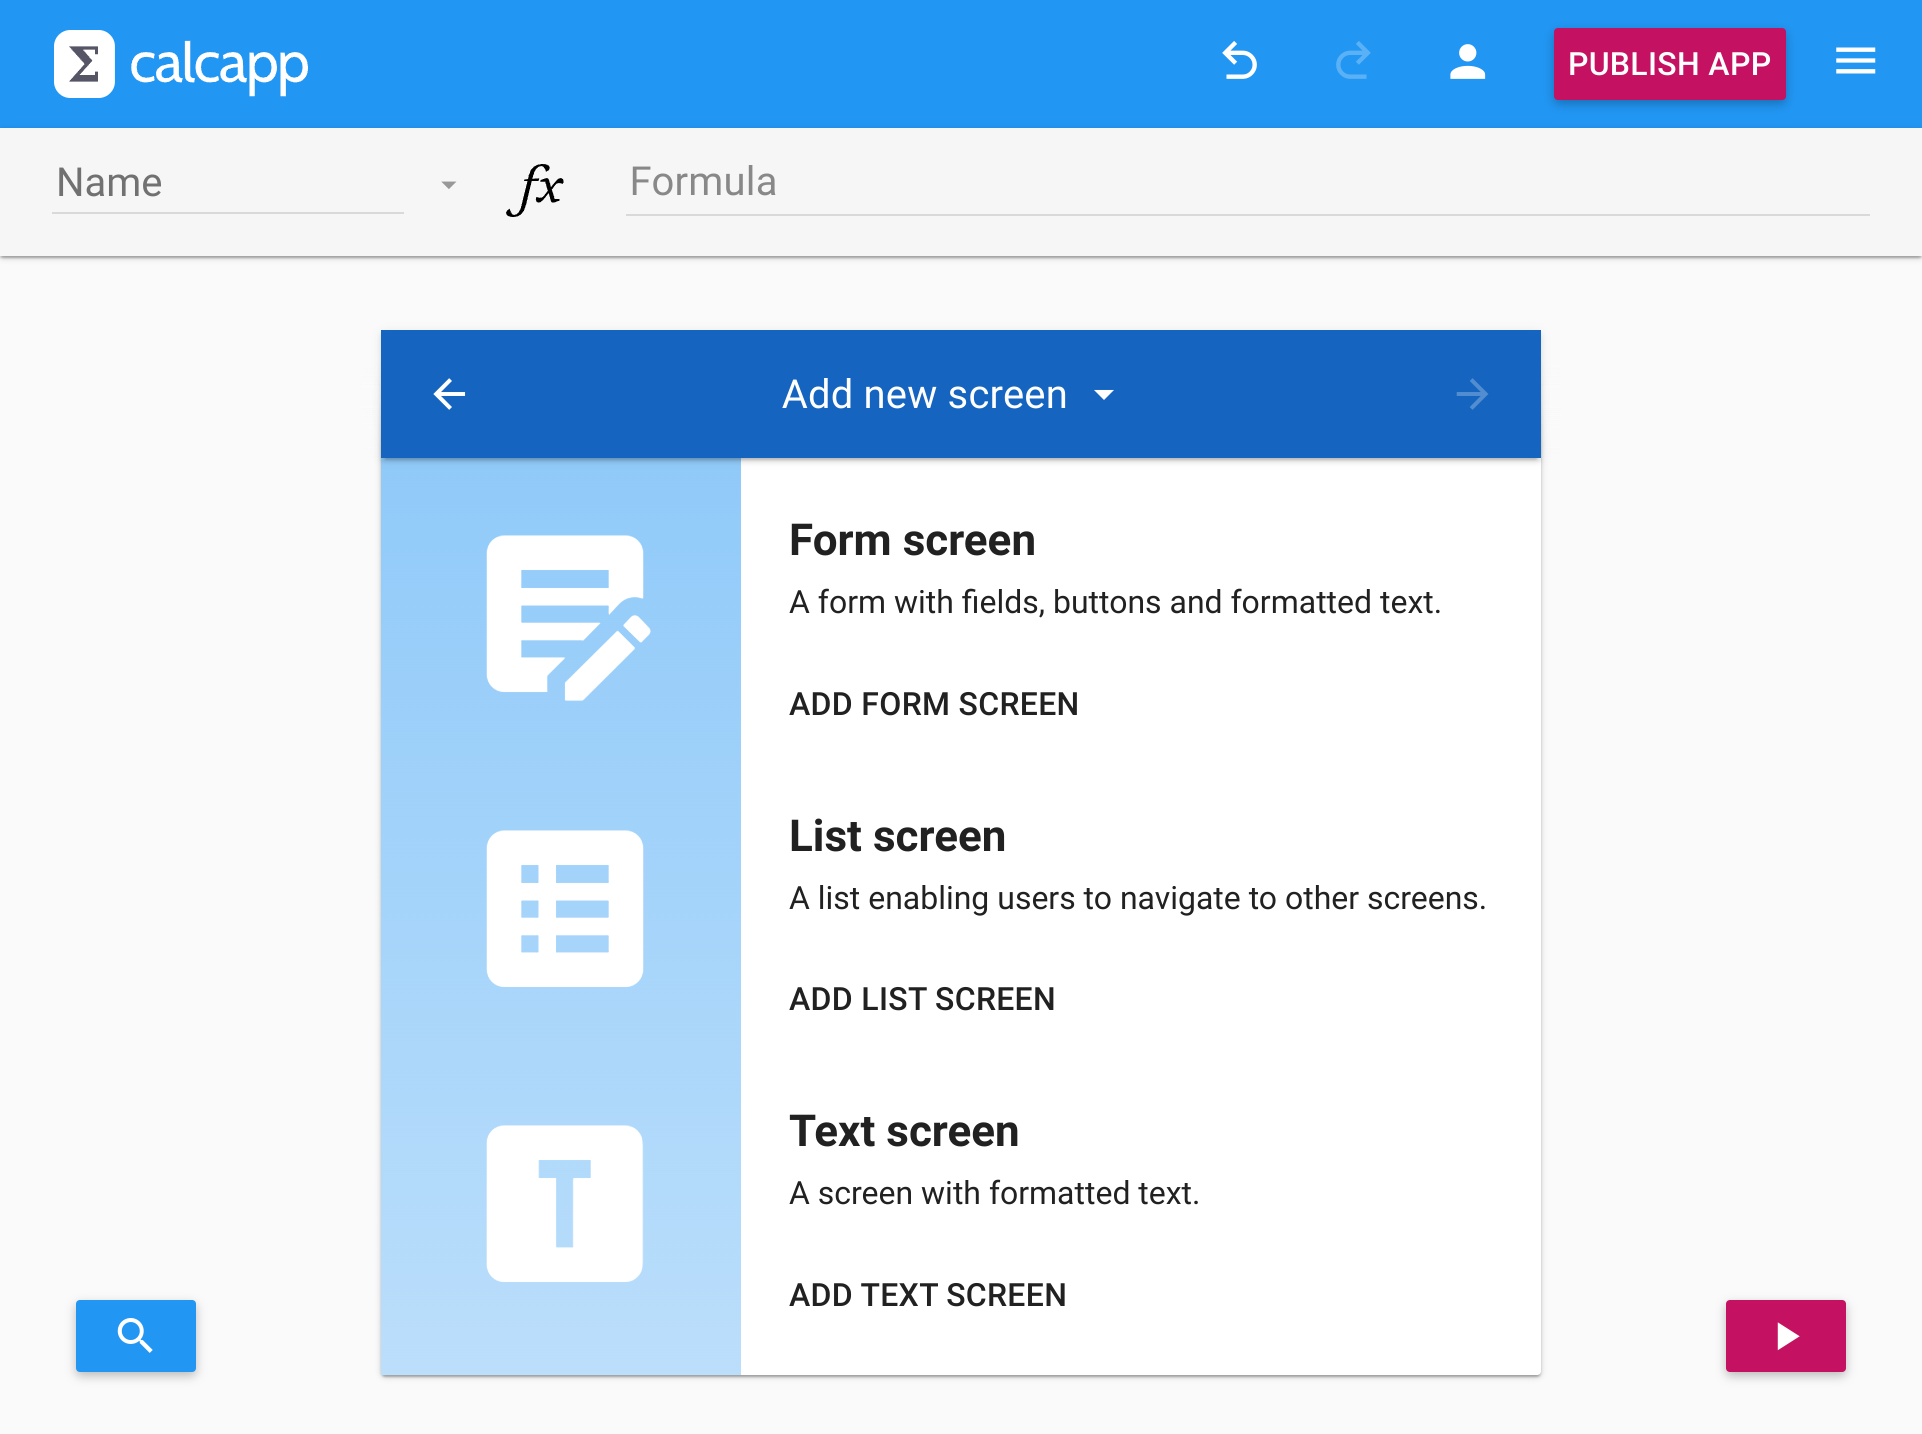
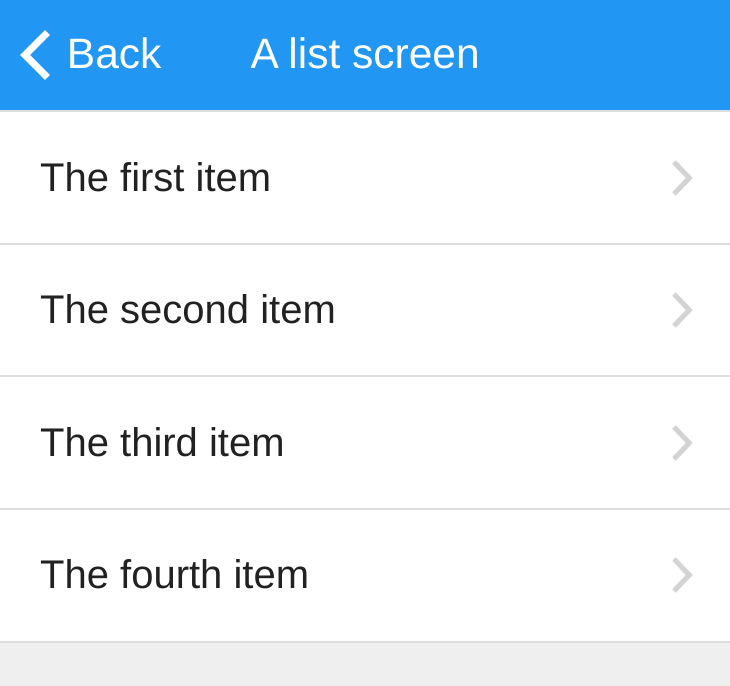
Click Add list screen when adding a new screen. Here’s how it appears when running:
This is what editing a list screen in Calcapp Creator looks like:
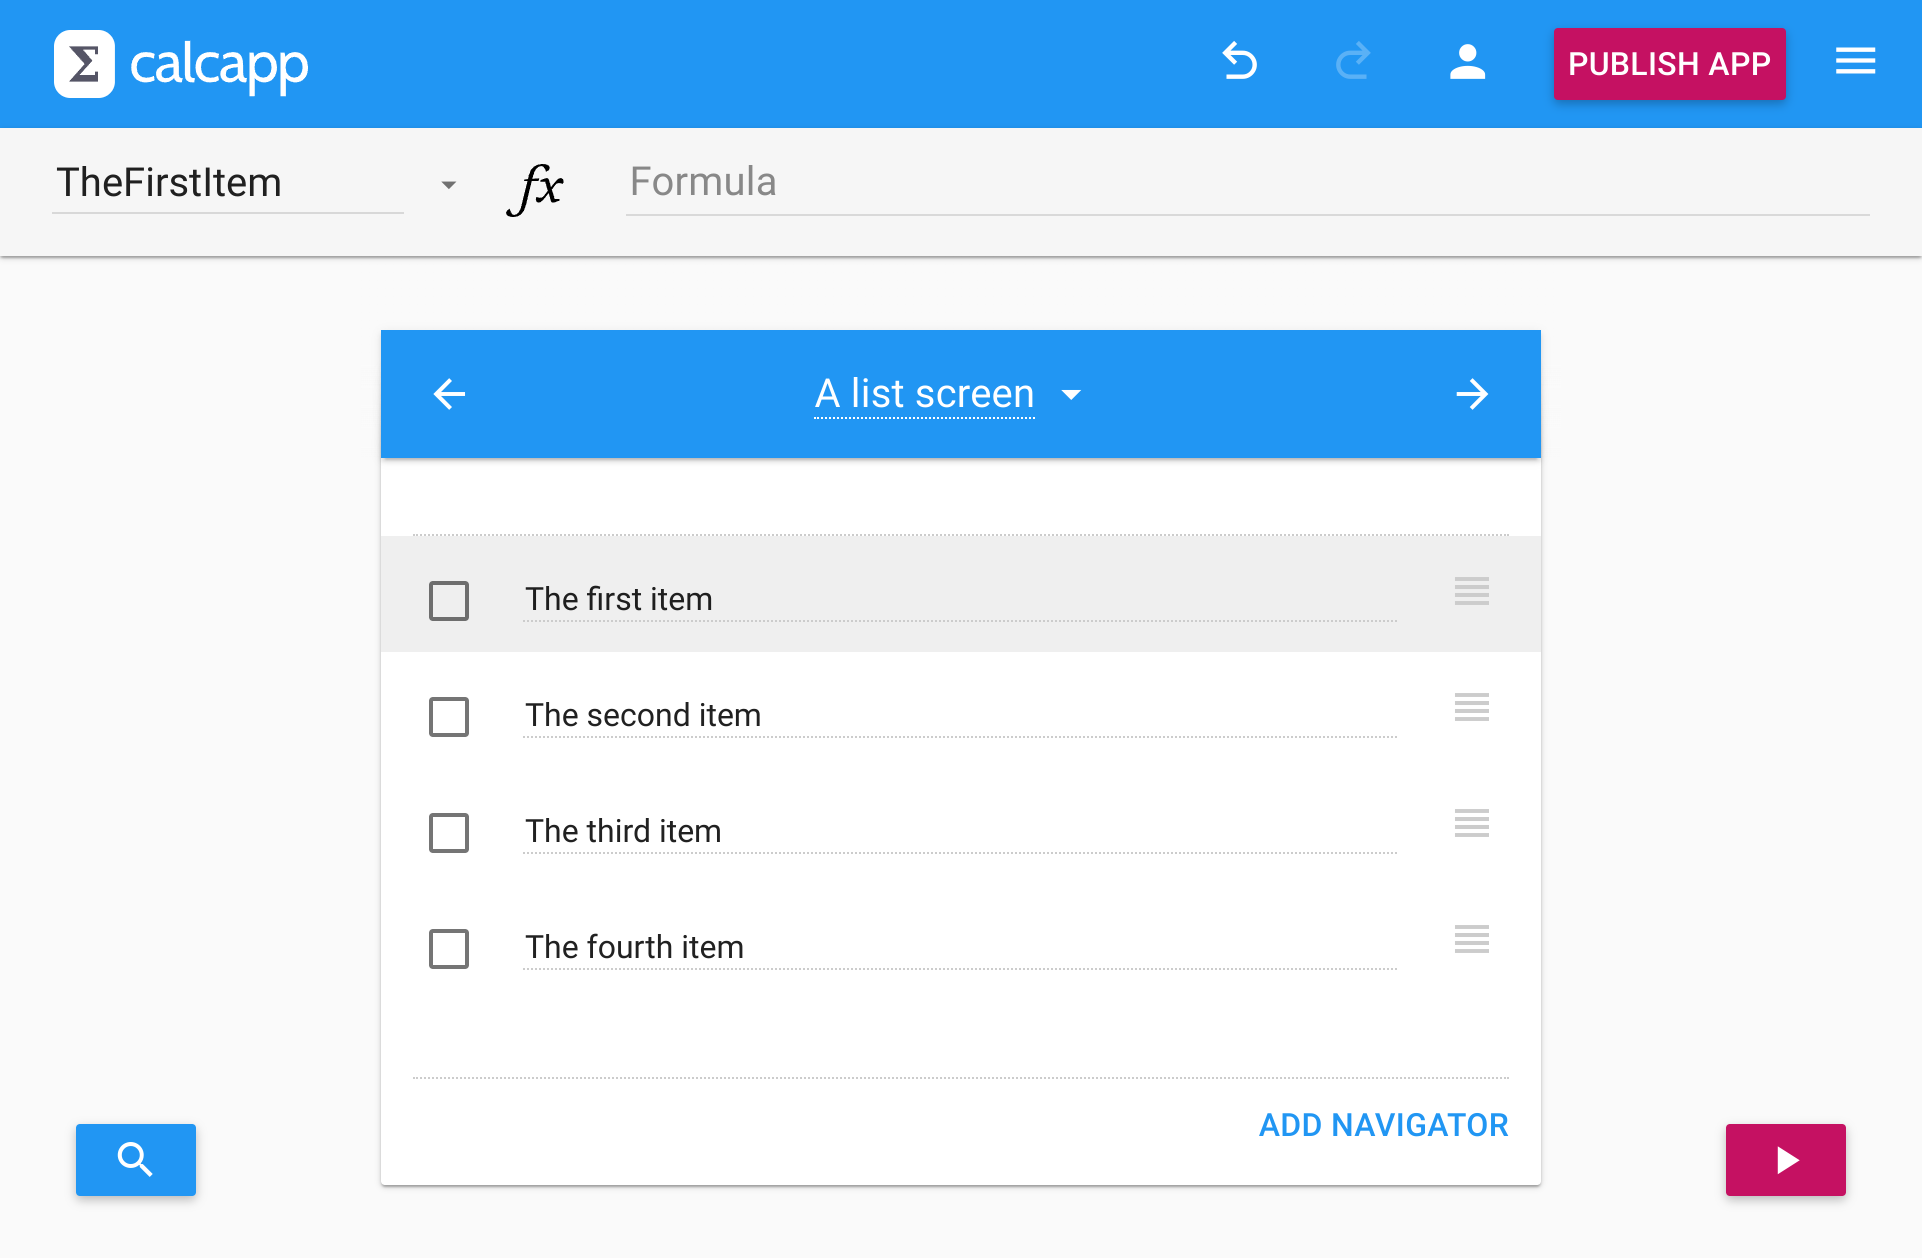
Users tap an item to navigate to the corresponding screen. In Calcapp Creator, click an option and press the right arrow .
If no screen exists for that option, you can create one. You can also add another list screen, creating nested menus for complex apps.
This video shows creating a menu with three options, where the second option contains a sub-menu with two options:
Managing screen structure
Reorder screens by dragging the symbol in the Screens sidebar:
For more options, use the screen menu (press the button next to the screen title):
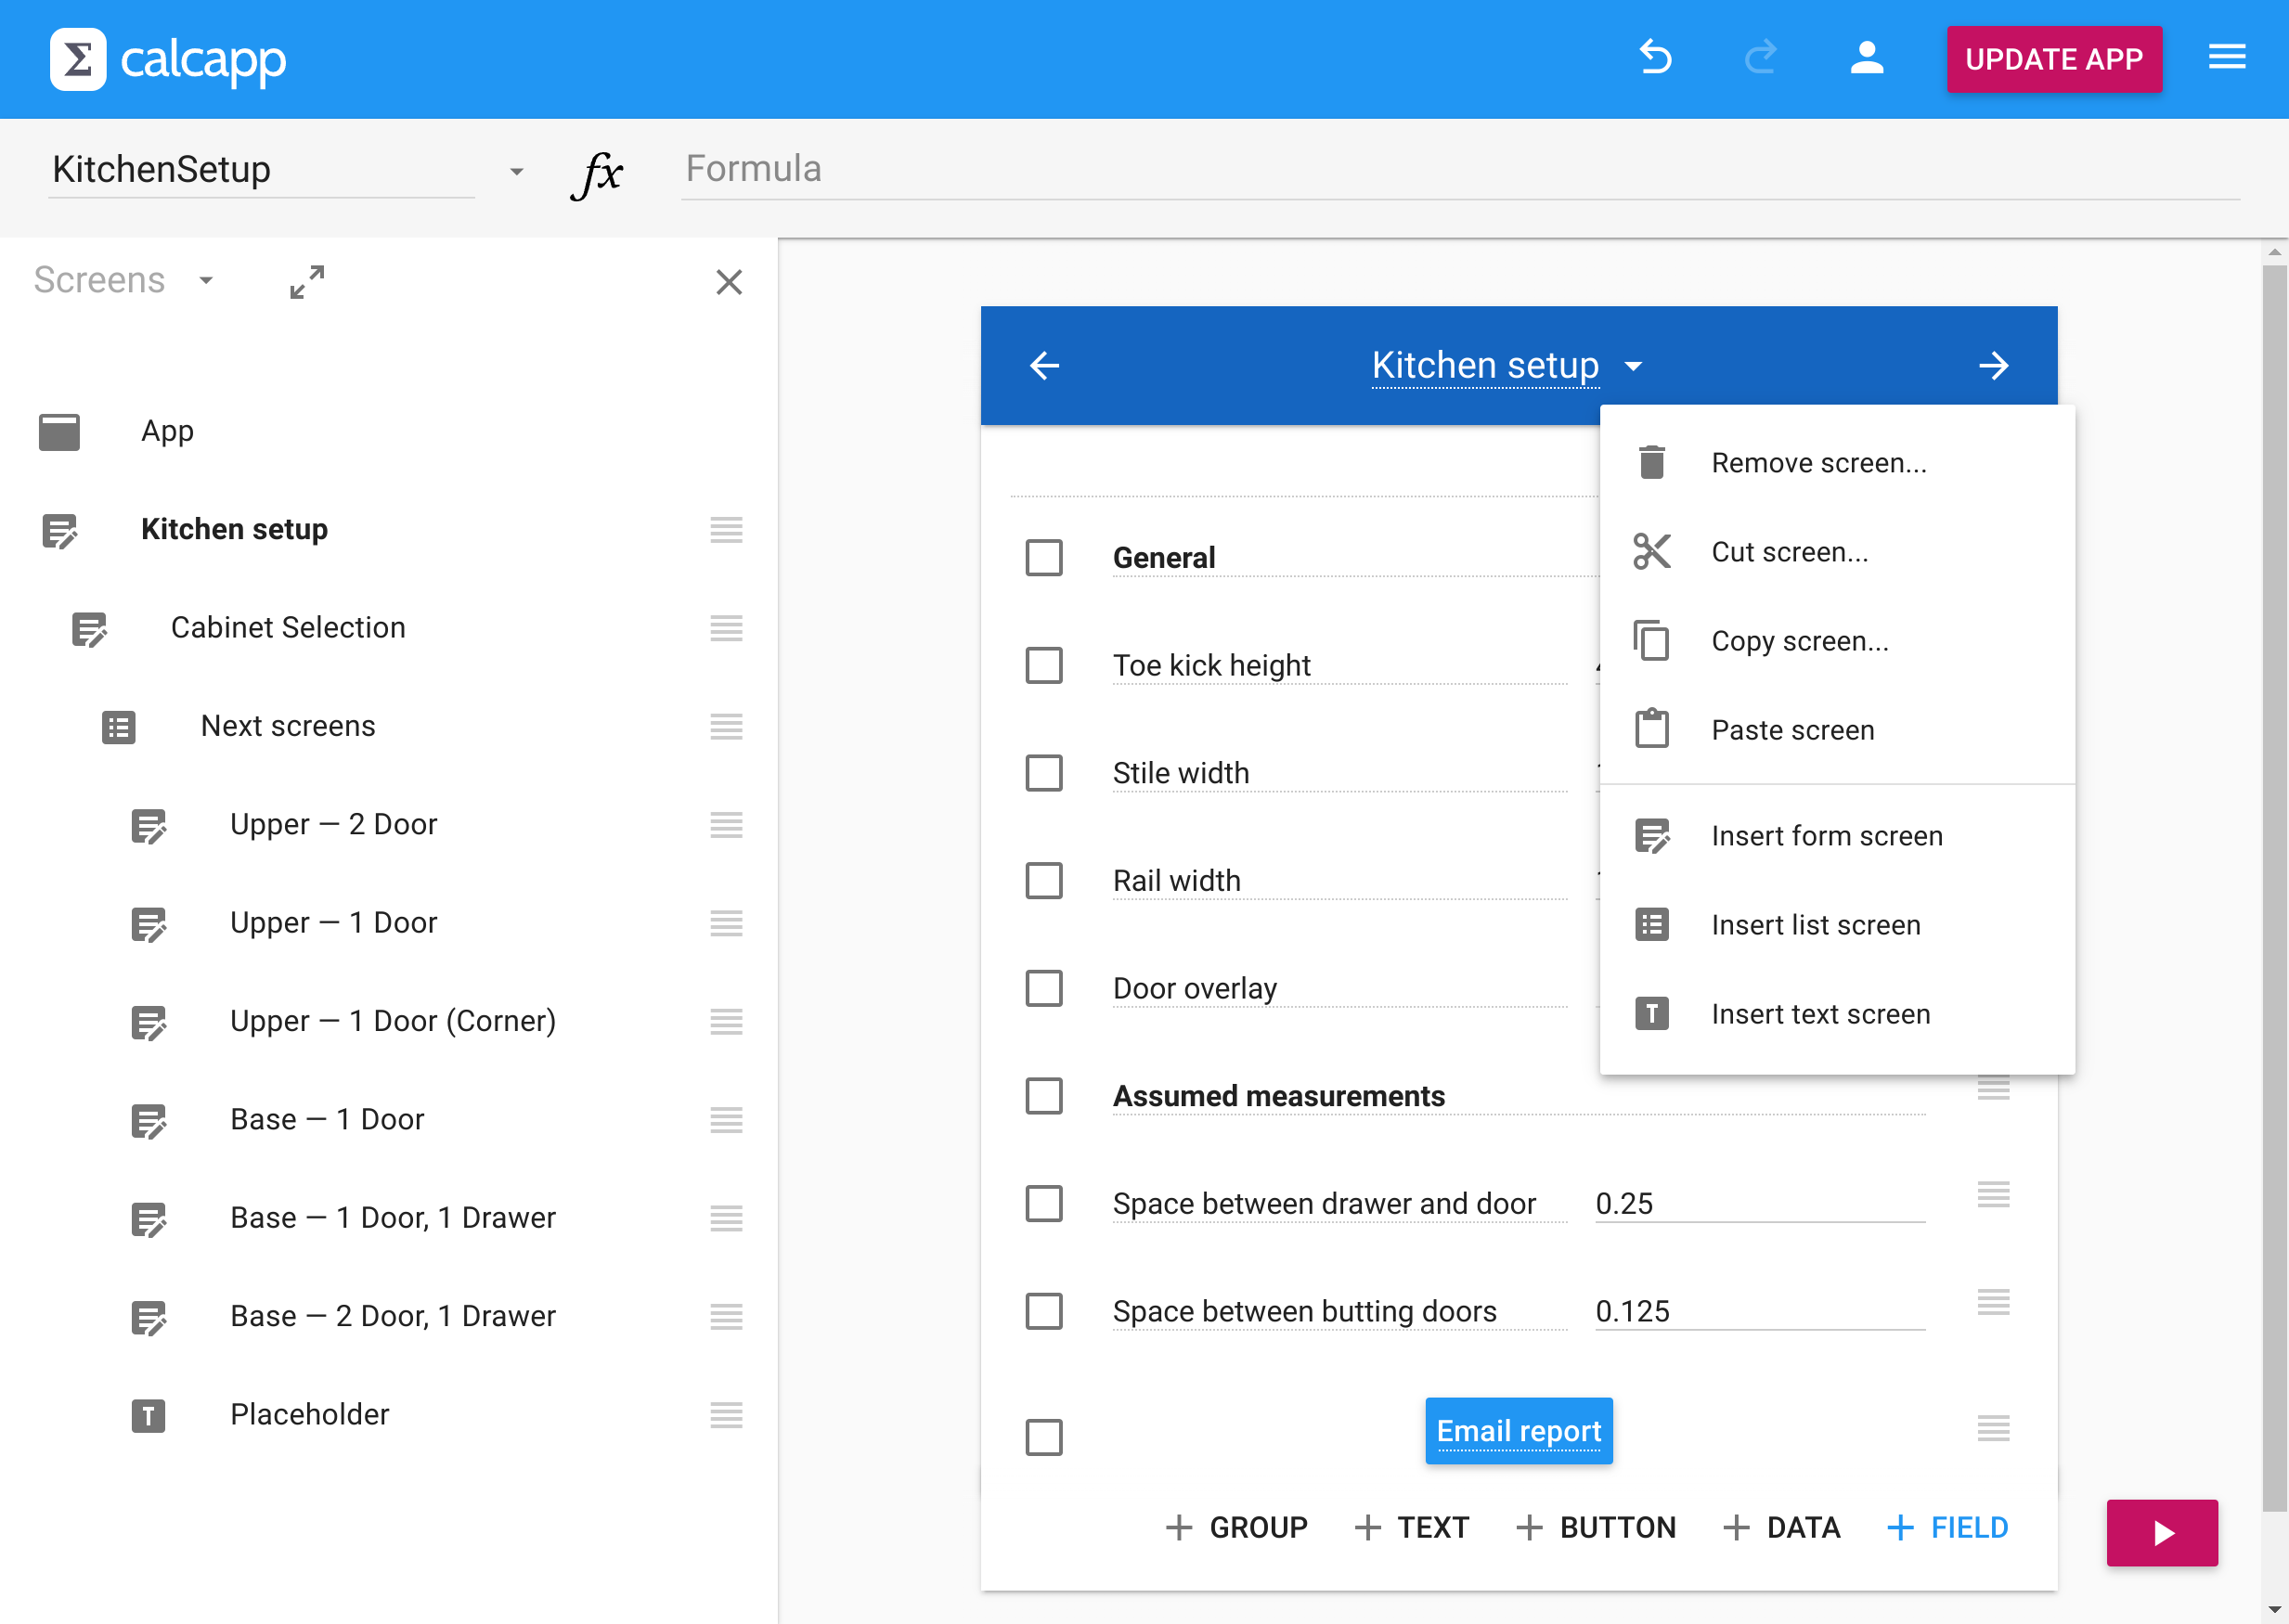
Remove screens - Select Remove screen… to delete the current screen or the current screen plus all following screens.
Cut and paste - Use Cut screen… to move screens or Copy screen… to duplicate them. Choose to include just the current screen or all following screens. Navigate to your destination and select Paste screen.
Cut and paste provides more control than drag-and-drop for complex screen hierarchies.
Insert screens - The Insert form screen, Insert list screen and Insert text screen options insert a new screen at the current position, moving the original screen after it.
Cross-screen references
Formulas normally reference items on the same screen using their names (like Field1). To reference items on other screens, use the format ScreenName!ItemName.
For example, to reference Field1 on WelcomeScreen from another screen, type WelcomeScreen!Field1WelcomeScreen!Field1. For properties, use WelcomeScreen!Field1.VisibleWelcomeScreen!Field1,Visible.
Name screens by clicking the toolbar with the screen title and editing as you normally would.
The easiest way to reference items on other screens is through autocomplete. Start typing any field name or label, and autocomplete will suggest the proper cross-screen reference format.
Dynamic navigation
The techniques above create fixed screen hierarchies. For dynamic navigation based on user input, use the NextScreen property of form screens, text screens and list screen navigators.
For example, to send users to Screen1 if Field1 is valid and Screen2 otherwise, use this formula with the NextScreen property:
To prevent users from advancing, use the NextScreenAvailable property of form screens and text screens.
Multiple screens and navigators can lead to the same destination. Select the same screen from the relevant NextScreen drop-downs in the inspector.
When multiple list screen navigators lead to the same screen, use the ActiveNavigator property to determine which navigator the user selected.
This blog post contains an example that uses the techniques above to look up values using the XLOOKUP function.
Customizing the first screen
By default, users see the first screen you created in your app. The FirstScreen property lets you change this, making apps that adapt to different users or contexts.
Set the first screen using the inspector when you first open your app:
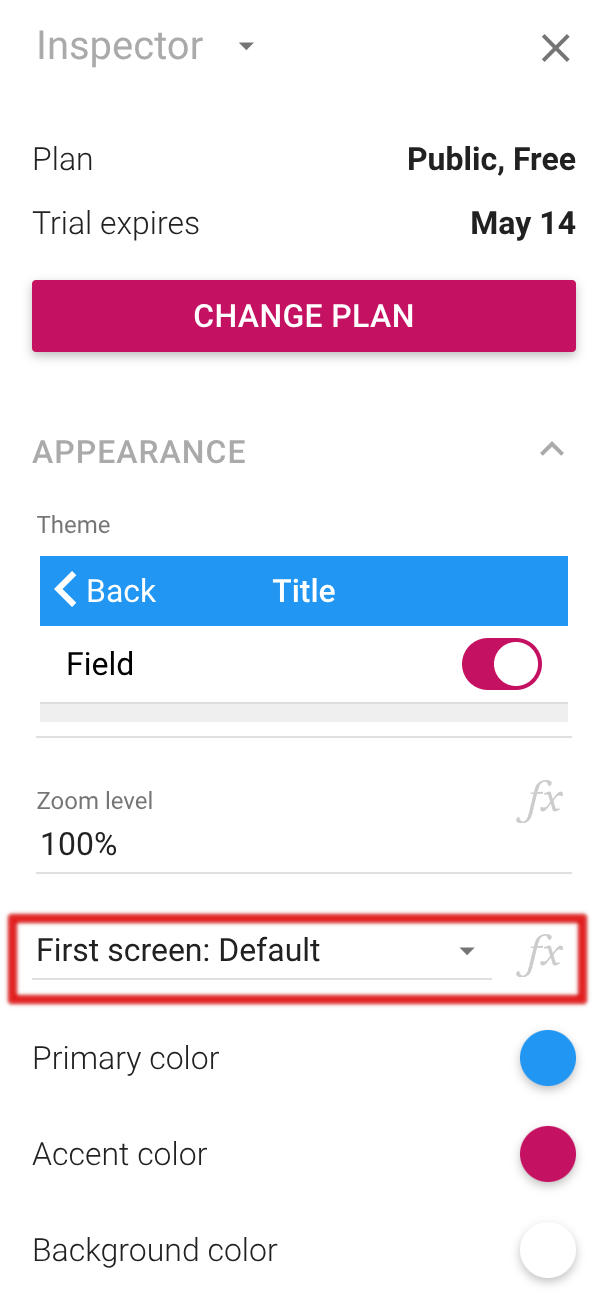
Select any screen from the drop-down menu, or use a formula (press fx) for dynamic behavior.
Common use cases
Role-based access - Show different screens based on user tags in private apps:
Launch options - Adapt based on how the app was opened using launch options:
App organization - Place data tables and hidden fields on initial screens, then jump to the user-facing content. This keeps your app structure clean without workarounds.
Important: Users can’t go back from the first screen you set. Screens that come before it in Creator are only accessible through forward navigation.
Finding errors
Large apps with many screens can develop errors that prevent running or publishing. Calcapp Creator highlights erroneous fields with purple bars:
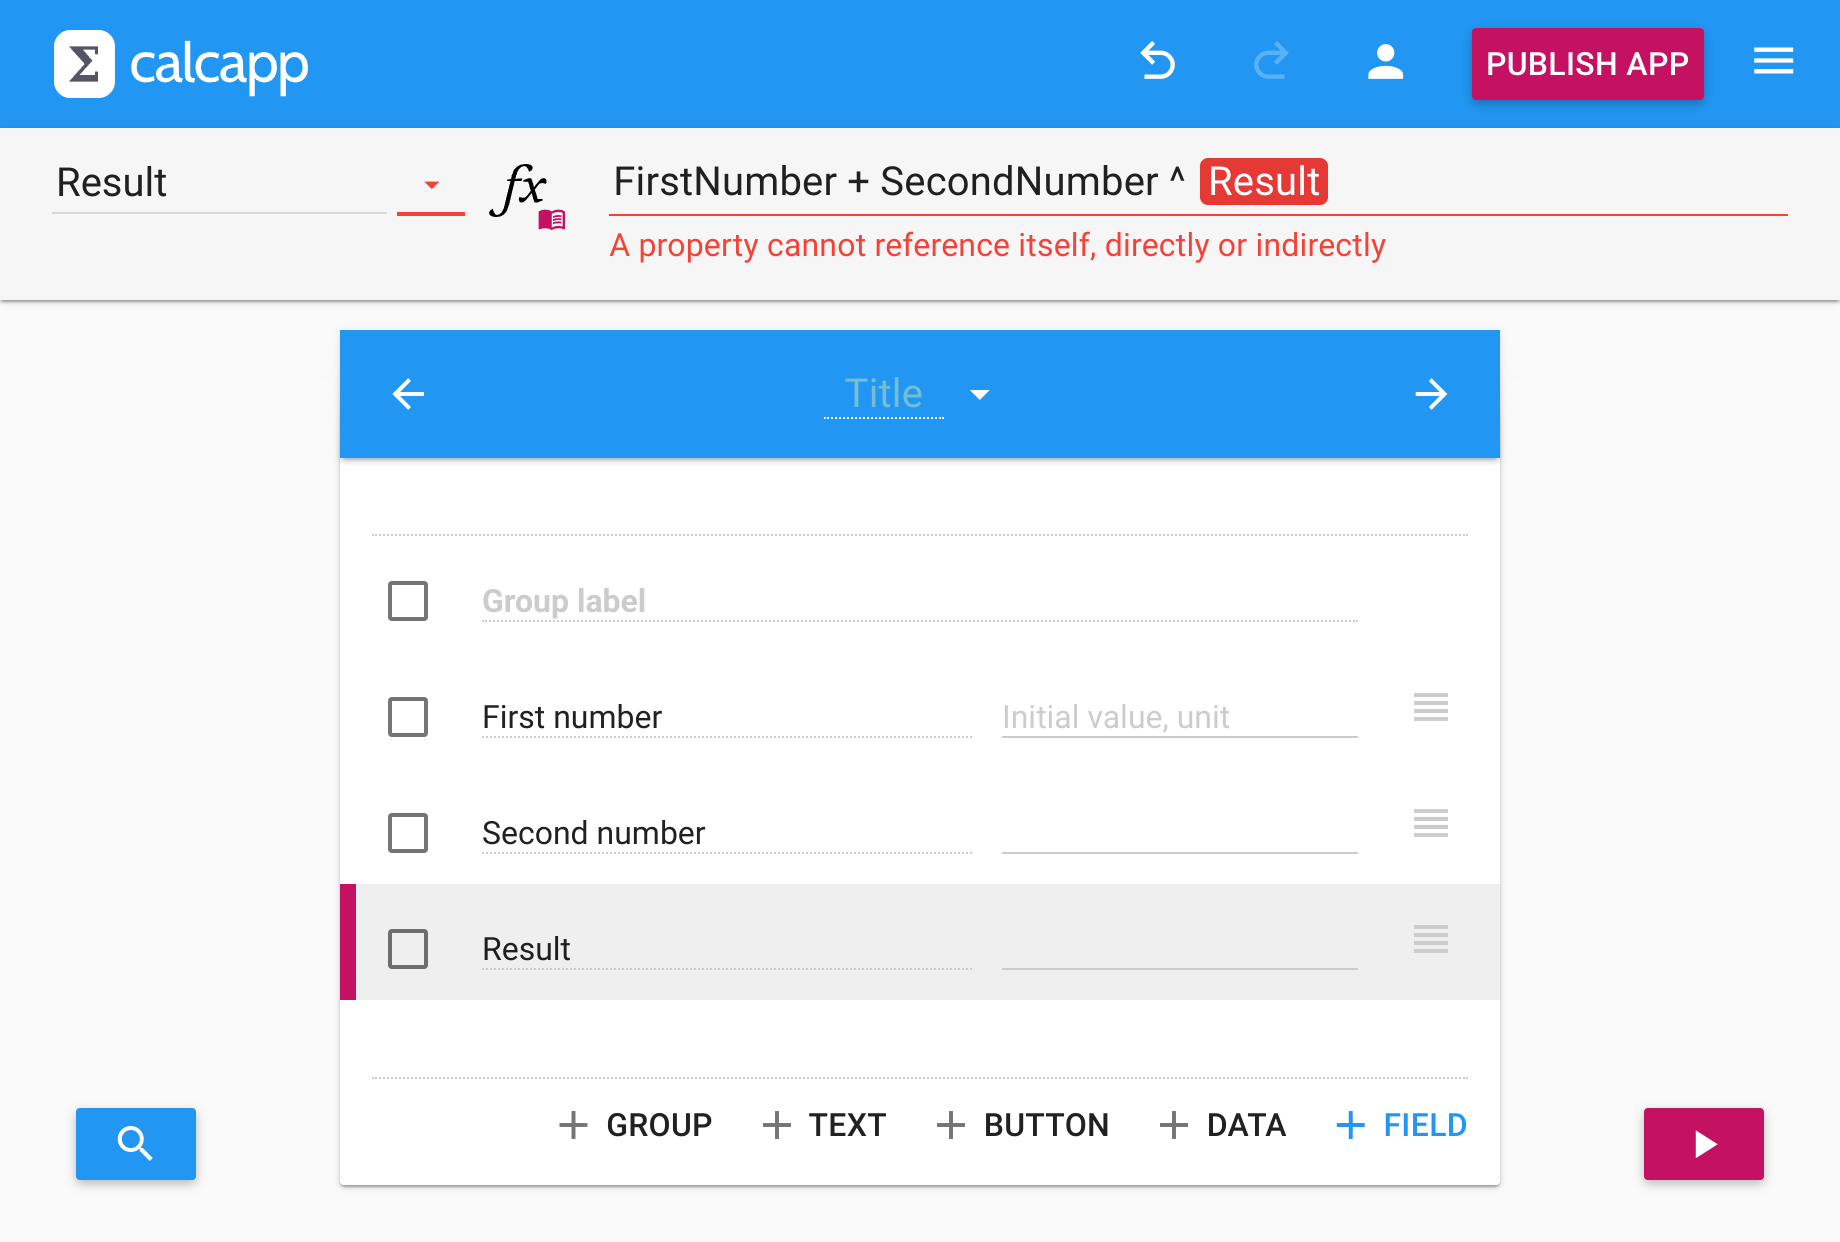
Click the field with the purple bar to see error details in red text below the formula field or name box.
The example above shows a circular dependency—the field
references its own value. Removing ^Result from the formula
would fix this error.
List screen navigators show purple bars when their destination screens contain errors, even if the erroneous screen is nested deep in the hierarchy.
Navigation arrows turn pink when they point toward erroneous screens. Follow the pink arrows to locate problems preventing your app from launching.
This example shows errors in both a previous screen and a screen reachable from the first option:
Video recap
This video builds on the simple adder from the getting started guide. The first number and result stay on the initial screen, while the second number moves to a screen accessible through a list menu. It also demonstrates conditional visibility for fields and list options:
Continue reading about additional field types »