Handling tabular data
Many apps use data tables for calculations rather than traditional math. Calcapp’s data editor lets you import spreadsheet data directly into your apps, creating lookup tables for tax brackets, product catalogs, pricing tiers and more.
This guide covers importing data, working with the data editor and using lookup functions like XLOOKUP to retrieve values based on user input.
Getting started with the data editor
Calcapp supports spreadsheet-like data tables using our data editor:
Press the DATA button in the app designer to launch the data editor:

Importing spreadsheet data
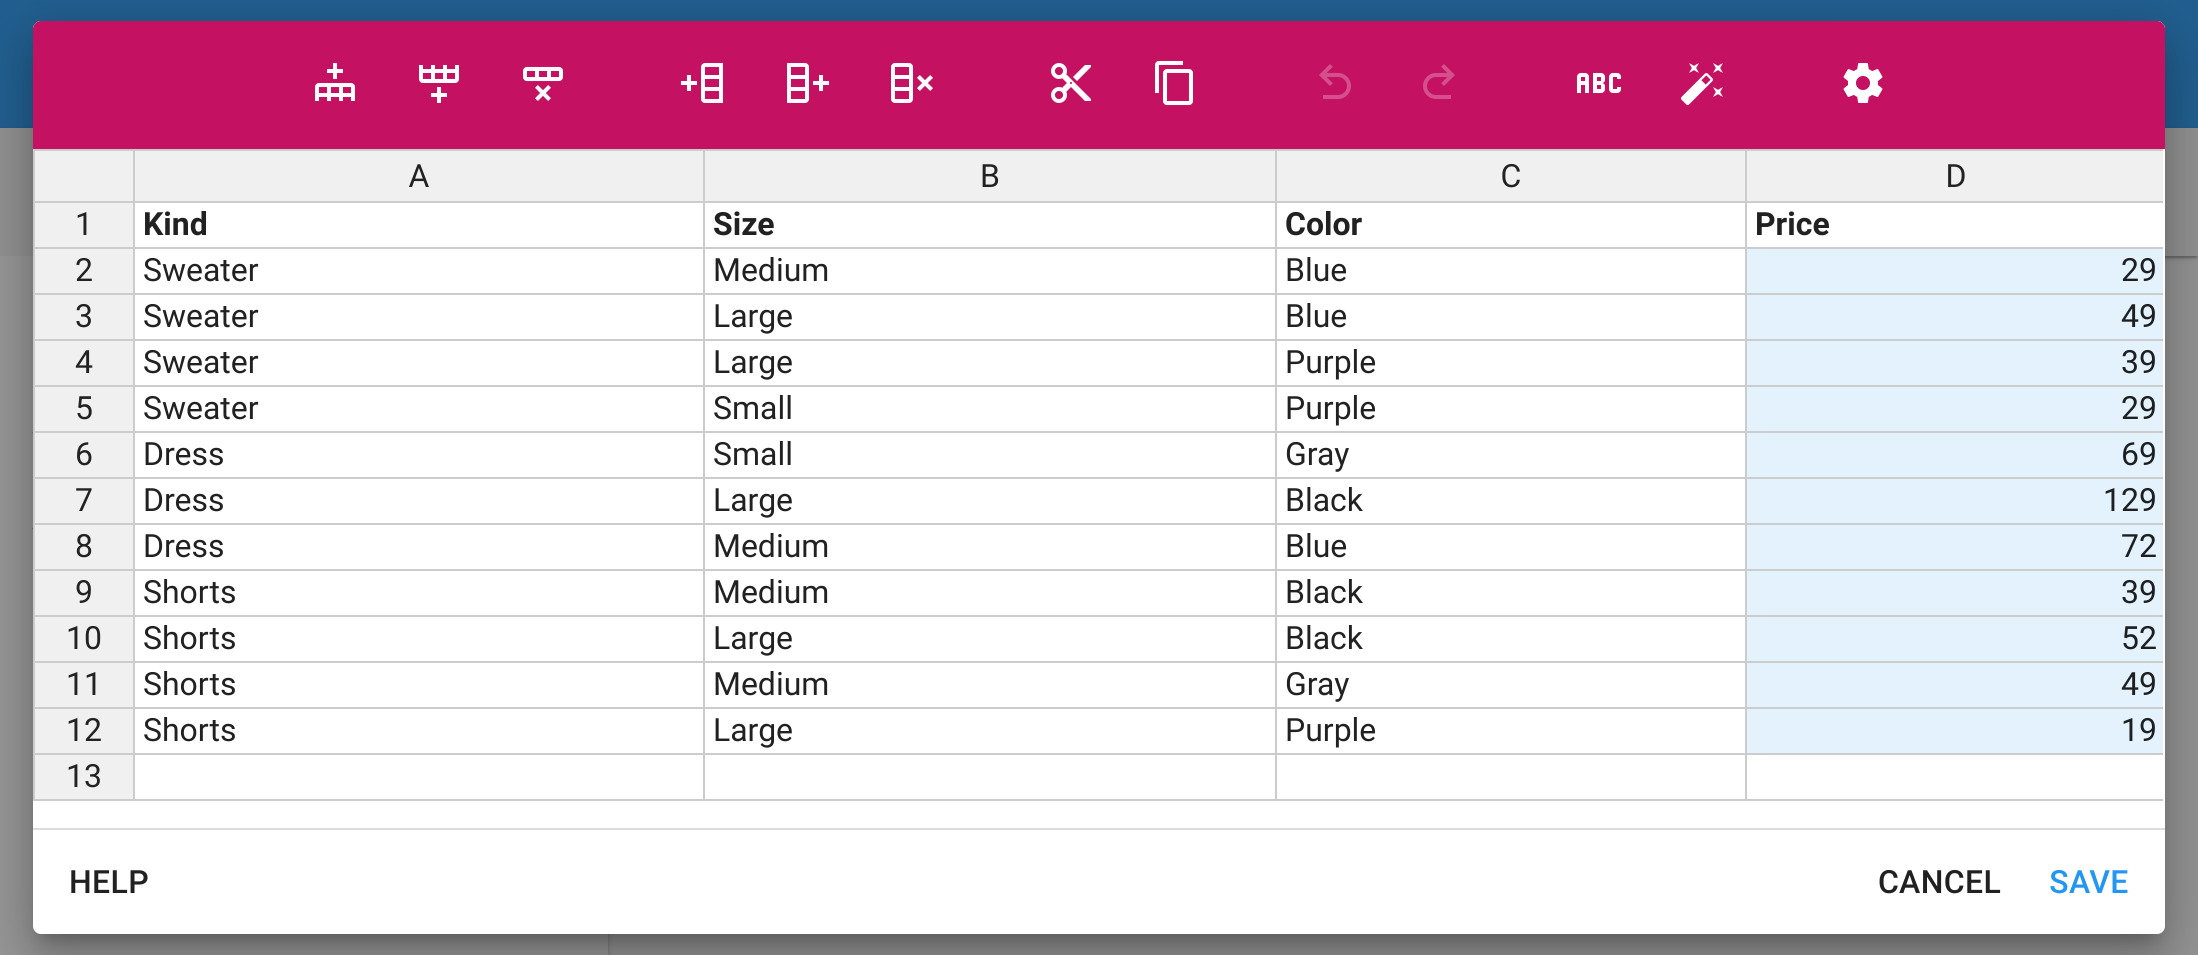
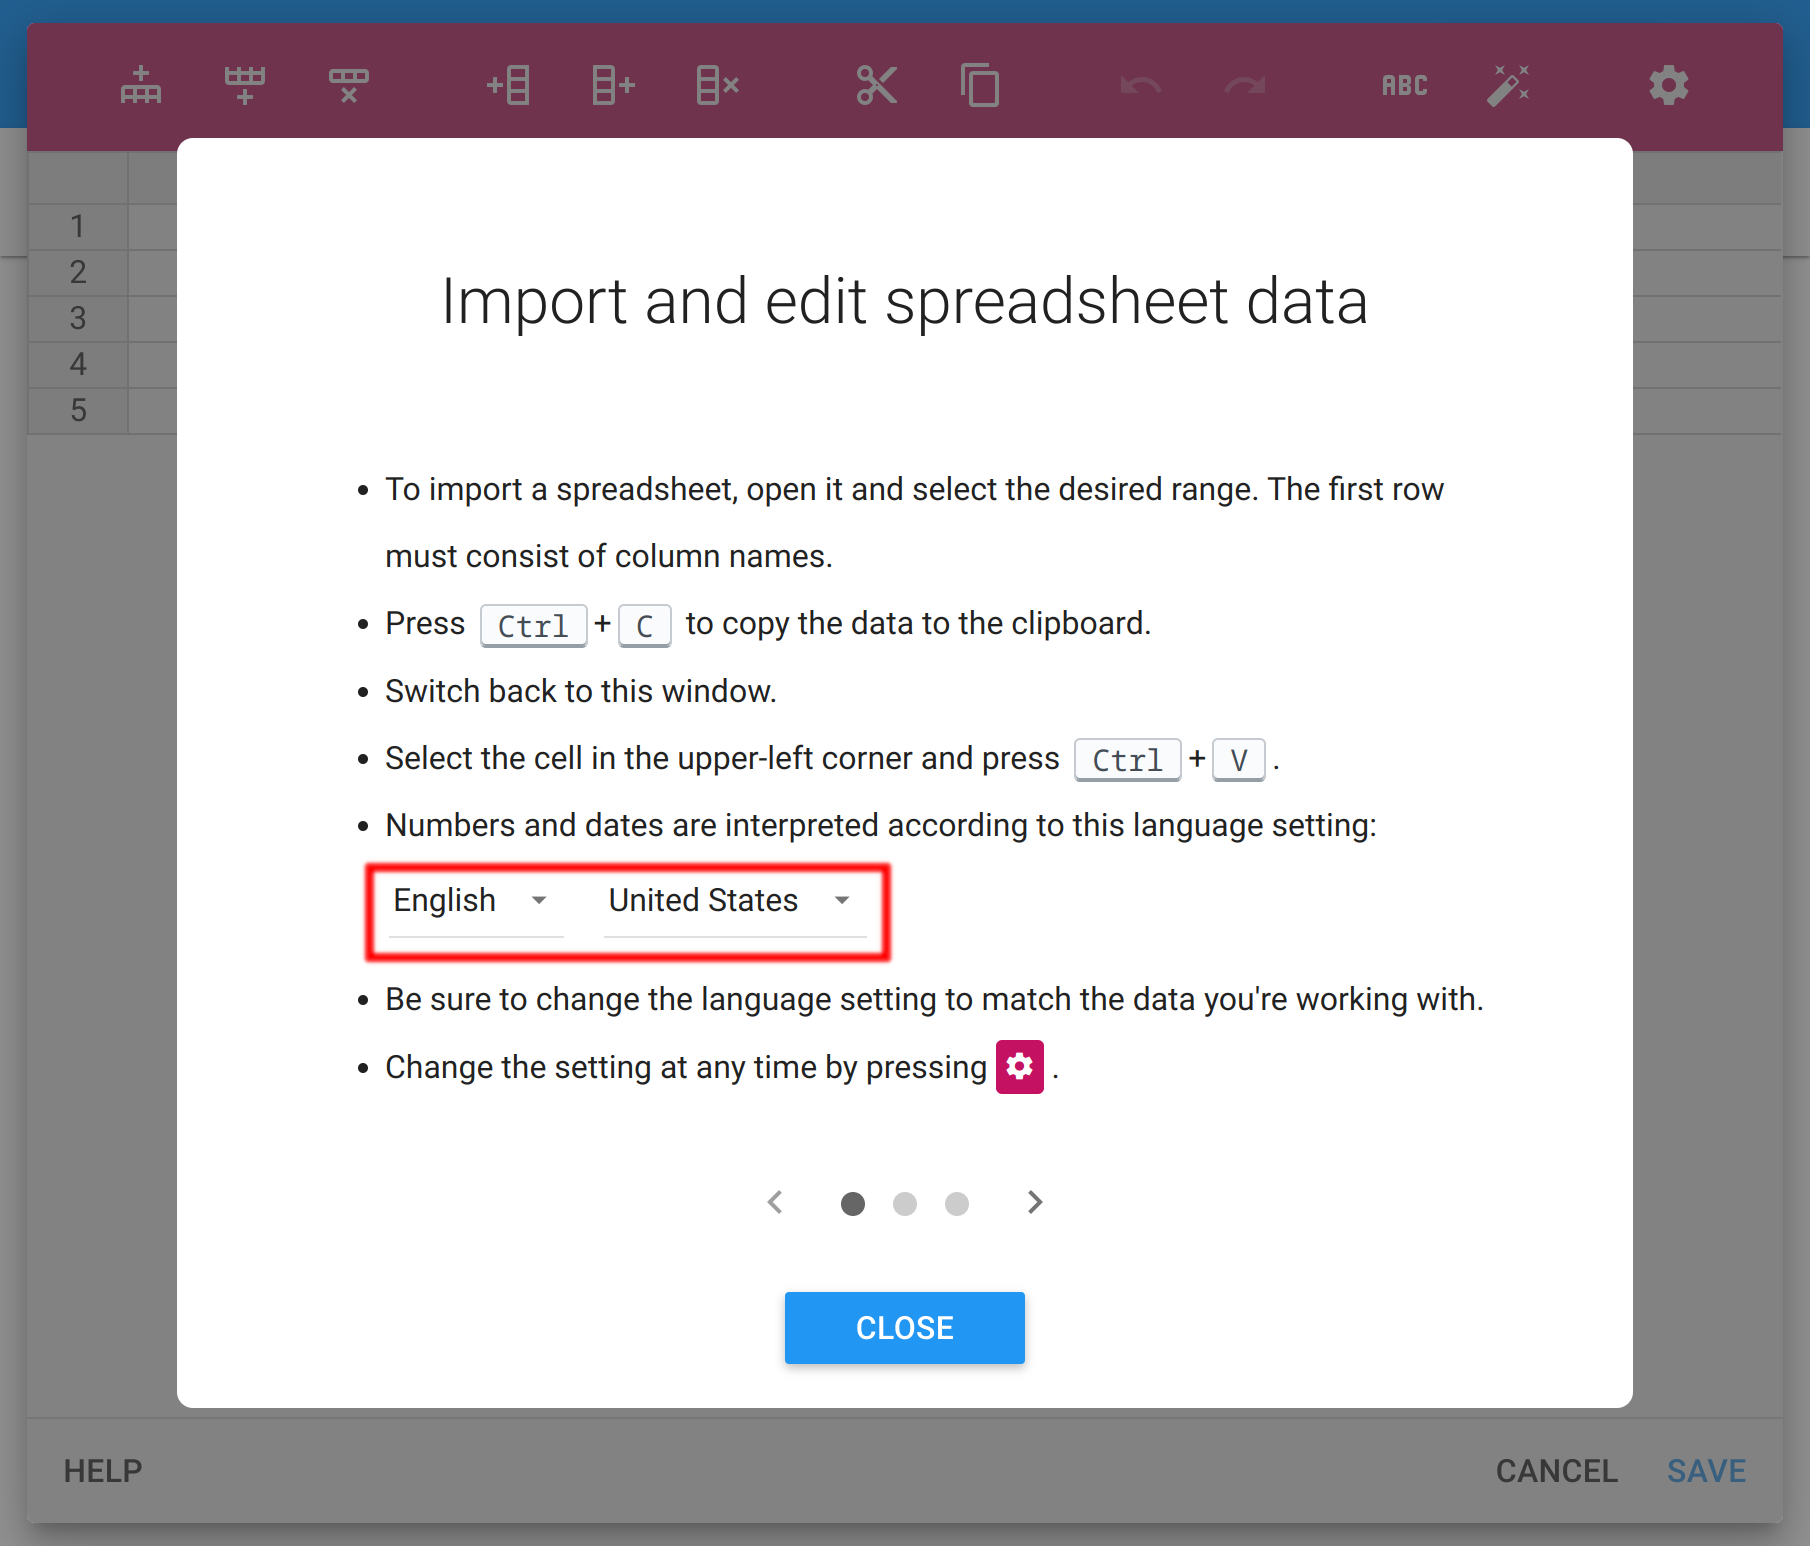
The first row must contain column names. To transfer data from your spreadsheet:
-
Switch to your spreadsheet.
-
Select the desired range.
-
Copy the data to the clipboard (press Ctrl+C on PC or ⌘+C on Mac).
-
Switch back to Calcapp Creator and the data editor.
-
Select the cell in the upper left corner.
-
Paste the data from your spreadsheet (press Ctrl+V or ⌘+V on Mac).
When you click Save, one named value per column is created:
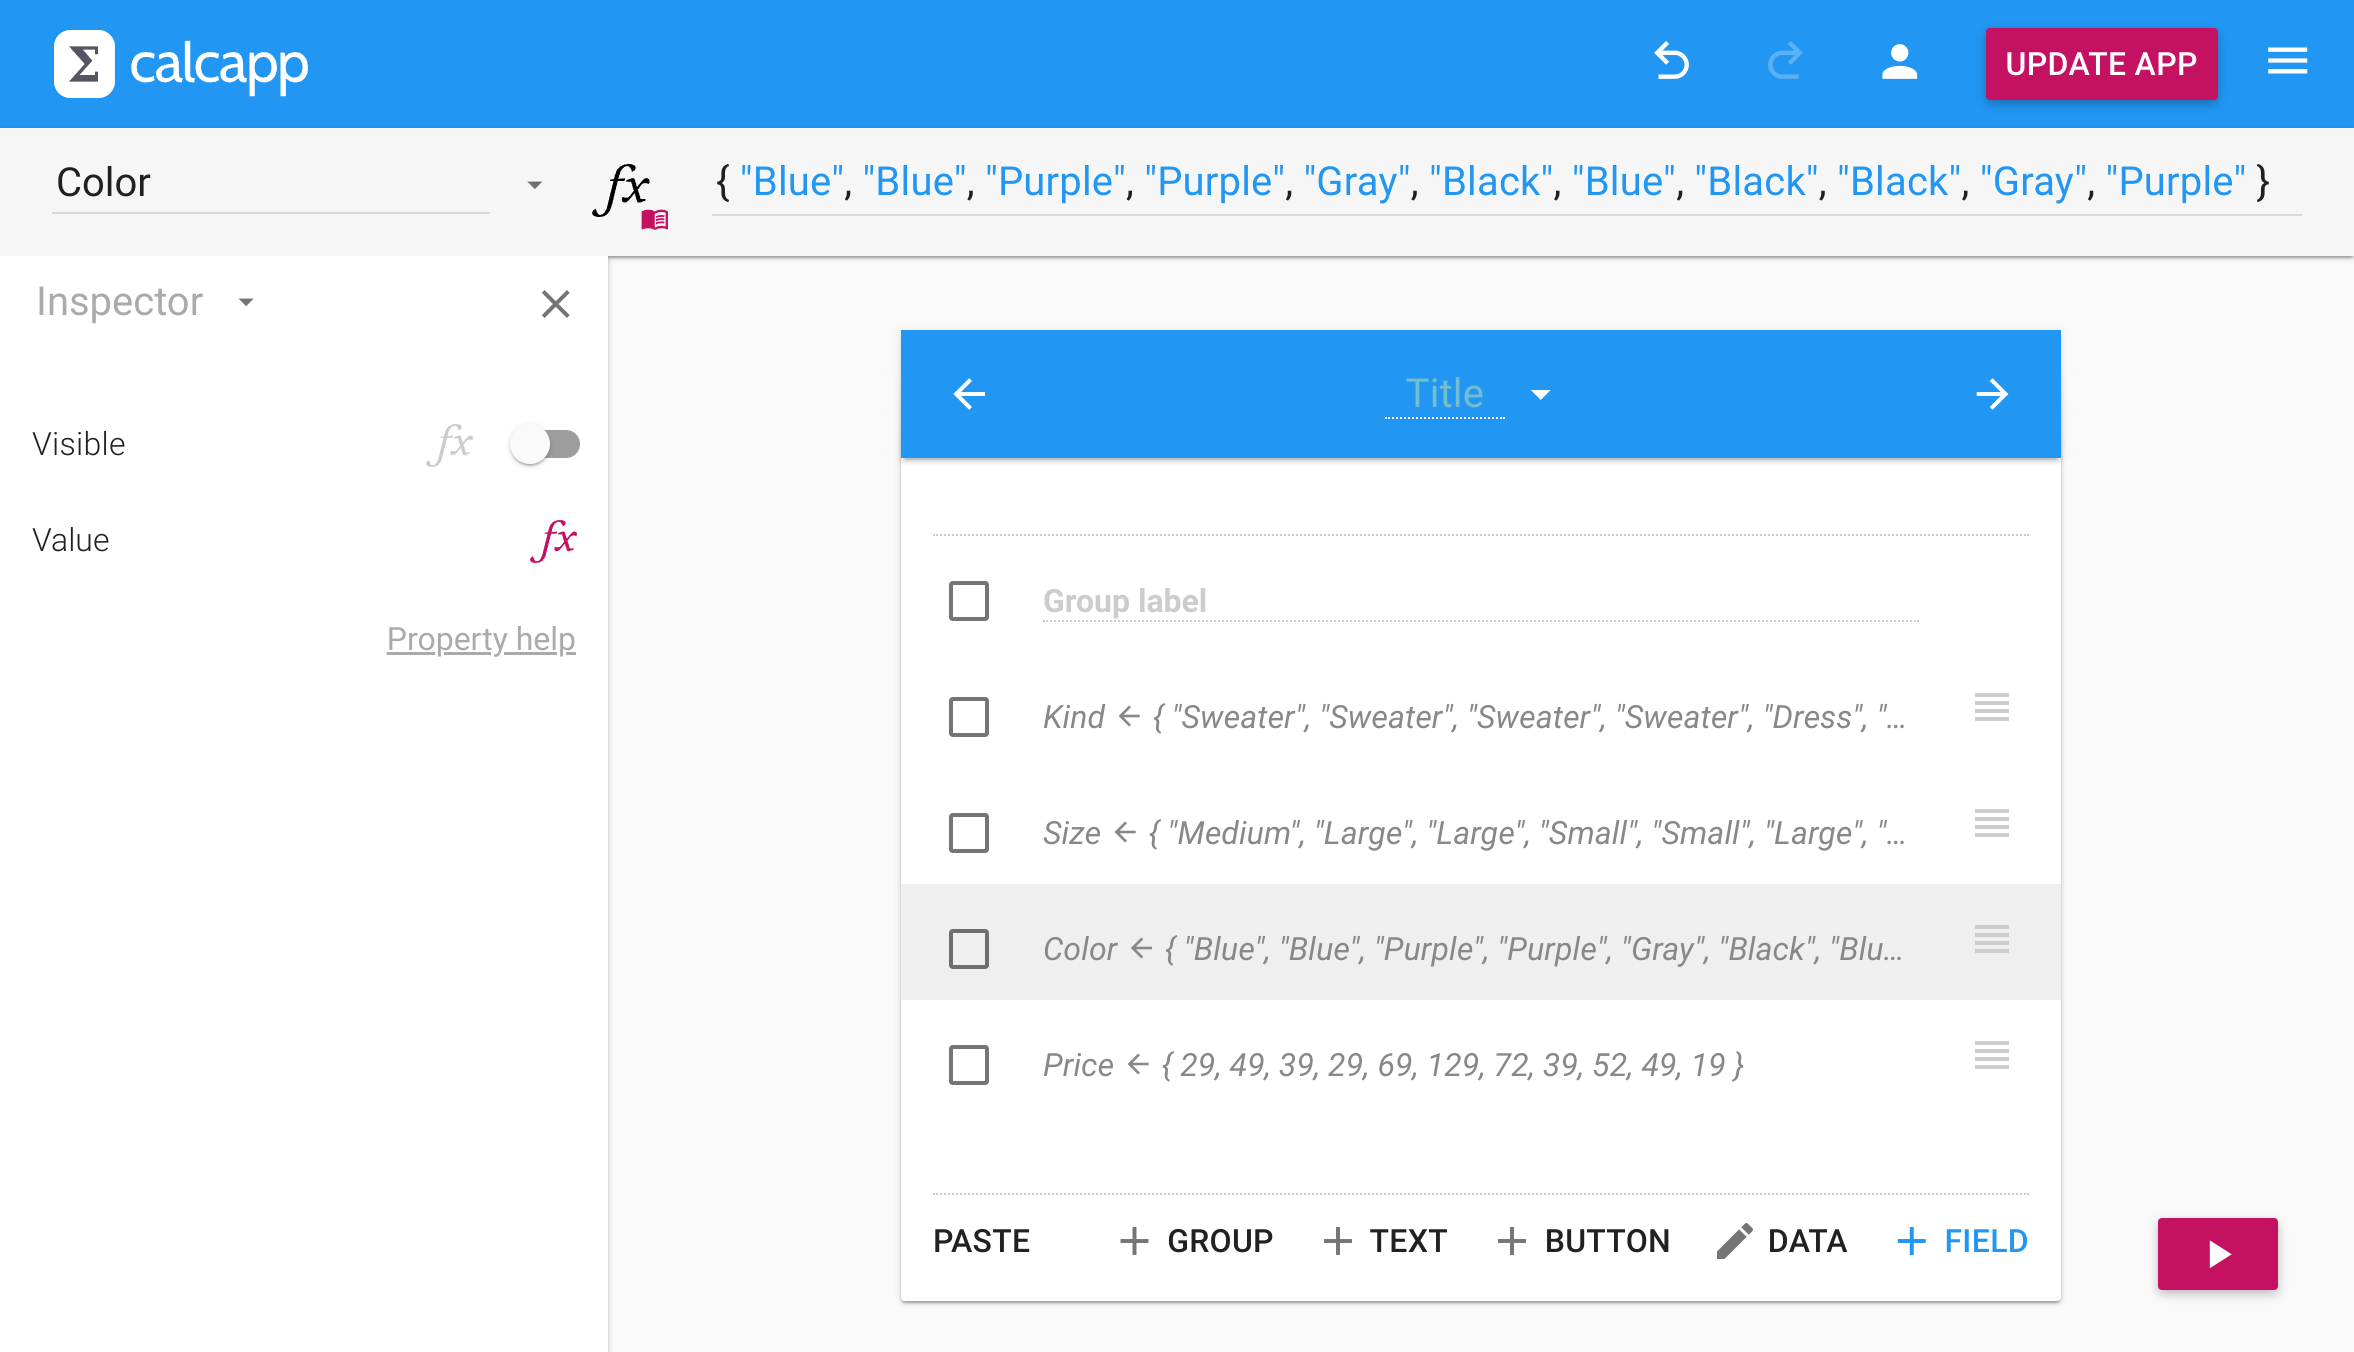
The DATA button changes to DATA when a compatible named value is selected, allowing you to edit the data using the data editor.
Important: If you need to rename a column, rename the named value in the app designer instead of renaming the column in the data editor. If you rename the column directly, the data editor will leave the old named value in place and create a new one with the new column name.
Apps can read and process the data you enter using the data editor. However, they cannot currently modify the data. To change the data, the app author needs to use Calcapp Creator.
Detecting numbers and dates
The data editor automatically detects numbers and dates to ensure they’re stored as the correct data types rather than text. This enables them to be used with functions and operators that require numbers or dates.
For automatic detection to work properly, the language setting must match your data format (which can differ from the app’s language). Set the language by pressing the button:
Detected numbers appear on a blue background and detected dates appear on a pink background.
You can override the automatic detection:
- Press to force selected cells to be interpreted as text.
- Press to re-run automatic detection on selected cells.
Organizing data with dedicated screens
The data editor creates named values on the current screen. For small tables with a few columns, this works well.
However, for large tables or data used across multiple screens, consider moving your data to dedicated screens that users never see. This keeps your app organized and makes data management easier.
For example, you could put product data on a screen named Products. This would enable you to reference the Color column by writing Products!ColorProducts!Color in formulas.
To prevent users from accessing data screens, use the FirstScreen property: place data screens at the beginning of your app, then set FirstScreen to jump directly to the screen users should see.
Using data in formulas
Once imported, reference your data in formulas using the named values created for each column. This section covers common patterns for working with tabular data.
If you want to try these formulas yourself, import this sample data spreadsheet into your app.
Basic operations
Calculate statistics across your data:
Count items meeting criteria:
Find values using complex logic:
Simple lookups
The XLOOKUP function retrieves values from one column based on matches in another. This formula returns the color of the product costing $129:
Multiple criteria lookups
Many apps need to match multiple conditions simultaneously. For example, finding the price of a specific product by kind, size and color.
Assume you have three drop-down fields—Kind, Size and Color—populated with values from your data table columns. This formula finds the price matching all three criteria:
The field names (Kind, Size, Color) reference
your drop-down fields, while names with Products! reference the
data table columns.
This technique works by creating an array of TRUE/FALSE values and finding the first TRUE match.
For comprehensive XLOOKUP examples and detailed explanations, see the function documentation.
Continue reading about customizing the appearance of your apps »