Additional field types
The previous guides covered number fields and date and time fields. Now you’ll learn about three additional field types that expand what your apps can do: switch fields for yes/no choices, drop-down fields for predefined options and text fields for free-form input and calculated text display.
Switch fields
Switch fields let users toggle between TRUE and FALSE values, perfect for yes/no questions and binary choices. To create one, select Switch from the field type drop-down in the inspector.
This example shows switch fields in both Creator and the running app:
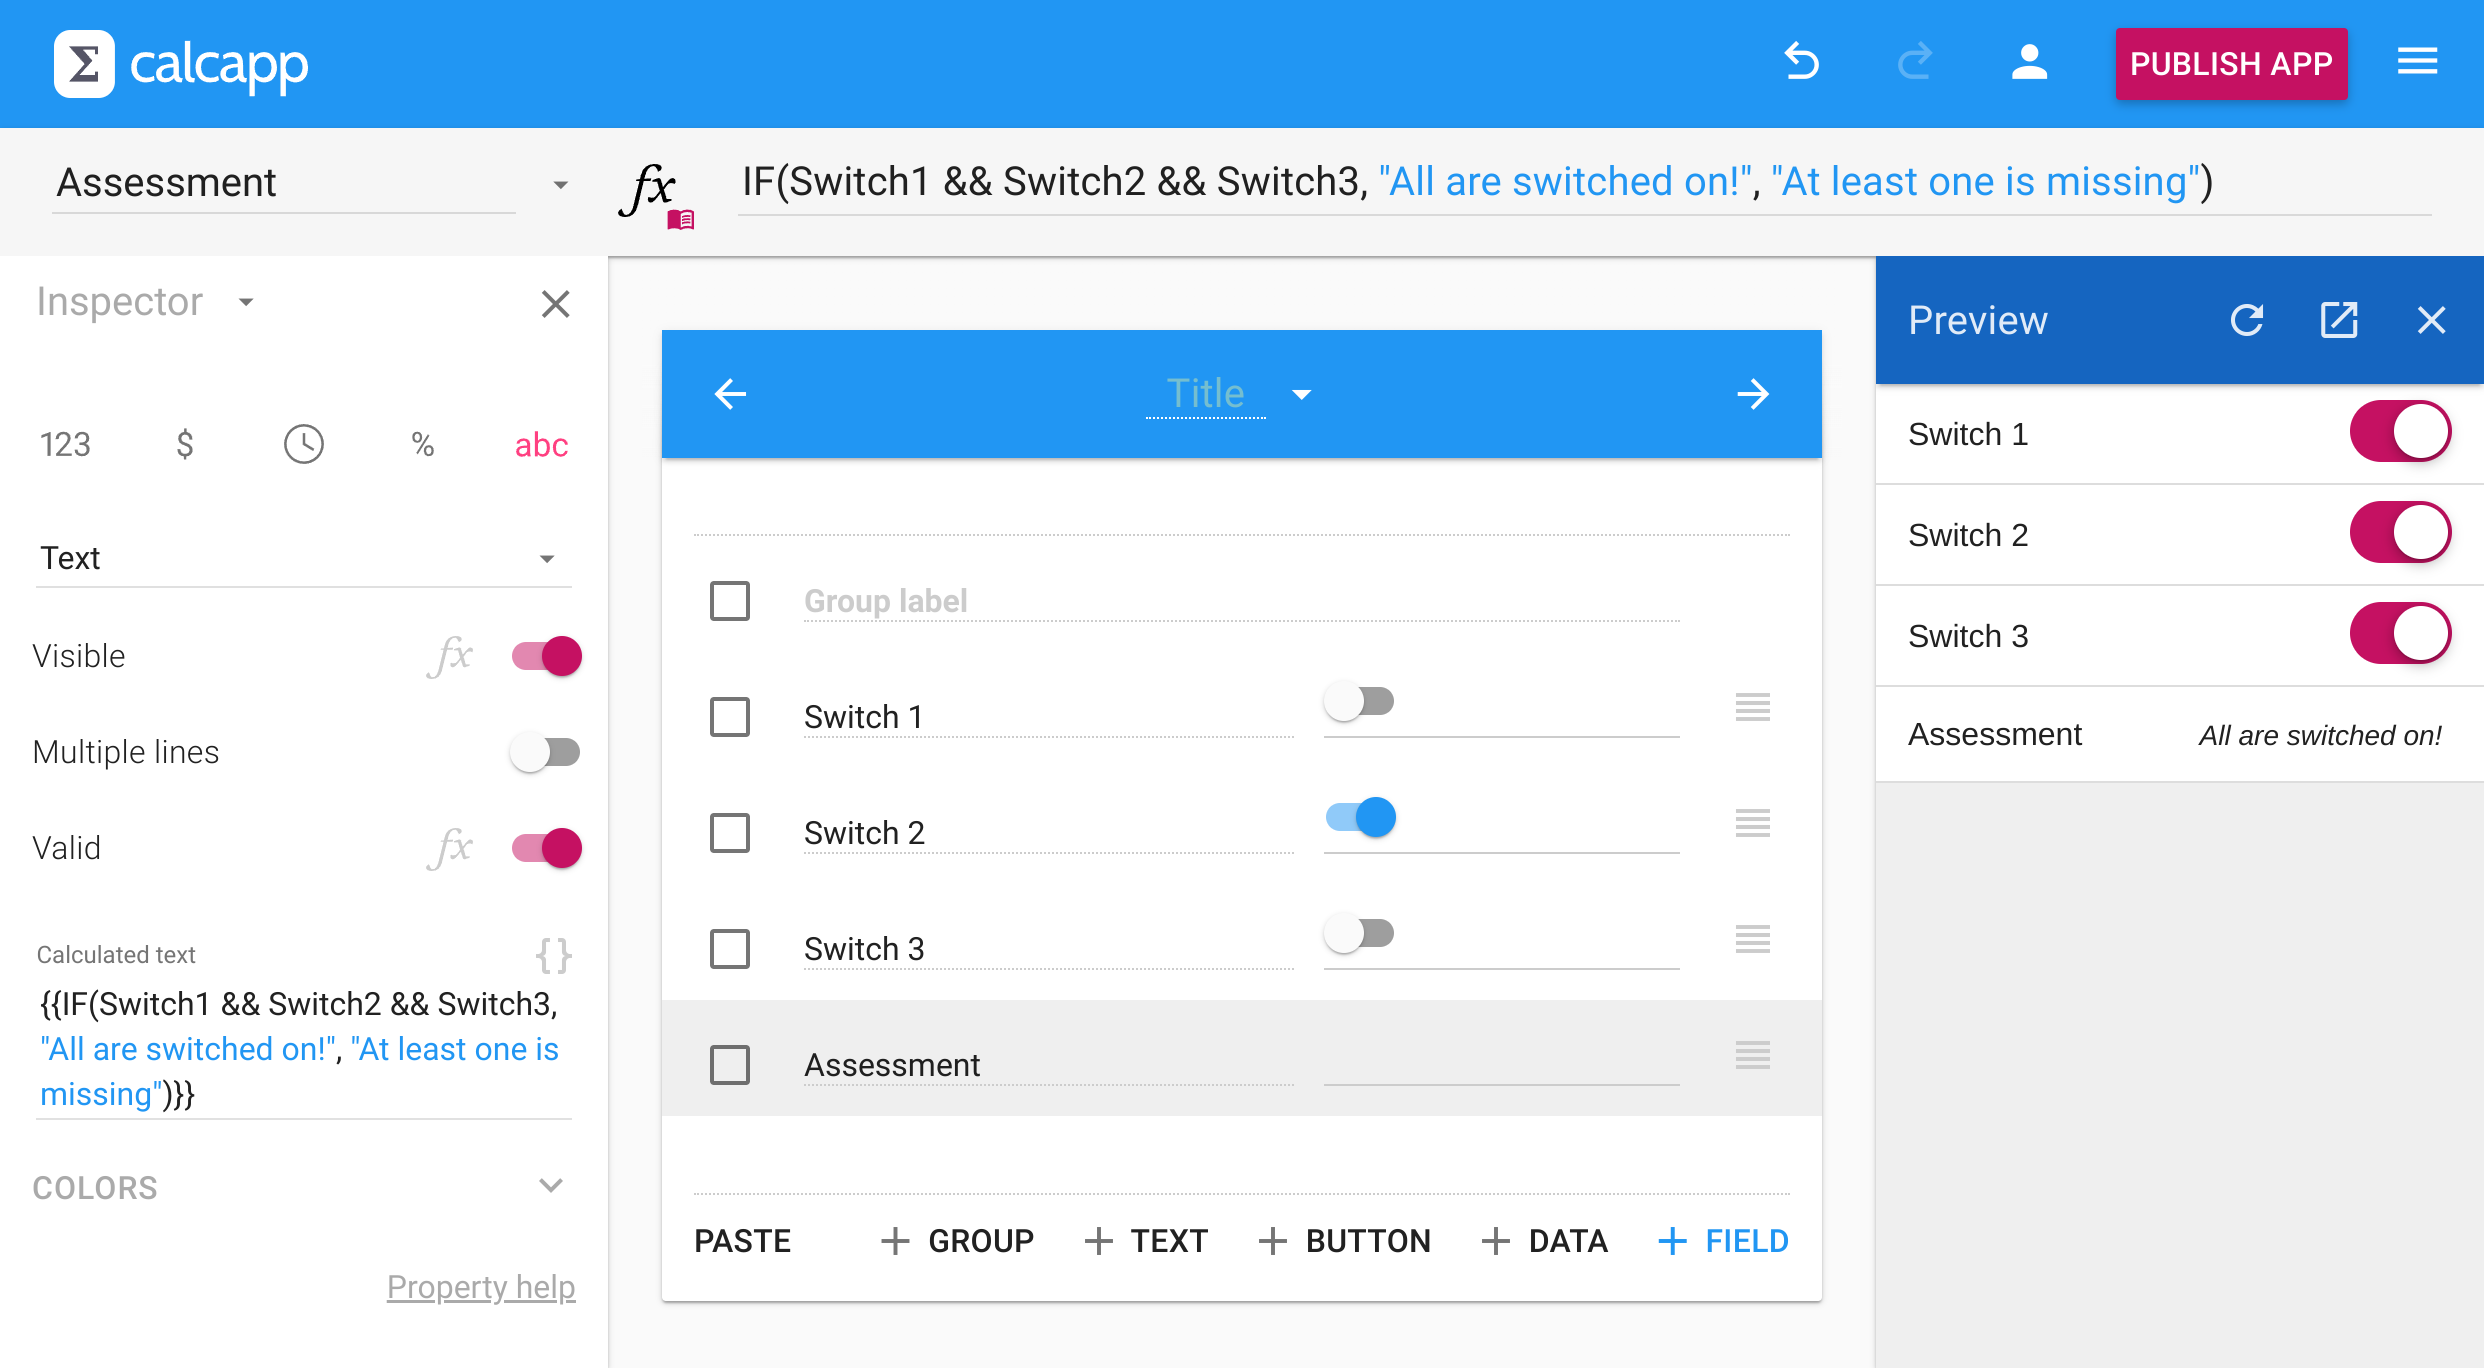
This simple app has a single form screen, Switches, holding three switch fields and a text field. The text field displays one value when all fields have been toggled to the “on” position and another when at least one is in the “off” position. To do so, this formula is used:
Switch1 && Switch2 && Switch3Switch1 && Switch2 && Switch3 may also be written as follows with the AND function:
The last two formulas use techniques explored here.
Drop-down fields
Drop-down fields let users select from a list of options. Choose Number drop-down or Text drop-down from the field type menu in the inspector. You can set options manually or use formulas to generate them dynamically.
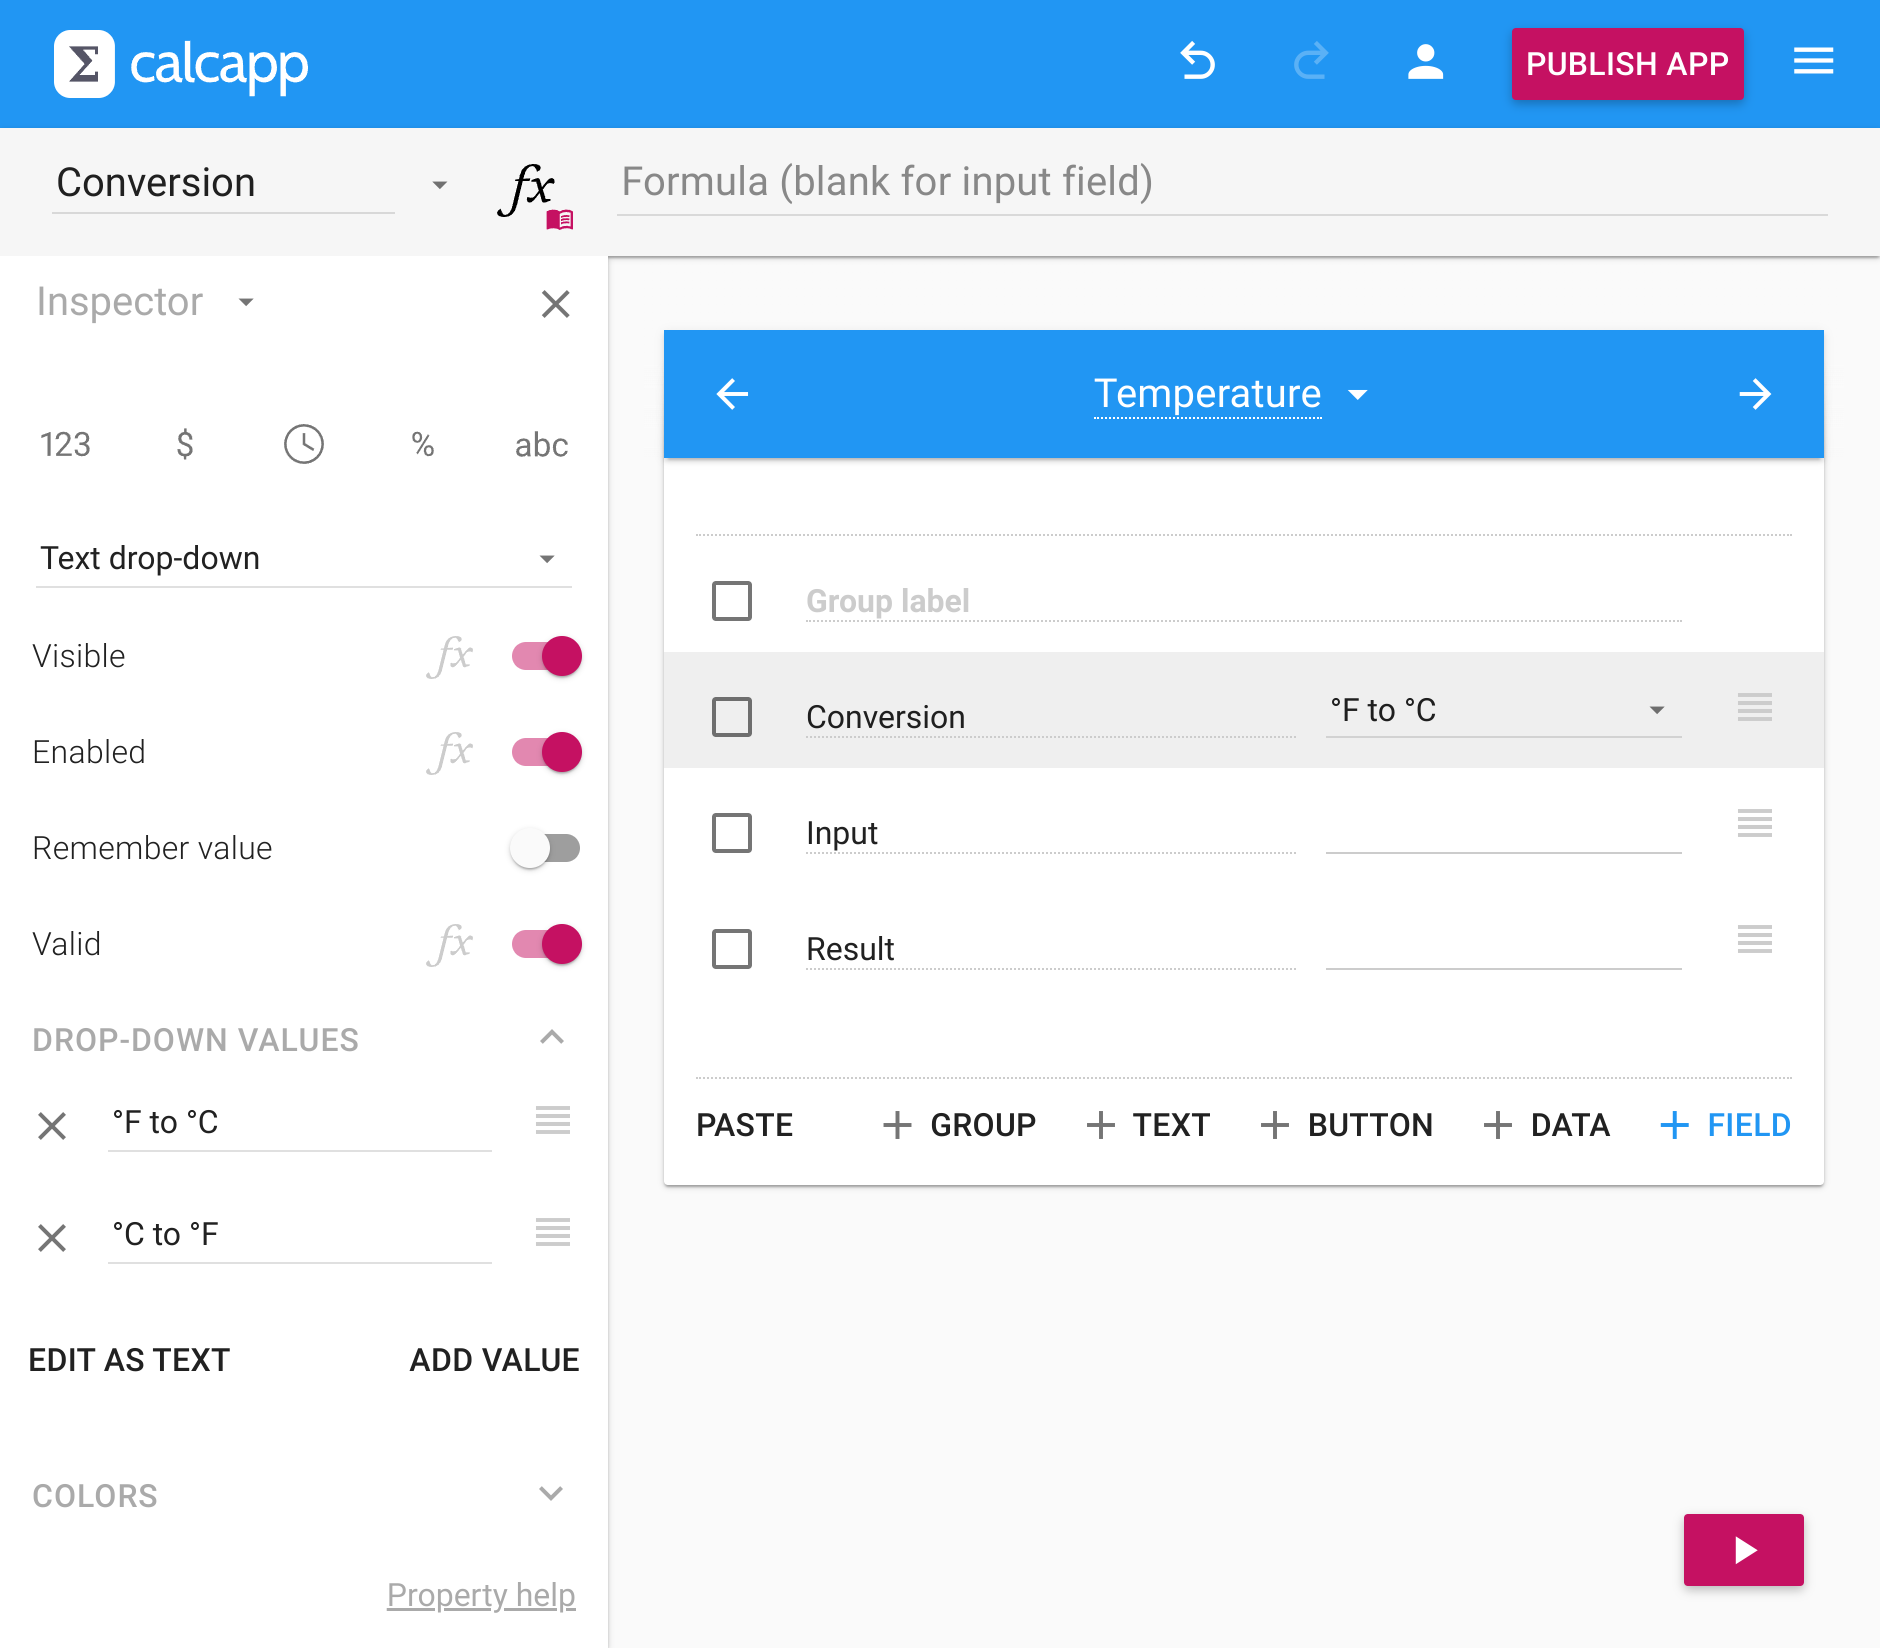
The Drop-down values section in the inspector lets you add and remove values. Press Add value to add new options and the button to remove them. Drag the symbol to reorder values.
To make a value pre-selected when the field first appears, select the corresponding value from the drop-down in the app designer (which reads °C to °F in the image above).
If you don’t want any value pre-selected, select the first blank value from the drop-down. To let users select a blank value, add an empty value under Drop-down values in the inspector.
Dynamic drop-down options
Drop-down options can also be generated dynamically using formulas. Press the fx button next to the Values property in the inspector to create formula-driven drop-downs that adapt based on user input, data tables or other criteria.
Dynamic drop-downs use arrays (lists of values) to provide their options. Arrays are written with curly braces like { "Option1", "Option2", "Option3" }{ "Option1"; "Option2"; "Option3" }.
Conditional options
Include elements only when needed:
This shows “Small” and “Medium” always, but only includes “Large” when Field1 exceeds 100.
Data table integration
Pull values directly from data table columns, keeping drop-downs synchronized automatically (further reading):
Multi-level filtering
Create drop-downs where selecting from one field determines options in another (further reading):
Text-based filtering
Filter large lists based on user search input:
Role-based access
Show different options based on user roles in private apps:
Dynamic sorting
Let users control how options are ordered:
Using formulas with drop-down values
To use different formulas depending on the value selected by the user, use the IF function. In the temperature converter app above, the Result field might use this formula to determine if degrees Celsius should be converted to degrees Fahrenheit or the other way around:
Text fields
Text fields handle free-form text input and calculated text output. Click the abc button in the inspector to create one. Input fields let users enter text, while output fields display text generated by formulas.
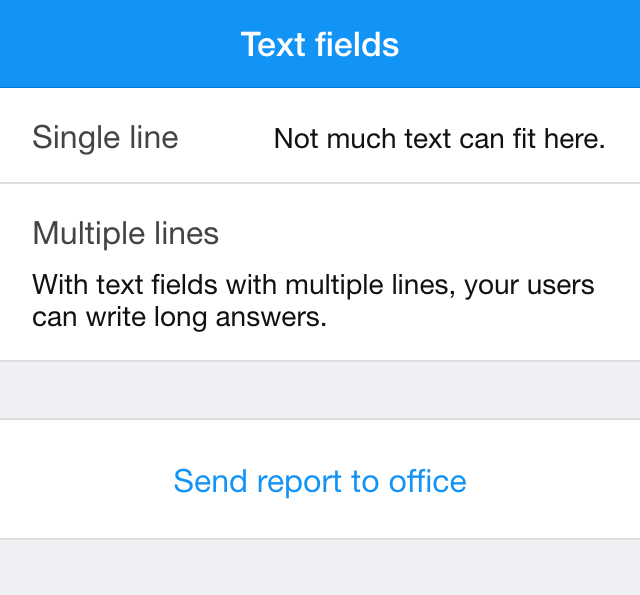
Text fields can display multiple lines by toggling the Multiple lines property in the inspector. For input fields, this enables collecting long-form answers (which can be emailed to you):
Output text fields display text generated by formulas, making them perfect for dynamic messages, reports and conditional content. The IF function is particularly useful for showing different text based on user input or calculated conditions.
Multi-line text displays
Use NEWLINE to create structured, multi-line output:
This creates organized displays that update automatically as users change other fields. Multi-line text fields work well as live dashboards showing calculated results, summaries and status information.
Common text functions
Calcapp includes many functions for text processing:
- Length and extraction - LEN returns text length, LEFT, RIGHT and MID extract portions of text strings.
- Case conversion - LOWER and UPPER convert to lowercase or uppercase.
- Search and replace - FIND locates text within strings, SUBSTITUTE replaces old text with new text.
- Joining text - Use the & operator or CONCATENATE function to combine multiple values into one text string.
Working with text in formulas
Text must be enclosed in quotation marks in formulas. If a literal
quotation mark should be part of a text string in a formula, type two
consecutive quotation marks ("").
This sample app demonstrates text calculation by giving an assessment of a temperature:
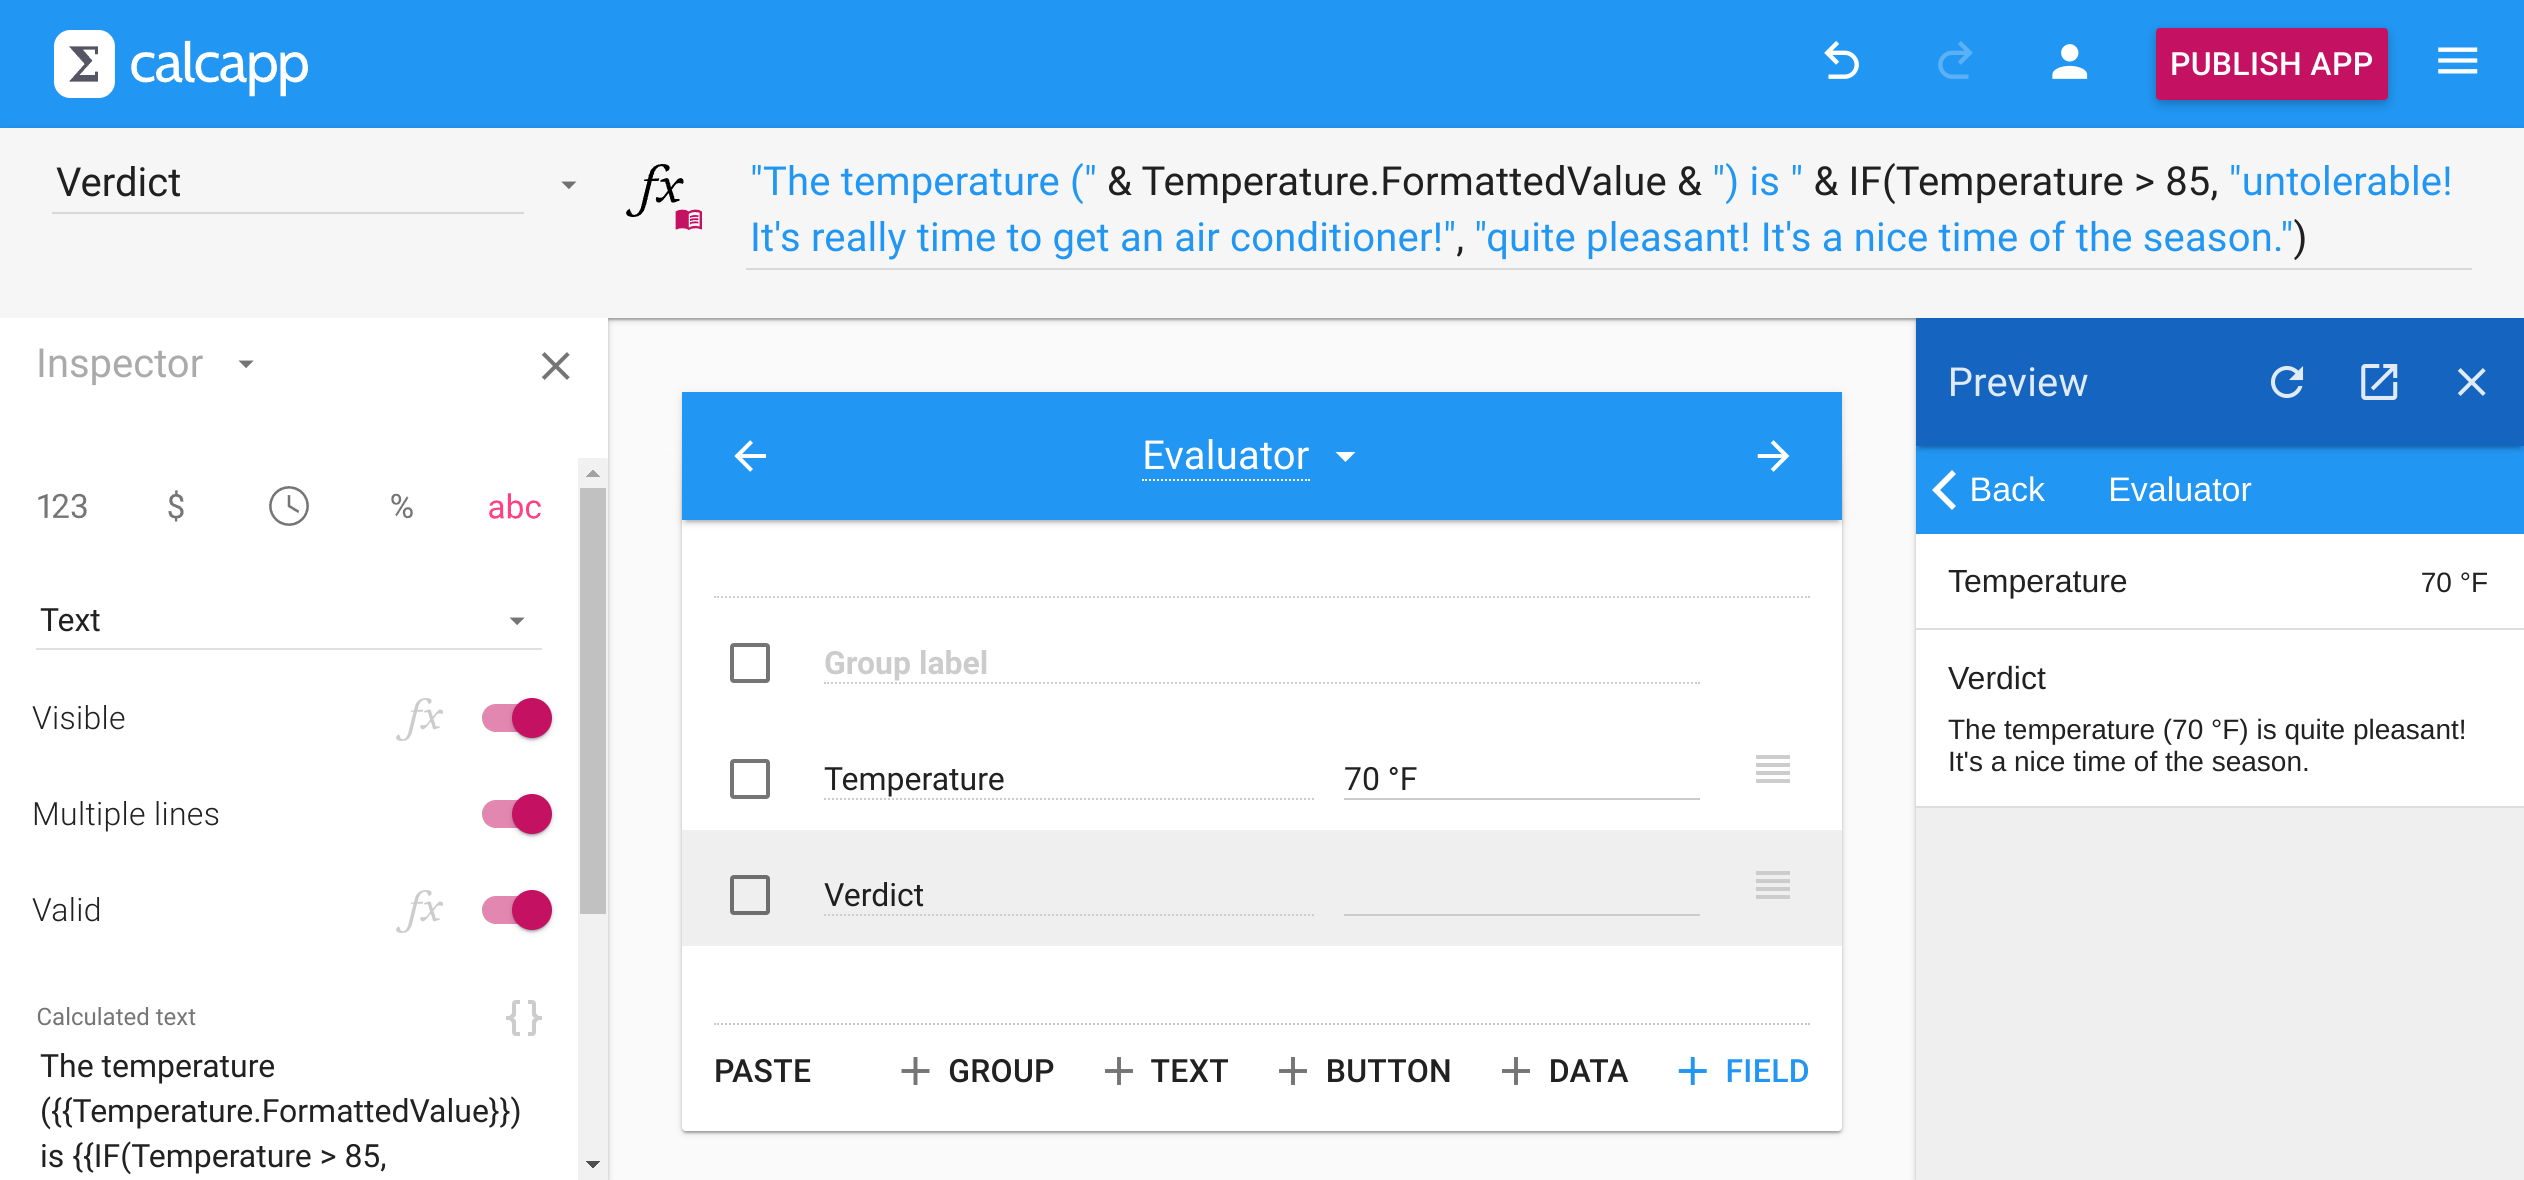
The following formula is used in the image above:
This formula joins text strings together using the & operator and uses the IF formula function to select one of two text strings based on the temperature entered by the user.
You can type NumberField1.FormattedValueNumberField1,FormattedValue to access a text string version of the number of the field, which has been formatted according to your instructions.
Text field validation
Text field validation helps ensure users enter correctly formatted information like phone numbers, email addresses or ID numbers. Unlike number field validation which can use minimum and maximum values, text validation always uses formulas.
Associate a formula with the Valid property that returns TRUE for valid input and FALSE for invalid input. Press the fx button next to the Valid property to edit the formula.
Basic validation
For simple requirements, use basic text functions. This formula requires at least four characters:
Advanced validation with regular expressions
For complex format validation, use REGEXMATCH with regular expressions. Our blog has a guide to regular expressions and Calcapp’s regular expression functions.
US phone number (formats like “(541) 754-3010”, “541.754.3010” or “541-754-3010”):
US Social Security number (format “123-45-6789”):
Email address (use the built-in ISEMAIL function):
Continue reading about handling tabular data »